Thursday, May 29, 2014

$800.00 DIY Kitchen Renovation!


I am so excited to share this kitchen makeover with you today!
My friend, and talented Interior Designer, Lee recently renovated her kitchen for $800.00.
After receiving a $3500 quote to reface the cabinets, they decided to tackle the job themselves.
The painted the cabinets, changed the counter-tops, updated the hardware, removed a couple cabinet doors, and added a backsplash.

The kitchen was clean and functional but lacked personality.
The after is oh-so-good. 
A little paint (and elbow grease) can sure go a long way.
I adore the blue base cabinets paired with the brass hardware. So so good.
I love how she removed a couple cabinet doors to create open shelving. It breaks up the heaviness and adds some much needed personality.
The countertops were the biggest splurge ($600.00) but the impact was well worth the money. She painted the cabinets and installed the subway tile backsplash herself! 
In my opinion you can never go wrong with white subway tile and grey grout.
Love it.
Lee was kind enough to share all her sources with us, now we can get this look too!
 Benjamin Moore Hidden Sapphire
Benjamine Moore Snowfall
Successi Bin Pulls
Subway Tile
Butcher Block Countertops
Is that really the same kitchen? 
I want to move in.
Thanks for sharing Lee, you are so talented!

the story & cost of our kitchen renovation


i apologize up front for those that are sick and tired of seeing this kitchen but i've been getting lots of emails asking for details so i kinda need to do this.


this first picture was taken the day we took ownership.  you can see larry has already started ripping out the carpet in the living room.

this kitchen cost $14k to renovate.  i'll tell you exactly the price breakdown at the end of the post.
remember, the kitchen is small and only has 3 base cabinets and one upper (w/o doors) so that kept costs down.
another key to keeping the cost relatively low was using the same layout of basic fixtures that was already here.
i tried to think of ways to have a proper triangle working space but in the end it was impossible.
so now when i cook i get exercise too.


another trick to save money was using the baseboard and crown molding as part of the cabinet design.  we ran the 6" crown around the room, wrapping the upper cabinet in.  and then we ripped 4" off the 10" baseboard and incorporated it into the base cabinet structure.
all 3 cabinets have a furniture look to them now b/c of that.  it's one of my favorite things about this kitchen.


here you can see how the crown and base moldings are incorporated into the cabinets.
i often get asked about whether or not i like having the open cabinets and the answer is Yes.
i love the way they look and i love the way they function.
also, i got used to not having the toe kick really fast.  it is no big deal and again, love the way it looks.


i remember this day so clearly.  the floor was complete and covered with paper and cardboard to protect it and when those cabinets were brought in and the granite was placed on top i think i cried.  yeah, i'm sure i did.  my heart was ready to burst i was so happy.  up until this point i had no idea if any of my ideas were going to really work out.


we started with the flooring in this kitchen b/c i wanted the cabinets to sit on top of the flooring instead of the flooring butting up to them.  see that big old refrigerator?  when we moved it there was a big hole in the floor where it had been leaking.  we knew at that point we were going to have to tile the floor.
we could reuse the kitchen floorboards that were still in good shape in the living room to fill in the large hole that the floor heater left when we tore it out.  so it all worked out nicely.


the cabinets and all the walls and trim throughout the house are painted in benjamin moore's simply white.
(except the office which is ralph lauren mercer)


ahhh, the lovely pantry.
quite scary in there.


i love all the beadboard that the cabinet guy put in.  even the ceiling is beadboarded.
you can see this is where the microwave, toaster and coffee maker is.
it's our breakfast center.

ok so here is the basic cost breakdown, installation is included
kitchen cabinets (includes all baseboards, crown moulding and rebuilding pantry 4k
countertops (honed black granite) 2k
viking range 5k

kohler farmhouse sink 1k
vintage faucet 300.
backsplash (white subway) 300.
flooring (2x2 hex tile) 1400.
-----------
total 14k


you could easily knock $4 or 5k off this if you used a regular stove and sink.
and even more if you can do tile work.

wait...the price for the subway tile is a little low b/c about a year after being here i had the guy come back and tile the entire wall behind the stove.  i think he charged $200 to do that.
and the bamboo blinds are from lowes - i think they are $20 bucks each.
and the drapes are from target and are $20 a pair.

so that is that.
and i hope this answers your questions.


xo
janet

ps

my dear friend sarah from the blog my yellow house recently lost her entire blog!
she has started a new one and i'd love for you to pop over and say hi.
thanks!

one day

Kitchen Renovation | The Before


So you know what this means, right? If I'm posting "befores" of our kitchen, the "after" is around the corner. I'm happy to post that our kitchen renovation is 100% done and the "after" shots will be revealed in a few days.

The before shots are so dramatically different than what we have now, that they deserve their own post. Above are some photos of what the kitchen looked like when we bought the house. The fridge is blocking the doorway, we had a rolly-dishwasher that you had to attach to the sink (that was blocking the doorway to the basement). We had gross peel and sick floor tiles and one ugly light figure. Over the last three years of living in our house we did small minor improvements to the kitchen to make it liveable (and clean). You can see a the "in between stage" in this post. More photos of the kitchen, and how we lived with it for 3 years after the jump.


So above is a shot of what we lived with for the three years after moving in. The kitchen's "in-between" stage is really quite nice. Small changes including new "peel & stick" flooring, fresh paint, and some updates to the eat-in area of the house really make the area feel better. But even with it being cleaned up, main issues still remained. The lighting was terrible, the cupboard space sucked, and our appliances were dying.  I'm pretty excited to show you the "After" because it's a huge improvement. :) YAY!

OUR $500 DIY KITCHEN REMODEL

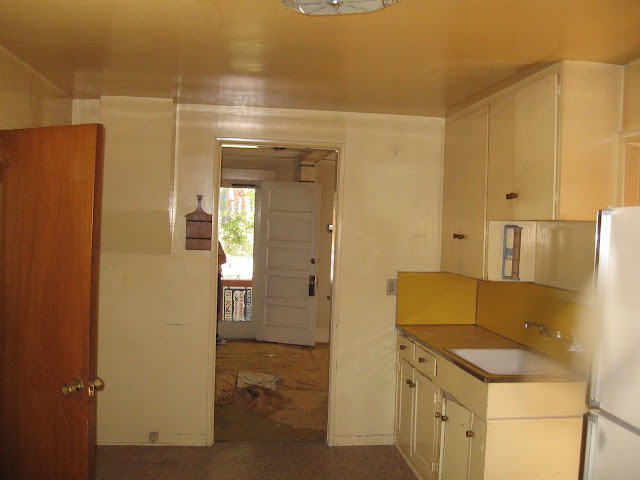
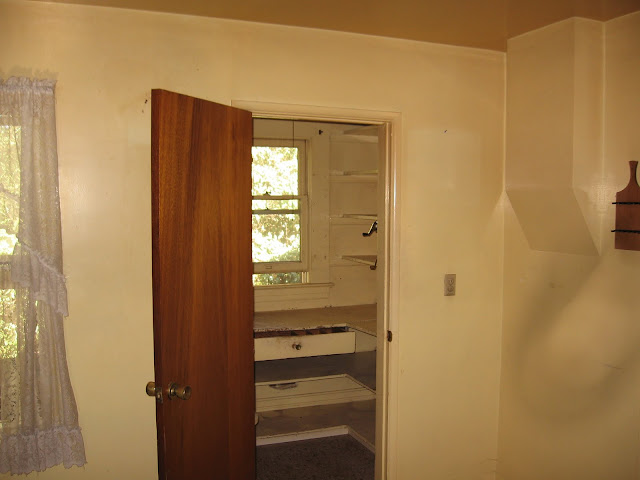
We bought our house 3 years ago and the kitchen looked something like this:


Can you say DATED?!?

Even though it was built in 2002 and served as a model home for our subdivision early on, the wood everything and tacky wallpaper made it feel much older.

Thankfully Tedgar and I were able to see past this and envision something much more up to date, fresh and modern in our future kitchen.

We had to buy new appliances when we moved in, so we opted for stainless steel. This helped bring it into the now a little bit.

Then over a year ago, out of curiosity, we got a quote from a local home improvement company and to paint or stain our cabinets, install granite and a tile backsplash it was going to be roughly $12,000. Being the frugal DIYer that I am, I just couldn't stomach paying someone to do this project for us, and I knew Ted was handy (and patient) enough to tackle a future remodel - so I waited it out.

To help us "get by" with the kitchen as is for the time being, Ted added wainscoting and trim to the island and painted it a creamy white (Behr, lunar light) and I painted the walls a deep eggplant (an accidental color...long story) and the window and door trim the same creamy white (these were the only colors that sort of coordinated with the purple/mauve countertops and backsplash...barf). Then the addition of the updated pulls (which Ted got for free) and the butcher block island top (a very nice gift from Ted's mom) helped make the room feel more tolerable (I'm so dramatic, I know:).

We lived with this for the last year or so:


Until we decided to pull the trigger on a compete kitchen update (which took us almost 2 months from start to finish).

Here are the details:

CABINETS
While perusing Pinterest one day I ran across this blog post with very detailed directions on how to paint your cabinets WITHOUT SANDING them first, I got the bug to finally paint the cabinets. I quickly got my hubby on board and we set out to Home Depot to buy our supplies the very next day (which ran us about $65).

1. Bulls Eye 1-2-3 Primer for all surfaces*
2. Behr paint in lunar light (flat)
3. Minwax Polycrylic Water Based Protective Finish (semigloss)


* This is crucial and the only way I recommend painting    cabinets without sanding them first.


We immediately got to work and after 3 days of priming, painting and sealing, we were done with the cabinets. We couldn't believe how much brighter the kitchen had become.

That was exciting and all...but I couldn't stand having the fresh white cabinets and keep our existing purple/mauve laminate countertops and backsplash!


COUNTERTOPS
We wanted new granite (or similar) countertops, but with a new roof, a baby on the way, a home refi (and a few other larger expenses) we just couldn't swing it.

We investigated pouring our own concrete countertops, but decided that we were not ready to take the plunge quite yet, so I once again turned to Pinterest, where I stumbled upon this blog post with steps detailing how to pretty easily convert your existing countertops to polished concrete coated ones. We decided that this was the only way for us to go (at least for now until we are possibly ready to professionally update them in the future).


We ordered our 4. Ardex Feather Finish concrete mix from Amazon (1 bag was all we needed and it was under $20). It arrived on or doorstep a few days later and Ted got to work. He followed the directions on the blog very closely, and a few days later we had smooth concrete covered countertops.

Ted took an orbital sander to them once they were dry to smooth them out even more (thanks mom and dad). We wanted to stain the concrete a darker charcoal color for a nice contrast, so we went to Home Depot and got this 5. concrete stain in Dark Coal STC-35 (for around $25). We applied 2 coats with a spray bottle and a small paint roller.  We wanted the end result to be very high gloss (wet look), so after the stain dried, we applied 4-5 coats of this 6. wet look sealer (also from Home Depot for around $25).

***Just a warning. The concrete stain has a navy blueish tint to it for a couple weeks or so after it is applied. We sealed over it while it had the blue tint. It eventually turned to black, so don't be alarmed (like I was). :)***


BACKSPLASH
Tiles came next...we knew all along that we would go with 3" x 6" subway tiles.

We have enough white subway tiles already on hand to complete the project (we got them for free awhile back), but felt that they might be too much white.

After collecting samples from various places, we finally decided on 35 sq. ft. of light olive colored glass subway tiles from My Tile Backsplash. This was our only "splurge" for this project (ran us just under $350 shipped).

We removed the old tiles and realized that there was no way around the fact that no matter how gentle and precise we were, we were tearing off drywall with each section of removed tile (nothing is ever as easy as you think it is going to be). We decided that Ted would just rip the walls out from behind the older tile and re-sheetrock the areas that were damaged. We purchased the new sheetrock (for around $10) and Ted measured, cut and installed (he is my hero).


WALL & ISLAND PAINT
I painted the walls a deep shade of grayish green (Martha Stewart, thunderhead for about $25).

Then for the island I mixed the same wall paint with the creamy white paint (Behr, lunar light) in a ratio of 90 (thunderhead) / 10 (lunar light) and painted the island. I used the same paint mixture to paint the insides of our one double glass front cabinet and then installed 3 battery operated lights inside the cabinets to add some much needed light and interest.


...and FINALLY here are the finished results:


I think it all came together pretty nicely (if I do say so myself) and the grand total was only $520!!

If we would have used the tiles we already had on hand it would have only been $173...crazy! We are very happy with our splurge though.


If you are interested, you can see a few of our other home improvement projects here:

Dining Room

Nursery

Half Bathroom 

Bathroom
Living Room


Other home updates:

+ New roof added April 2013

+ New stair carpet added October 2012

+ New living room, dining room, hallway and nursery carpet added December 2012

+ Painted all trim white

+ Painted fireplace white

+ Added fence in back yard

+ Added landscaping


Still on our list:

+ Tile master bath

+ Tile jack and jill bath

+ Recarpet master and 2 guest rooms

+ Backyard and deck overhaul

+ Retile laundry room

+ Paint exterior

+ Eventually finish basement