Monday, June 28, 2010

Maanga Vattakuzhambu ~ Sun dried mangoes in tamarind gravy AND a prelude to a giveaway

Remember I had hosted a promotional giveaway sometime back and Shoba of Anubhavati won the waffle maker. Its time for another giveaway. This time its going to different. Watch this space for the details which will be posted soon.


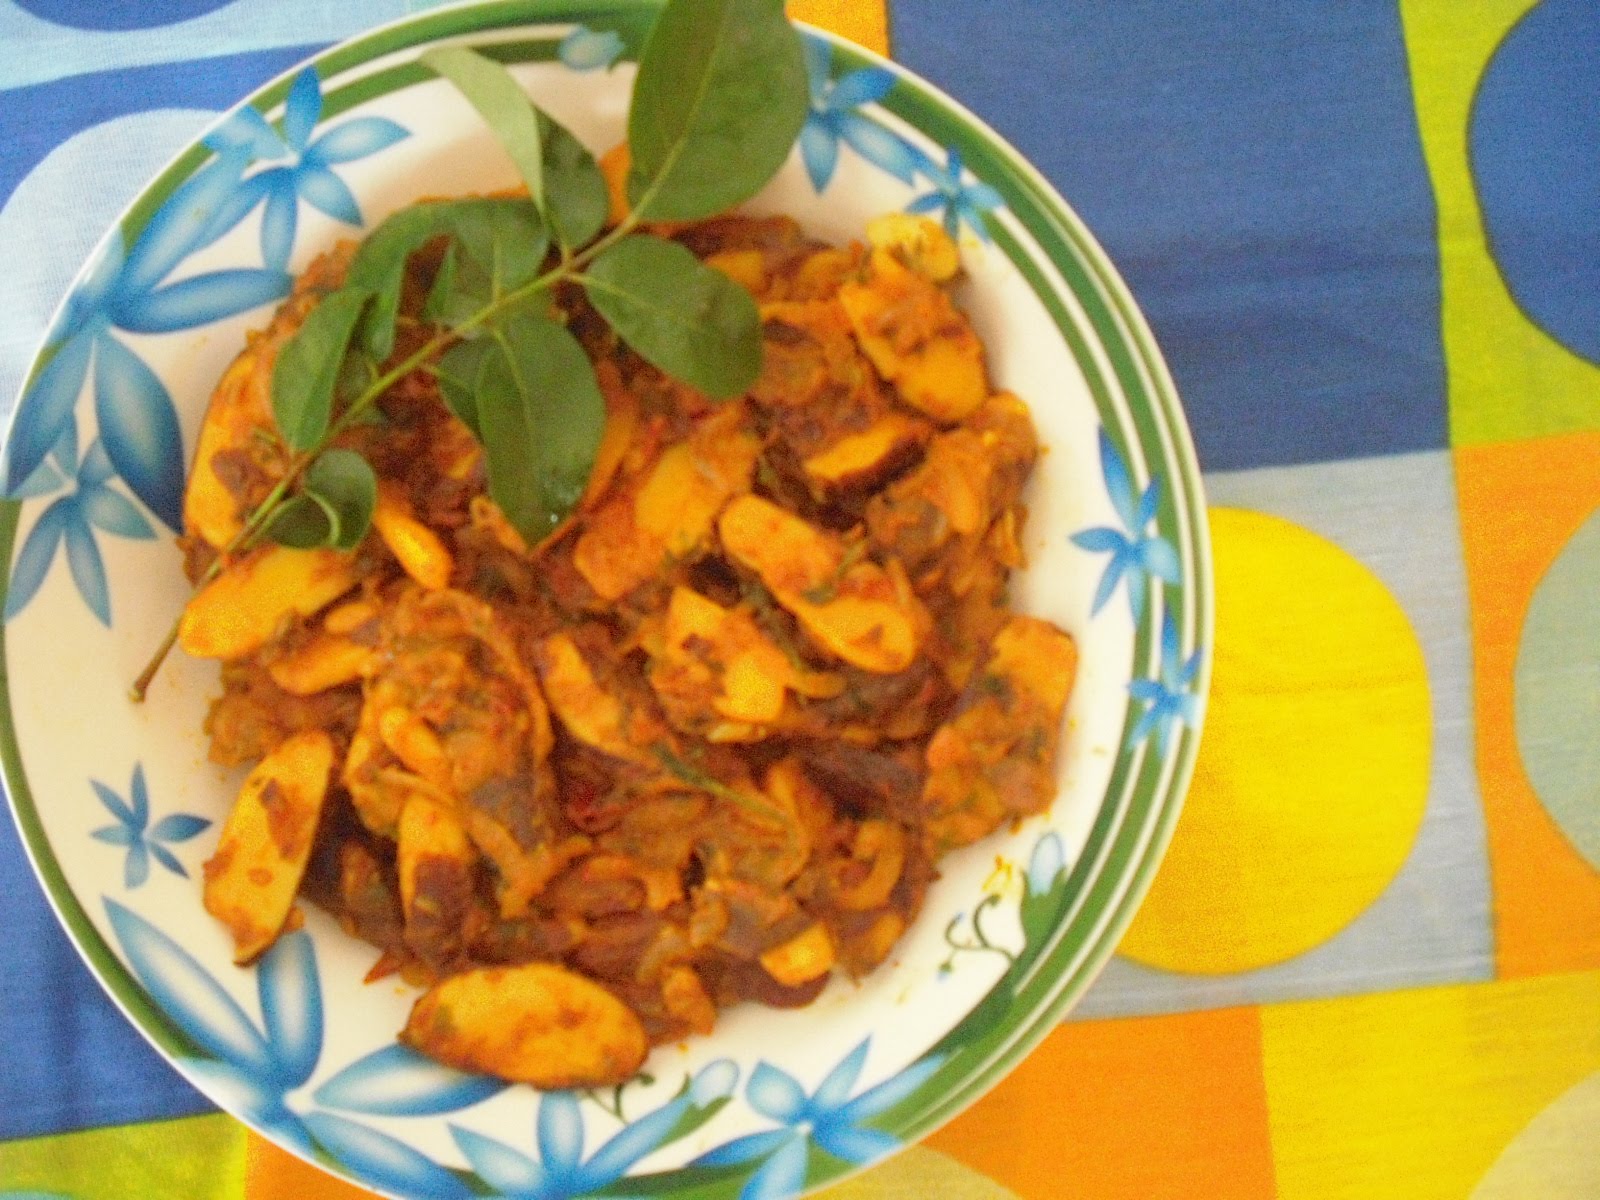
Now on to the recipe. Apart from pickling  raw  mangoes, I preserve them in the form of vathals/sun dried mangoes. Fresh mangoes which are sour and raw is chopped into pieces and marinated in salt and kept for a day. During the course, water will be released from the salt and mango juice. Next day, the mango pieces are squeezed and dried in the sun. The dried mangoes are put back in the squeezed salt water and this is repeated, till no water is left in the jar. A day more of drying in the sun leaves you with salted and dried mangoes. Store them in air tight container. It stays good for a year. This mango vattal is made into a vathakuzhambu.  In this kuzhambu, red chilly is used mnimally and heat is from peppercorns.


You need

Dried Mango pieces - 1/2 cup heaped
Tamarind - goose berry size
Turmeric - a pinch
Salt

To roast

Red chilly - 1 nos
Peppercons - 1/2 tspn
Urad dal- 2 tspn
Cumin seeds - 1/2 tspn
Curry leaves - few
Ghee/Oil - 2 tspn to roast

For Seasoning

Oil - 1 tspn
Mustard seeds - 1 tspn
Methi seeds -a pinch
Hing powder - few shakes


Method

Soak the dried mango pieces in a cup of warm water for 20 minutes to soften. You can also microwave the mango along with water for a minute.  Extract tamarind juice. Roast the ingredients in ghee/oil till dal turns brown. Add the cumin seeds towards the end since it gets roasted faster.


Grind the soaked mango pieces along with the roasted ingredients to a smooth paste. You can use the soaked water to grind. Stir in the ground mixture to the tamarind extract. Add salt, tumeric powder and bring to a boil. Let it simmer for a while till the gravy thickens. Season with mustard, hing and methi seeds.


Note:
Adjust the tamarind according to the sourness of the dried mangoes. Since the mangoes have salt in it, add salt keeping that in mind.


KHI Quarterly V1 Q2

Click to Enlarge

KOZHI AVARAI PORIYAL

This kozhi avarai belongs to the avaraikkai family. When we cut it, it resembles like a star. This is a rare vegetable. I have seen it when I was a young girl. Now after a long time, I have purchased this in the local market here. This vegetable can be cooked as poriyal and also used in sambar, mutton kuzhambu etc.


கோழி அவரை பொரியல்

Ingredients:

Kozhi avarai- 250 gms
Finely chopped onion-2
Green gram- 2 tbsp
Black gram- 1 tbsp
Mustard seeds- 1 tsp
Turmeric powder- half sp
Salt to taste
Chopped coriander- 2 tbsp
Oil- 2 tbsp


Grind the following ingredients coarsely:

Red chillies-3
Asafetida- half sp
Fennel seeds- half sp
Small garlic flakes-3
Shredded coconut- 3 tbsp

Procedure:

Heat a kadai and pour the oil.
Add the mustard seeds and when they splutter add the grams and fry them to golden brown.
Then add the onion and fry them for a few seconds.
Add the chopped kozhi avarai with the turmeric powder and salt.
Cook on medium fire.
After 5 minutes, add the ground paste and mix well.
When the vegetable is cooked well add the coriander.
Mix well and put off the fire.
NB: For viewers, I am publishing the photograph of Kozhi avarai [winged bean] here! This is very famous in Thai cooking!

Friday, June 25, 2010

Apple vattal kuzhambu - Sun dried apples in tamarind gravy

APPLE VATTAL KUZHAMBU


I was wondering not knowing how to use the sun dried apples which my cousin had brought from Kashmir. My son said that my daughter - in - law used sun dried apples (Apple vattal ) to make a 'trail snack' along with nuts, chocolate chips and other dry fruits. This snack he said restored energy during their trekking expeditions.
As I was just getting ready to mix a trail snack my aunt called up and said that her ' vella pachadi ' and ' vattal kozhumbu' with apple vattals had turned out very good. With a little hesitation I prepared this novel vattal kuzhambu, but my family enjoyed the new dish very much.


INGREDIENTS
Sun dried apples ( cut into small pieces ) - 1 cup
Tamarind - 1 lemon size ball
Jaggery - 1 lemon size piece
Salt - 1 1/2 tsp
Sambar powder ( Unroasted spice mix) - 2 tsp
Rice flour - 2 tsp
Gingelly oil - 1 tbsp
Mustard seeds - 1/4 tsp
Fenugreek seeds - 1/4 tsp
Bengal gram dal - 2 tsp
Asafoetida - 1 pinch
Broken red chillies - 2
Curry leaves - a few


METHOD
1. Soak tamarind in warm water and extract the juice.
2. Heat oil in a pan and add mustard seeds.
3. When the mustard splutters add fenugreek seeds and then the bengal gram dal.
4. When the dal becomes golden in colour add red chillies, curry leaves and the apple pieces.
5. Lower the flame and quickly add asafoetida, sambar powder and rice flour and stir.(Take care not to burn the sambar powder).
6. Add the tamarind extract, salt and jaggery.
7. Boil the vattal kuzhambu until it reaches a sauce like consistancy, stirring now and then.


Enjoy the pleasant flavour of apple in your delicious vattal kuzhambu. It tastes heavenly with hot rice topped with a dollop of ghee. You can also enjoy it with pongal, upma, dosai, adai or chapati.

Thursday, June 24, 2010

VEGETABLE OMELETTE

There are so many varieties of omelettes in every body’s kitchen. This vegetable omelette is a very tasty dish which is a suitable filling for a delicious sandwich. Other than this, this vegetable omelette can be used in gravies and kuzhambu varieties to enhance the flavour as well as taste. For sandwiches, toast the bread slices, spread the butter on them and fill the slices with this vegetarian omelette and a few pieces of cucumber and tomatoes. Even without toasting and the addition of cucumber and tomatoes, this vegetable omelette sandwich tastes divinely!


Ingredients:

Sieved gram flour- 2 cups
Chilli powder- 1/4 sp
Finely chopped spring onion- 1/4 cup
Finely chopped onion- half cup
Finely chopped tomato- half cup
Finely chopped coriander- 2 tbsp
Finely chopped green chillies- 1
Salt to taste

Procedure:

Add the flour in a bowl.
Again add the vegetable mixture with salt.
Mix well with the fingers.
Then add enough water to mix it to a dosai batter consistency.
Heat a tawa and pour 1 tbsp of this batter.
Spread thinly.
Sprinkle a little oil around it.
Butter is a good substitute for the oil.
When one side is cooked to golden brown, flip the other side to cook.

NB:

The fire must be low to cook this to a golden brown colour.

New Survey Indicates Americans are Cooking More

I have taken part, as a kitchen designer expert, in RICKI surveys in the past. Looks like they have created a new consumer survey with results that anyone thinking about a kitchen remodel should note for their planning:

We are cooking at home more in the current economic environment. That's good for our health as well as our pocketbooks.

Most everyone (65%) wants to be able to eat in the kitchen, so space and seating need to be planned. Probably 100% would like to be able to eat in their kitchens if they had the space.
 
Meal planning takes place in the kitchens of 62% of consumers, so cookbook storage and grocery lists and coupons need to have a place to live in the kitchen.             


Consumers planning their kitchens should think about storage space for medications and vitamins in the kitchen. Who knew? Our household keeps all of our meds and vitamins in the kitchen and I guess lots (49%) of others do too!

Also storage for pet foods and a place to feed them (38%) and sorting mail (38%).

Don't forget these essential considerations when planning your new kitchen and  you won't be at a loss to figure out where to put them when it's all said and done.

Peggy


July is National Culinary Arts month. With that in mind, RICKI, the Research Institute for Cooking & Kitchen Intelligence, took a look at what’s going on in the kitchen these days, based on findings from its recent study, Remodelers 360: How Americans Use their Kitchens. The study was conducted among nearly 3,000 U.S. consumers and has been conducted every other year since 2006.

Some highlights from the study include the following:
  • Americans are experimenting with new recipes. Around two-thirds of survey respondents say they try new recipes at least once a month (67%). According to RICKI’s Executive Director, Brenda Bryan, “This figure has been consistent study to study – around two-thirds of Americans try a new recipe at least monthly.”
  • Nearly a quarter of survey respondents (23%) agree that this statement describes them ‘completely’: ‘I love to cook and try new recipes’. “Women and those under the age of 35 are significantly more likely than their counterparts to say they can relate to this statement,” says Bryan. This percentage does not vary by income level.
  • More people are eating at home now compared to two years ago. The frequency of eating at home has increased significantly since the 2008 wave of Remodelers 360, jumping from 43 percent of respondents saying they are eating at home more in 2008 up to 59 percent in 2010.
  •  Besides cooking meals, eating and planning meals are the most common activities taking place in the kitchen (65% eating and 62% planning meals), followed by taking medications or vitamins (49%), talking in-person with family or friends (46%), talking on the phone (43%), caring for pets (38%) and sorting mail (38%). And women and higher income people are doing all of these activities in the kitchen more than others.
  •  Of the 17 kitchen activities measured, five declined significantly in the latest survey compared to 2006 and 2008 levels: taking medication or vitamins, talking on the phone, reading newspapers or magazines, entertaining, and caring for plants.
  •  On the other hand, the use of computers in the kitchen has almost doubled (from 6% in 2006 to 11% currently).
“Despite the hectic pace of modern life, the kitchen remains the center of activity in the home,” according to Bryan. “Food is central to our well-being and something that is a hobby for many. Just look at the boom in enrollment at cooking schools. At the Culinary Institute of America for example, enrollment increased 50 percent in the past six years. Many culinary schools have had to add classes in the past few years to meet demand. And another 24/7 food channel was launched this year. I think all of this adds up to a growing base of foodies and good news for those in cooking- and food-related industries.”


NOTE: Detailed PowerPoint slides (charts and graphs) of select findings are available upon request.

Methodology: 2010 Remodelers 360: Trend Report was conducted among 2,906 American consumers between the ages of 18 and 64 from February 12 through March 2, 2010. The study was conducted online in partnership with a leading national online panel company, GMI (Global Market Insite, Inc.), headquartered in Seattle, WA.

About RICKI: The Research Institute for Cooking & Kitchen Intelligence (RICKI) is an independent, membership-based organization of manufacturers, retailers, wholesalers and publications whose revenues come from sales related to activities that take place in the kitchen, including kitchen remodeling.

Find out more at www.kitchenintelligence.org.

Important Questions to Ask Before You Sign a Plumbing Contract

Household plumbing problems can cause anxiety and stress for many homeowners. Leaking pipes, water back-up, clogged drains and drippy faucets are not only annoying, but they often lead to more serious plumbing trouble such as water damage and mold. In a perfect world, we’d all have a reputable, trustworthy plumber on call any time of the day or night. But what if you don’t have that magic plumbing number taped to your fridge or printed on a business card stowed handily in your wallet?

If you’ve decided that you need to bring in a professional to work on your home’s plumbing, there are some important areas to cover with your plumber before you sign a plumbing contract.
  • Get Prices Up Front. No one likes to be surprised by hidden plumbing fees and additional plumbing charges. A good plumber will provide a complete estimate free of charge before beginning a plumbing project and will get your approval for any unforeseen fees that pop up as plumbing work goes on. Generally, you can expect to pay for hourly labor, parts and travel time; extra charges are almost always tacked on for emergency service. Keep in mind, though, that cheaper isn’t always better when it comes to plumbing. The best way to keep plumbing costs under control is to get a ballpark number up front.

  • Choose The Right Plumber For Your Job. Plumbers fall into two general categories: those who work on emergencies like burst pipes and water back-up, and those who do installation and renovation. Hiring a plumber who doesn’t have experience doing the kind of work you need done is like flushing money down the drain. Make sure the plumber you hire is qualified to do your specific plumbing job; for example, even the trusted general plumber who never fails to come to the rescue when you have a plumbing emergencies might not be able to manage a bathroom remodel.

  • Do Your Homework. All reputable plumbers are licensed, adequately insured and certified; every state has a set of standards that these plumbing professionals must adhere to in order to do business. Don’t rely on your plumber’s word, either. Check with your local regulating organization to make sure the plumbing company or contractor’s license and certification are current; ask about insurance policy coverage details; and get a list of references. A good plumber will provide this information (and more) willingly and will encourage you to do a background check before signing a plumbing contract.

  • Get Everything in Writing. An honest plumber will provide a written estimate containing details of service fees, labor charges, cost of parts, and any other costs associated with your plumbing job. This simple piece of paper can not only help you budget, but will also prevent you from sticker shock and price gouging once your plumbing project is finished. A plumber who won’t give you this information in writing is probably not someone you want to hire.
Remember...once you sign a plumbing contract, it is binding. Take some of the panic out of plumbing repairs and installation and future plumbing problems by devoting a little extra time to finding the right plumbing professional for your job BEFORE you put your signature on the paper.


Related Plumbing Information from Horizon Services...

Monday, June 21, 2010

Blueberry Bakewell Tart


I guess it's blueberry season now as I realized there are many bloggers had posted their bakes with blueberry which had given me lots of inspiration. I didn't think much and took two punnets of fresh blueberries when I saw it in the supermarket. At first, there are many ideas came to my mind whether to make muffins, pancake, juice or crumble etc but I don't really have the appetite to eat what is in my mind so ended up I choose to make a rustic yet with country feel of bakewell tart which will top with my fresh and juicy blueberries. I like bakewell tart because the almond bring lots of flavor with the combination of butter together with the shortcrust pasty. Normally I would like to make bakewell tart with plum or apple and here I found blueberry goes well well with it too! A piece of this nutty and buttery flavor tart for an afternoon tea,  simplicity is my biggest satisfaction. 


Recipe for 8 inches baking pan


For the pastry:
220g plain flour
110g unsalted butter
20g sugar powder
pinch of salt
2 egg yolks + 2 tbsp water


For the fillings:
95g ground almond
27g plain flour
1 tsp vanilla extract
83g unsalted butter
55g caster sugar
1 egg
some blueberry jam


Method:
  1. For the pastry, add the cold water to the egg yolks and stir with a fork.

  2. Place the flour into the bowl of a food processor, followed by the cold butter, sugar powder and the salt.

  3. Turn the processor on and pulse several times until the mixture resembles fine breadcrumbs.

  4. Add two-thirds of the egg yolk/water mixture and pulse again. If the mixture is still too dry, add the remaining egg and water mixture (you may not need to use all of it). Be careful not to overwork the pastry. Stop pulsing when the mixture has the consistency of chunky breadcrumbs.

  5. Turn the pastry out onto a clean, floured work surface and, with floured hands, bring together to make a smooth dough, but don't knead.

  6. Shape into a flattened ball, wrap in cling film and refrigerate for about 10-15 minutes. You can keep the pastry at this stage for 2-3 days if not using it immediately.

  7. Remove the pastry from the fridge. On a clean, floured work surface, roll it out with a floured rolling pin until it's slightly larger than the flan ring. Using the rolling pin, lift the pastry and lay it over the flan ring.

  8. With your fingers, lightly press the pastry into the sides of the ring. Run a rolling pin over the top of the ring and pull away the excess pastry at the edges. Using your fingers, gently press the pastry up to slightly build up the height of the pastry at the edges. Prick the base of the pastry with a fork.

  9. For the fillings, blitz the butter, sugar and vanilla extract in a food processor until light and creamy.

  10. Add in the ground almond, plain flour and beaten eggs and whiz until completely mixed and smooth.

  11. Place in the fridge to firm up for at least half an hour.

  12. Spoon some blueberry jam into the pastry case then spread the almond batter over the blueberry jam.

  13. Arrange the blueberries on the surface of the almond batter, pressing them in lightly.

  14. Bake the tart in the 180'C preheated oven for about 30 minutes. Remove tarts from the oven and leave it to cool.

Hot Water Without the Waste!


"Have hot water at your fingertips whenever you turn on the faucet. Stop wasting water as you wait for cold to turn to hot. Stop burning energy as you wait for warm to turn warmer. The Taco D’MAND® System puts an end to the waste – and the wait – forever.

How D’MAND® works:

The D’MAND® System is a small, silent pump attached to your hot and cold water lines in the cabinet under your most remote kitchen or bath fixture. When D’MAND® System is activated, the cool water you normally let run down the drain is circulated back to the water heater through the cold water line.

At your “demand,” the pump circulates hot water from the water heater, and returns the cooled water back through the cold water line. When the hot water arrives at the faucet, the D’MAND® System’s patented heat sensor and control board shut off the pump to prevent pumping excess hot water into the cold water line.

Activate D’MAND® only when you need it. D’MAND® System only runs when you tell it to, and it’s smart enough to know when the water currently in the line is hot enough.

D’MAND® System can be activated with the push of a button, or with an optional wireless remote transmitter/receiver. D’MAND® System is easy to install. No new piping required.

The D’MAND® System not only saves water and energy, it saves in construction costs as well. No new return line is necessary; no need to drain the system; no demolition and repair." - www.taco-hvac.com

50+ Ways to Lower Your Electric Bill This Summer

Summer is the time of year when most homeowners' electric bills hit the roof. Air conditioning is the primary culprit in causing summer electric bills to rise, but other appliances in your home also get heavy usage in the summer and can cause your electric bill to skyrocket. In honor of today being the first day of summer, here are 52 easy tips that you can do all summer long to keep your electric bill in check, stay cool and still enjoy the summer season to its fullest.


  1. The ideal thermostat setting is between 75 and 78 degrees in the summertime. Set your thermostat to the highest comfortable temperature when using your air conditioning. Moving the thermostat up just one degree could lower your electric bill as much as 3 to 5 percent.

  2. Keep air conditioner filters clean. Aluminum mesh filters may be washed; fiberglass filters should be replaced, usually on a monthly basis.

  3. Get an air conditioning tune-up. Your air conditioner will run more efficiently with a lower risk of breaking down.

  4. Keep air vents and ducts clear of obstructions.

  5. Use duct tape to seal cracks and leaks on any sections of air duct on your central air conditioning system.

  6. Close the drapes on the sunny side of the house during the day.

  7. Leave storm windows and doors in place when the air conditioner is running.

  8. If you leave your home for vacation or extended period, leave your air conditioner off.

  9. If you cool your home with window air conditioning units, place them on the north side of the house. Keep window air conditioner vents free from obstructions.

  10. Keep lamps, TV sets and appliances away from your thermostat. Heat from these devices can cause your air conditioning system to run longer or unnecessarily.

  11. When you turn on your air conditioner, do not set the thermostat at a lower than normal temperature. It will not cool the room any faster, but it will use more electricity.

  12. Clean your outside condenser coil once a year by spraying with a hose at low pressure.

  13. Plant shade trees and shrubs around your home to shield from sunlight and heat.

  14. Apply reflective film on all south facing windows to reduce solar heating of your home's interior.

  15. Use window or whole house fans to ventilate your home. Use ceiling fans to cool kitchens and other hot indoor rooms and to evenly distribute conditioned air.

  16. Take brief, cool showers with minimal hot water. Showers use less water and energy than baths.

  17. Install a low-flow shower head; it can reduce water usage by 50-70 percent.

  18. Set your hot water heater thermostat to 120 degrees.

  19. Insulate the pipes going into and out of the hot water heater tank. Add an insulated blanket around your water heater if it's an older model.

  20. Turn the water heater off when you're gone longer than a weekend.

  21. Run your dishwasher only when it's full.

  22. Replace conventional light bulbs with Compact Fluorescent lLght (CFL) bulbs. This will save up to 75 percent in lighting energy, produce more light and last up to 10 times longer.

  23. Use one large light bulb rather than several small ones. A 100-watt bulb produces more indoor light and uses less energy than two 60-watt bulbs.

  24. Switch to tungsten-halogen incandescent bulbs; they cut lighting costs by about 15 percent.

  25. Use low-watt bulbs where lighting is not critical.

  26. Use dimmer switches in as many rooms as possible.

  27. Dust your light bulbs. Dust on bulbs can reduce light output by up to 50%.

  28. Place floor lamps and hanging lamps in corners. The reflection off the walls will give you more light.

  29. Turn off all lights, TVs, stereos and radios if no one will be in the room.

  30. Set your refrigerator temperature between 36 degrees and 40 degrees. Set freezer temperature between 0 degrees and 5 degrees. Use a refrigerator/freezer thermometer to check the settings.

  31. Wash full loads of clothes in the coolest water possible. Rinse clothes in cold water.

  32. Toss a dry towel into your dryer to absorb moisture from the load of moist clothes. Your dryer won't have to run as long.

  33. Be sure to clean your dryer's lint filter after every load

  34. Place full loads of clothing in the dryer, but don't overload.

  35. Don't over-dry clothes. Stop running the dryer as soon as clothes are dry, or use the moisture sensor control to automatically shut ohe dryer off.

  36. Dry multiple loads of clothing one right after another. The dryer is already heated so, you'll use less energy because the dryer is already heated.

  37. Skip the dryer altogether. Hang your clothes on a clothes line to dry in the sun.

  38. Let warm foods cool to room temperature before placing them in the refrigerator.

  39. Place the refrigerator away from the stove, dishwasher, heat vents and direct sunlight.

  40. Keep refrigerator door closed as much as possible. Don't make unnecessary trips to the fridge.

  41. Keep the freezer full. A full freezer loses less cold air when you open the door.

  42. Defrost freezers when the frost builds up to 1/4" thick.

  43. Vacuum dust and dirt from refrigerator coils so refrigerator runs more efficiently.

  44. Try to cook several items in the oven at the same time.

  45. Avoid pre-heating your oven whenever possible.

  46. Use the microwave for items that need a quick cooking or reheating.

  47. Use crockpots and slow cookers whenever possible.

  48. Defrost foods before baking or microwaving; it will use 1/3 less energy than starting with frozen food.

  49. If you're going to clean your oven, use the self-cleaning cycle right after you finish baking. That will give the self-cleaning cycle a head start in heating the oven.

  50. Give your oven and stove a vacation. Barbecue or grill outdoors whenever possible.

  51. Switch from a desktop to a laptop computer. Laptops use much less electricity and throw off much less heat.

  52. Go outside! Take advantage of the warm weather and extended sunlight. Eat, read, talk and have fun outside as much as you can!

Related Information from Horizon Services...

Sunday, June 20, 2010

FLASH! EPA Delays RRP (Lead Paint) Rule

This just in from the National Kitchen & Bath Association:
June 18, 2010: NKBA just learned that the Environmental Protection Agency has decided to delay enforcement of the Lead Renovation, Repair and Painting Rule until October 1, 2010.

Acknowledging the need for additional time to enable firms and contractors to become trained and certified in compliance with the April 22 rule, the Agency has agreed to delay any enforcement actions.

The EPA will not take any enforcement action for violations of the Rule’s firm certification requirement until October 1, 2010.

The EPA also will not take any enforcement action against individual renovation workers if the person has applied to enroll in, or has enrolled in, by no later than September 30, 2010, a certified renovator class to train contractors in practices necessary for compliance with the final rules. The training must be completed by December 31, 2010.

To read a copy of the EPA’s announcement, click Here.


This is good news for contractors and painters because many have not been able to get the training needed to become certified. The delay will give them time to do so.

Peggy


Addendum from Qualified Remodeler Magazine:
 
The EPA asserted that enforcement would continue on work practice standards whether a firm was certified or not.

In a FAQ posted on the EPA’s Web site, the agency issued a clarification to its initial announcement, which was misinterpreted by many to mean that all enforcement was to be postponed. The EPA reiterated that it was not stopping enforcement of work practice standards and record-keeping requirements. Whether or not a firm is certified, the EPA still expects it to adhere to the lead-safe practices outlined in its RRP ruling.


The EPA also withdrew the "OPT-out Provision" that allowed homeowners without pregnant women and children under six to opt out of the extra measures to protect from lead paint contamination when remodeling their pre-1978 homes. All remodels must now conform to the Renovation, Repair and Painting Rule.

A number of Housing Industry Groups plan to file suit over the change.

Peggy

JACKFRUIT SEEDS FRY:

For this fry the jackfruit seeds must be fresh and fleshy. We must peel off the outer cover and then cook it either in plenty of waters or in pressure cooker. When they are cooked, cut them into halves. Now they are ready to cook. We can prepare various dishes such as koottu, poriyal, podi thiruval, pakoda, briyani etc. The sambar would be very tasty if we add this jackfruit seeds to it. This fry will be delicious to eat as a side dish with sambar.


பலாக்கொட்டை வறுவல்:

Ingredients:

Jackfruit seeds- 30 [boiled and cut in to halves]
Turmeric powder- half sp
Red chilli powder-2 tsp
Oil- 4 tbsp
Salt to taste
Finely sliced onion- 1
Finely chopped tomato-half cup
Chopped coriander-3 tbsp
Curry leaves- 1 arc


Grind the following in to a coarse paste:


Shredded coconut- 4 tbsp
Small onions-5
Small garlic flakes-6
Shredded ginger- half sp
Fennel seeds- half sp

Procedure:

Mix the powders, ground paste and salt with the jackfruit seeds and marinate them for half an hour.
Heat a kadai and pour the oil.
Add the sliced onion and fry them to golden brown.
Then add tomato with the greens and fry them until they are cooked well and the oil floats on the surface.
Add the jackfruit mixture and cook on medium fire until it is fried well to golden brown.

Bring on the berries


STRAWBERRIES WITH LEMON THYME SHORTCAKES

(Adapted from Bon Appetit)

INGREDIENTS

4 cup fresh strawberries
2/3 cup powdered sugar
3/4 cup buttermilk
1 tablespoon finely grated lemon peel
2 1/4 cups all purpose flour
1/2 cup light brown sugar
1 1/2 teaspoons baking powder
1 teaspoon baking soda
1/4 teaspoon salt
6 tablespoons chilled unsalted butter
1 tablespoon sugar
Whip cream

INSTRUCTIONS

Sliced strawberries and toss in a bowl with powdered sugar. Set aside.

Preheat oven to 425 degrees.

Mix buttermilk, lemon peel, and thyme together in a small bowl. Set aside.

Mix flour, brown sugar, baking powder, baking soda, and salt together in a large bowl. Stir in buttermilk mixture until just blended. Transfer dough to lightly floured cutting board. Knead gently until dough just comes together. Do not over mix.

Divide dough into 10 balls. Transfer onto 2 baking sheets. Pat gently so they settle in place. Sprinkle with sugar.

Bake for 15 minutes. Transfer to cooking rack.

Carefully cut biscuits with serrated knife. Layer with whip cream. Add berries.


Friday, June 18, 2010

LED Lighting Fact PDF

Pacific Gas & Electric Company and the California Lighting Technology Center at UC Davis recently teamed to create a fact sheet that helps customers select the right light emitting diode (LED) for replacement applications.

The document addresses solid state lighting basics and offers test results and lamp comparison charts.

The fact sheet also discusses the LED product label that manufacturers are beginning to adopt so that consumers will more easily understand the lumens, watts, and efficacy of the lamps they are buying.

Download the LED fact sheet.

Peggy

Fluorescent Bulb Recycling Resource

The National Electrical Manufacturers Association (NEMA)’s lamprecycle.org website has provides a one-stop source of information about recycling mercury-containing lamps.

The latest version of the site allows visitors to find compact fluorescent lamp drop-off locations near them with the help of Earth911.com.

Peggy

Chakka/Jackfruit Adai

The monsoon has arrived in my part of the world. The late arrival meant few more days availability of mango and jackfruit in the market. In case of jackfruit, once the fruit is cut open, the segments has to be used up in a day or two, in case of refrigeration. I usually buy a small piece from the market. Husband is not very fond of eating jackfruit. I like to eat but there is a limit to which how much I can finish. With the left over fruit segments, I make filling for elai adai, chakkavaratty, chakka pradhaman (Just realised I haven't posted this yet). After a round of all these, I was reminded of the chakka adai. Soaked boiled rice is ground with jackfruit pieces and jaggery. I like the adais not very sweet. The adai with slight sweetness from jaggery and flavor of jackfruit makes a filling  evening tiffin. Those who prefer some sweetness during breakfast can make it in the morning. Adai ,hot from the pan, with a blob of butter- you cannot stop with one.

The quantity of ingredients can be taken as a pointer and not necessary to be exact. Adjust the jackfruit and jaggery to suit your palate


Ingredients


Boiled rice/Idly rice - 1 1/2 cups

Raw rice - 1/2 cup

Ripe jackfruit bulbs - 10 nos

Grated jaggery - 1/2 cup

Salt - a pinch

Oil to prepare the adai


Method


Wash and soak the rice for 5 hours. You can soak both the variety of rice together. Grind rice coarsely. Add chopped jackfruit, jaggery and salt. Grind all the ingredients together. Don't make it too smooth. It will affect the texture of the adai. Let the batter be slightly grainy.


Heat a tava. Smear with little oil. When it is hot, pour a ladle of the batter and spread it like dosa. Don't make it very thin. You can use oil or ghee to make these dosas. Using ghee surely enhances the taste. When one side is cooked, flip and cook till it is golden brown. Enjoy hot with some home made butter.


Thursday, June 17, 2010

Urulaikizhangu patani thair pachadi - Potato, peas and yogurt salad/raita

URULAI KIZHANGU PATANI THAIR PACHADI


This is another of my favourite dishes which my mother prepared often.We usually had this side dish with mango rice,vangi bath or any other 'variety rice'.It goes very well with vattal kuzhambu and hot plain rice.On very hot days when we are not in a mood for hot and spicy side dishes,we can certainly enjoy this simple and cool nutritious pachadi with vegetable pulav, chapaties and other main dishes.

I wanted to post this recipe since a very long time but some how it got postponed.The moment I went through the list of vegetables to be used in the contest announced by Manjula's kitchen I was inspired to do this post.The only variation I have introduced here is the addition of green peas which my mother did not use in her dish.


INGREDIENTS
Potatoes - 2 big ones
Cooked green peas - 1 cup
Yogurt - 2 cups
Salt - 1/2 tsp
Oil - 1 1/2 tsps
Mustard seeds - 1/4 tsp
Fenugreek seeds - 1 pinch
Tur dal - 2 tsps
Curry leaves - a few
Broken red chillies - 3
Sugar - 1/4 tsp

METHOD
1. Wash and pressure cook the potatoes .( Cut into half if they are too big so that the inner core gets cooked well).
2. Cool the potatoes very well and then peel.
3. Crumble the cooked potatoes taking care not to mash them up into a paste.
4. Blend salt and sugar with the yogurt.
5. Add crumbled potatoes and cooked green peas to the yogurt and mix well.
6. Heat oil and add mustard seeds.
7. When the mustard splutters add tur dal and fry till it is golden in colour.
8. Add fenugreek seeds and then the red chillies followed by curry leaves.(Fenugreek seeds impart a good flavour to the pachadi.If the bitter taste is not prefered this ingredient can be ommitted.)
9. Pour seasoning on the pachadi and mix well.
Chill the pachadi. Add some more yogurt and fluff it up before serving because the potatoes tend to absorb all the liquid when chilled.
Enjoy the urulai kizhangu patani pachadi as it is or with your main course.

Tuesday, June 15, 2010

In our community....

Aune Plumbing take great honor and pride in our participation in the community.  Our latest efforts bring a calling for fund-raising, a little golf and a whole lot of FUN!  

If you can help in this great event your participation will go further to enhance the possibilities of hundreds of area youth in the Elk River and Zimmerman community.  Just think, a fun day on the course AND you will make a difference in the lives of so many for years to come!
Please forward this to anyone whom may be interested, hang it up at your work, call your friends and get a foursome together......hope to see you!

Monday, June 14, 2010

Hybrid Appliances Aim to Solve Energy Crisis

Have you seen the new horror/science fiction movie Splice in which scientists combine the DNA of different animals to create incredible new hybrid animals? It's pretty scary stuff...especially when they start splicing together the genes of animals and humans. But outside of Hollywood, there are some other kinds of "genetic engineering" taking place that could have a major and beneficial impact in your home in the coming years

There’s a new movement quietly gaining momentum as we search for ways to reduce our energy dependence, improve our environmental outlook, and save money on rising utility costs. Part innovation and part science fiction, the technology of hybrid appliances is fast taking the scientific world by storm. Here are some of the unusual and novel appliance and fixture combinations you may see in your home some day soon.


The Washing Machine Toilet:

At first, putting a washing machine together with a toilet sounds downright unsanitary. But upon closer examination, the idea is fairly brilliant. The washing machine does a load of laundry as usual, but then stores the waste water from the rinse cycle and uses it to flush the toilet when it’s needed. Using dirty water to get rid of…well…dirty water just kind of makes sense, doesn’t it? Users will cut down on water consumption while solving another common household problem: limited space. By combining a bulky appliance that normally takes up a lot of space with a necessity already found in every single home and apartment in the country, the washing machine toilet could prove a god-send to those in a serious space-crunch.

Developed by a Turkish engineer, the washing machine toilet was recently entered in the Greener Gadgets design competition. Though it’s still in conceptual development, this hybrid appliance could revolutionize the way we do our laundry and our “business.”


The Toilet Sink:

If it’s good enough to get set up with the washing machine, why not pair the toilet with the sink, too? The toilet sink is meant to be another space-saver and reduces water consumption, too.

How does it work? The water in the toilet tank and bowl combine with gravity to flush waste. Fresh water then flows into each receptacle. With the sink feature, this fresh water can be diverted to the tap where it flows out just like a normal sink. The water that drains from the sink then flows back into the toilet bowl where it stays until the toilet is flushed again. So you’re always washing your hands with fresh water, but you may be flushing the toilet with grey water on occasion.

The downside of this neat little device is that you’d have to lean directly over the toilet seat to use the sink, so just be sure to keep the bowl clean!


The Tanning Shower:

It’s every prom queen’s dream: a shower that gives you a tan while you lather, rinse, and repeat.

Made by ProSun International, the SunShower was first introduced in 2006 when it won an award for best bath product at the Kitchen and Bath Industry Show.

According to ProSun, the tanning shower emits a balanced, gentle UV light spectrum that’s similar to natural sunlight. It allows the user to tan just a little bit with each shower, rather than experience the UVA and UVB bombardment of one 10 or 15 minute session in a traditional tanning booth. Supposedly, this gradual tanning is easier on the body.

While there’s as yet no proof that these claims are true, tanning enthusiasts are already snapping up these powder room novelties.


Related Information from Horizon Services...

Sunday, June 13, 2010

Milky Square Loaf


I've received quite a few comments from previous bread post recently. Many of them having some problems just like I do, either the dough couldn't rise to the perfect square or the texture was not right etc. I must said I'm not a perfect baker and sometimes I do have problems with my dough too especially my first year of learning bread making, it's really a struggling. I think the problems could be the room temperature, humidity, yeast and all other ingredients that cause a failure. However, we all learn from mistakes. The more you practice and the more you could figure out the solution. I've been long time didn't bake a square loaf because I was crazy about the wholesome blacky bread recently, the texture and taste is just so good for me. This milky wholemeal bread is the one I did it quite often at my earlier bread learning journey and it become my almost daily bread. As some of the bloggers had problem making it, so I decided to give this a try again since I quite miss it too! 


I'm quite happy with the result this time, it's a square loaf and the texture is soft and light. I hope people who face the failure please don't be dishearten and give up. Do it again until you get it. I'll not shame to tell you that I've feed the bin with my failure doughs many times which I couldn't remember how many. Again, thanks for everyone dropping at my blog for leaving your words! Let's face the problem and solve it. You'll get a right bread soon!


Recipe for the bread:

Bread flour 270g
Wholemeal flour 30g
Yeast 3g (this time I used 4g for a square loaf)
Sugar 6g
Salt 5g
Cold milk 240g
Unsalted butter 12g


Method:
  1. Mix all the dry ingredients in a kneading bowl with 240ml cool milk except butter. Knead until everything combine.

  2. Gradually add in the butter continue the kneading process until it become smooth and elastic. (the dough might have a bit wet but not sticky, you might need longer time to knead it)

  3. Shape it into a smooth round dough, cover with cling film and let it rest for 80 minutes. (This time I proof for 60 minutes)

  4. Divide the dough into 3 equal pieces and roll to form 'ball' shapes.

  5. Flatten each dough and roll out into a longish shape. Roll up the dough like a swiss-roll. Place the rolled doughs on a baking pan proof for 60 minute. (I forgot to set the time, and almost proof until 95% full of the tin about 80 minutes)

  6. Bake approximately 25 minutes or until golden brown at 190'C preheated oven. (For a square loaf I baked at 200C about 35 minutes)

PANEER CHILLI KOTHU PAROTTA

With paneer there are so many Tiffin varieties. But this paneer chilli kothu parotta is the most fulfilled one with a divine taste. There is no need for a side dish as this is a wholesome food. However, curd salad with cucumber, carrot, onion and tomato is ok with this if any side dish is needed. This dish can be prepared with left over parottas.


பனீர் சில்லி கொத்து பரோட்டா

Ingredeints:

Parotta-4
Onion-4
Medium sized tomato-4
Garlic-ginger paste- 1 tsp
Chilli garlic sauce- 2 tbsp
Finely chopped green chillies- 1 tbsp
Soya sauce- 1 tsp
Capsicum [big]-1
Paneer- 200gms
Oil-4 tbsp
Butter- 2 tsp
Salt to taste
Turmeric powder- half tsp
Chopped spring onion- 5 tbsp
Finely chopped coriander- 5 tbsp

Procedure:

Microwave the parottas for 2 minutes in High.
Then cut them in to thin pieces.
Slice the onions thinly.
Crush the tomatoes coarsely.
Cut the capsicum in to small cubes.
Soak the frozen paneer pieces in slightly warm water for 20 minutes, drain the water and then scramble them in to small pieces.
Heat a pan and pour the oil.
Add the onion and fry them to slightly golden brown.
Add the ginger- garlic paste and fry them for a few seconds.
Then add the tomato with the turmeric powder and the green chillies.
Cook them until they are finely mashed and the oil floats on top.
Add the capsicum, spring onion, salt and the coriander leaves with the sauces and cook them for a few seconds.
Add the scrambled paneer and cook on slow fire until it is mixed well with the gravy. 
Finally add the parotta pieces and toss them until they are well coated with the gravy.
Add the butter and cook the parotta on slow fire for another 5 minutes.
Now the delicious paneer chilli kothu parotta is ready!

Friday, June 11, 2010

EPA Lead Paint Rules for Pre-1978 Homes

I've been busy with "family stuff" lately, but figure it's about time to post here again. And I've been meaning to get this out.

There's a new issue that is plaguing the remodeling industry and owners of pre-1978 homes who want to remodel:

April 22, 2010 marked the onset of new EPA (U.S. Environmental Protection Agency) Renovation, Repair and Painting (RRP) rules on testing and remediation of lead paint in pre-1978 homes (also schools and child care facilities) to protect children and pregnant women from the dangers of lead paint dust and chips generated during remodeling.

Here's the EPA RRP Rule:


http://www.epa.gov/lead/pubs/renovation.htm

Remodeling contractors all across the nation are in a tizzy over new requirements for training to deal with the new rule. Some have entirely precluded work on pre-1978 homes from their businesses. It's the asbestos thing all over again.

Here's what contractors have to deal with to get certified:

Shawn McCadden's very well presented synopsis (Thanks Shawn)

Do-It-Yourselfers are excluded. This from the EPA site:


"Information for Homeowners Working at Home

If you are a homeowner performing renovation, repair, or painting work in your own home, EPA's RRP rule does not cover your project. However, you have the ultimate responsibility for the safety of your family or children in your care. If you are living in a pre-1978 home and planning to do painting or repairs, please read a copy of EPA's Renovate Right: Important Lead Hazard Information for Families, Child Care Providers, and Schools (PDF) lead hazard information pamphlet (11 pp, 1.1MB). | en español (PDF) (20 pp, 3.2MB). You may also want to call the National Lead Information Center at 1-800-424-LEAD (5323) and ask for more information on how to work safely in a home with lead-based paint."


That doesn't mean that you DIYers shouldn't be concerned or that homeowners should be cavalier about hiring a contractor who doesn't initiate testing as a first action when talking to you about renovating your pre-1978 home.

In fact, you yourselves should spend the money and have the testing done on the room(s) you plan to renovate before talking to contractors. Most pre-1978 homes going back as far as the 1950's will test negative for lead based paint on the INTERIOR of the home. Exterior is another matter (Much more likely to contain lead-based paint unless it has all been removed in the past).

If your kitchen and bathrooms show negative on testing, you can pretty well assume there is no lead-based paint in your home. If they show positive, you should get all rooms tested. If you plan to replace windows or doors or add on, disturbing exterior paint as part of your renovation, you should have those areas tested too.

Here's a Consumer Product Safety Commission info sheet on lead-based paint and testing options:

What You Should Know About Lead Based Paint in Your Home: Safety Alert

I'm sure in a few years we will all settle in with the new rules and things will get comfortable again for contractors and homeowners, but right now is definitely a bit more difficult for both with the new rules. Saving children from lead poisoning or reduced leaning capacity is a valid reason to support the rule, which has been a long time coming.

According to a study published in the New England Journal of Medicine in 1990:


"The persistence toxity of lead was seen to result in signifiant and serious impairment of academic success, specifically a seven fold increase in failure to graduate from high school, lower class standing, greater absenteeism, impairment of reading skills sufficiently extensive to be labeled reading disability (indicated by scores two grades below the expected scores), and deficits in vocabulary, fine motor skills, reaction time and hand-eye coordination."

America's children have enough to deal with these days without the added burden of lead poisoning.

Peggy