Tuesday, March 31, 2009

Stuffed Capsicum, Tomato Rice and Beetroot Pachadi

TAKKALI SADAM STUFFED IN KUDAMILAGAI
Tomato rice stuffed in Capsicum

The Summer Vacation has just begun and my grand children are greatly relieved that they got the much needed break from the boring ‘dabba’ lunch. They pamper themselves by getting up late in the mornings and have a late breakfast. For the first few days they were really grateful for the hot sambar, rasam, rice and curry meal for lunch. I know that they will be bored with the monotony soon. And with friends coming to stay over for lunch, their expectation for a delicious treat is but natural. I always keep my ‘antennas’
up to pick up any new recipe, so that I could cook a new dish to keep the little ones happy. My daughter calls it the height of spoiling, but what are grand mothers for?


TAKKALI SADAM or TOMATO RICE
INGREDIENTS:
Rice – 250 gms
Onion (Chopped finely) – ¼ cup
Tomatoes – 4
Cumin seeds – ½ tsp
Cinnamon – 1 small piece powdered
Sambar powder - 2 tsps (Refer to my recipe as it tastes good in almost all recipes since it has coriander seeds, cumin, fenugreek seeds and pepper in it.)
Salt – 11/2tsps
Sugar – 1 pinch
Cashew nuts – a few
Raisins – a few
Cooking oil – 2 tbsps
Coriander leaves – a few METHOD:
1. Pressure cook rice with with two times the volumes of water, such that it does not become mushy and the grains stand separate. Allow it to cool.
2. Heat oil in a pan and roast cashew nuts and raisins, drain and keep them aside.
3. In the same hot oil add the cumin seeds and the cinnamon powder.
4. When it is fried, add the chopped onion and fry until it turns pink in colour.
5. Add the finely chopped tomatoes, sambar powder, salt and sugar in the same order and stir well.
6. Cover with a lid and cook in slow fire.
7. Keep stirring now and then and cook till all the tomatoes turn into pulp.
8. When the gravy separates from the oil switch off the flame and add the chopped coriander leaves and the fried raisins and the cashew nuts.
9. Add the now cooled rice and blend well taking care not to mash the rice.
10 The tomato rice is ready for the stuffing. You can simply serve tomato rice as a dish as well.

INGREDIENTS FOR STUFFED CAPSICUM:
Well shaped capsicums – 4
Cooking oil - 1 tbsp
Chopped tomatoes – 2 tbsps
Salt – 1 pinch
METHOD:
1. Wash, dry and cut out a ‘lid’ on the top of each capsicum using a sharp knife.
2. Scoop out the seeds carefully so that the capsicum looks like a perfect box with a lid.
3. Spoon in the prepared Tomato Rice up to the brim and press the ‘lid’ firmly.
4. Heat oil in a shallow pan and add the tomatoes and salt and stir.
5. Arrange the stuffed capsicums in the pan leaving space to turn them occasionally. It is better to cook them in small batches if the pan does not accommodate.
6. Turn each capsicum once, so that it is coated with oil and salt.
7. Cover with lid and let it cook on slow fire.
8. When you hear the sizzling sound turn the vegetable to the other side very gently so that the rice does not come out.
9. When it is done switch off fire and serve the sizzling hot capsicum stuff with beet root thair pachadi which is not only a treat to the palate but also to the eye as well.

BEET ROOT THAIR PACHADI

Beetroot and curd dip
INGREDIENTS:
Beet root – 1
Thick curd – 2 cups (Chilled)
Salt – ¼ tsp
Oil – 1 tsp
Mustard seeds – ¼ tsp
Cumin seeds – ¼ tsp
Coriander leaves – a few
METHOD:
1. Pressure cook the whole beet root along with its peel.
2. Cool it thoroughly or even refrigerate for 15 minutes.
3. Peel the beetroot just as you would peel the boiled potato.
4. Grate the beetroot in the using the larger side of the grater.
5. Add the salt to the curd and beat with a spoon.
6. Add the grated beet root and blend lightly to avoid mashing up of the vegetable.
7. Heat oil and add mustard seeds.
8. When it splutters add the cumin seeds.
9. Pour the seasoning on to the pachadi.
10. Garnish with coriander leaves.

The cool and non spicy pachadi is a boon in the hot summer months.
Of late we've been having tough time keeping up with the number of events and dates. The capsicum was made for 'cooking with kids' - and a google search shows a number of events, and perhaps an ingredient for each month! ! Oh well ...
The beetroot thair pachadi in all its pink glory goes off to FIC Pink an event series started by Sunshinemom of Tongueticklers and currently hosted by Priya at Easy N Tasty Recipes!
Updated: Yea! There is always an event every post can go to! The stuffed capsicum goes to Srivalli's Monthly Mingle - Kids Lunches. Monthly Mingle was started by Meeta of What's for Lunch Honey, read more about it here.

Chilled Coffee Cheesecake

It's been long long time I didn't make this cheesecake and I'm recently quite naughty with sweet and rich flavour of desserts. So, I made this to fill my appetite. The cheesecake very creamy with rich coffee flavour and the chopped chocolate beads has enhanced its texture!

Since my biscotti and cookies jar had emptied, I tried the wholewheat cookies recipe from HHB to refill some cookies to the jar. I don't have any pretty cookie cutter so I just cut them into square. It's quite a rustic but I love the country look. The texture is crispy and crunchy! Although the process was a bit troublesome but it's worthwhile! Thanks HHB for sharing a great recipe again!

Chilled Coffee Cheesecake Recipe for 8 inches baking tin or 8 of 5cm chef rings
Bottom base:
90g digestive biscuits crumbs
30g oreo biscuits crumbs
75g butter (melted)
Fillings:
250g cream cheese
60g sugar
12g instant coffee (dissolve with 1 tablesppon water)
2 teaspoon gelatin (dissolve with 1 tablespoon hot water)
170ml whipping cream
40g chocolate beads
Toppings:
150g whipping cream
50g dark bitter chocolate
8 pieces of mocca beans (deco)

Method:

  1. Mix the crumbs and melted butter in a bowl. Press crumbs mixture onto bottom baking pan or little chef rings and keep in the fridge.
  2. In another bowl, beat cream cheese until soften, gradually beat in sugar until the sugar dissolve. Add in the coffee mixture until well blended.
  3. Whisk the whipping cream in another bowl until thicken.
  4. Mix the dissolved gelatin into the coffee mixture until well incorporated. Fold in the in the whipped cream until everything well combine.
  5. Pour into the baking pan or chef rings and chill in the fridge until it set.
  6. After the cheesecake has set. Melt the chocolate with the whipping cream. Pour a thin layer on top of the cheesecake. Let it set in the fridge.
  7. Run a sharp knife at the edge of the cake pan and unmold when everything has set. Decorate with a dollop of whipped cream and go with the mocca bean. Enjoy!

Lemon Poppy Seed Cookies for T & T


When Curry Leaf announced Tasty Palettes for Zlamushka's T &T, I knew what to make, since her vegan lemon poppy seed cookies is in my bookmarked recipes for a long time. As soon as I saw the event announcement, I immediately noted the recipe and baked it.

Here is the recipe

All purpose flour - 1 cup

Poppy seeds - 1 1/2 tblspn

Arrow root powder - 1 1/2 tblspn

Nutmeg powder - A big pinch

Salt - a big pinch

Butter - 5 tblspn

Sugar - 1/3 cup

Lemon 1 tblspn

Lemon Zest - 1 tspn

Vanilla essence - 1 tspn

Water - 3 tblspn


I have used white poppy seeds and arrow root powder in place of cornflour. Suganya had made it vegan by using margarine and I used butter.


Method

Mix flour, poppy seeds, arrow root powder, nutmeg and salt.Cream together, butter, sugar, lemon juice, zest and vanilla essence. Mix the dry ingredients into the wet mixture. Add water little by little to form the dough. Don't add 3 tblspn of water at one go.Pinch off a tablespoon of dough and shape in to a ball and slightly flatten it.


Bake in a preheated oven at 180 C for 25 minutes or till the sides starts browning. The original
recipe said 18-20 minutes, mine took extra 5 minutes. The timings may vary according to your
oven settings. Suganya's has got a nice brown color. Mine remained mostly yellow except the sides which were slightly brown. Don't know if it has anything to do with the use of butter in place of margarine. It was definitely tasty.


The cookies were melt in the mouth kind with a tangy flavor. It gives a nice feeling to bite into the poppy seeds. Thanks Suganya, for a keeper recipe.


Monday, March 30, 2009

Whole Wheat Quick Bread


I was searching for some quick bread recipe and the quick brown bread at Alanna's Kitchen Parade caught my attention. There wasn't much of preparation work. Just mixing the ingredients and it was egg less too. She has already given a healthy version. So there wasn't any substitution needed from my part, which I often try to do.

Whole wheat flour - 2 cups
All purpose flour - 1 cup
Baking soda - 2 tspn
Salt - 1 tspn
Brown Sugar -1/3 cup
Honey- 1/4 cup
Buttermilk - 2 cup
Tutty fruity- 1/2 cup

Mix dry ingredients - whole wheat flour, all purpose flour, baking soda,brown sugar and salt.
Stir in rest of the ingredients. Mix until just combined. The batter is of not pouring consistency. Its more like a loos chapati dough. Transfer the batter to a greased loaf pan. Smooth the top with the back of a spoon.Bake in a preheated oven at 190 C for 45 minutes or until a knife inserted comes out clean.

This slightly denser, mildly sweet, honey flavored, quick bread is good for breakfast with butter or jam.

This goes to
1) BBD#18-Quick Breads, guest hosted by Manasi, an event started by Zorra.
2) JFI-Wheat, hosted by Roma


"Joe the Plumber" vs. "Dan the Plumber"

It’s a “Battle Royale”!
It’s going to be a real knock-down-drag-out!

Who is the better plumber (for Southern California)?

- “Dan the Plumber” has never been on TV.
- “Joe the Plumber” has never fixed a leaky faucet in Aliso Viejo, or cleared a clogged drain in Rancho Santa Margarita!

- “Dan the Plumber” has never been featured prominently in a presidential campaign.
- “Joe the Plumber” doesn’t have a website, advertising his services, for customers all over Orange County, CA!

- “Dan the Plumber” has never been interviewed by a newscaster.
- “Joe the Plumber” is not a licensed plumbing contractor in California (License # 877283)!

Since this is an amateur bout, folks, it only goes three rounds, but I think the decision is obvious!

If you are a Southern California business or home owner, in need of standard or emergency plumbing repairs, “Dan the Plumber” wins all three rounds!

* Does your home in Mission Viejo need a new water heater?
* Does your Irvine business have a clogged toilet?
* Would you like a softener installed in your Laguna Beach home?
* Does your Costa Mesa business need to have the sewers jetted?
* Would you like to have a Reverse Osmosis system installed in your Tustin home?

Only “Dan the Plumber” can do all of these things and much more; “Joe the Plumber” isn’t allowed! (And his response time would be terrible since he lives in Ohio, or Indiana, or something.)

By the way… Who is “Joe the Plumber”, anyway? Does anyone really know? I mean, we have heard him mentioned in a presidential campaign, and then there was the guy on the news, but, is that the REAL “Joe the Plumber”?

“Dan the Plumber”, on the other hand, is a REAL person! He owns AB&R Plumbing (a full-service, 24-hour plumbing company, serving all of Orange County), as well as New Technology Plumbing (A commercial new construction and tenant improvement plumbing company). Some might say he is The Greatest Plumber in the World, but “Dan the Plumber” wouldn’t, he is just too modest.

Saturday, March 28, 2009

Indian Cooking - Frequently Asked Questions


Friends, folks who attend my culinary classes, and random people, intrigued by India, ask me an array of questions about preparing Indian food. Below you'll find responses to some of their most common questions.

1) What is "curry"?

"Curry" is a term coined by the British to describe savory Indian dishes that feature meat, poultry, fish, or vegetables, seasoned with a variety of spices. Although some spice mixtures are widely used, such as garam masala, Indian home cooks use many other spice combinations to flavor food. (I love the flavor that develops by combining cardamom, cinnamon, and cloves, for example.) I recommend you avoid the generic "curry powders" sold in chain grocery stores if you want to create authentic Indian flavors.

2) What is the difference between North Indian and South Indian food?

North Indian cuisine reflects culinary traditions brought to India by the Mughals, Muslim Turks from Central Asia. These traditions include the preparation of aromatic pilafs and roasted meats. North Indian food also incorporates more dairy products and features more flat breads. South Indian cuisine, by contrast, reflects the region's more tropical climate. Meals commonly include rice and often feature fish. In addition, many curries are seasoned with coconut. The vast majority of Indian restaurants in the U.S. serve North Indian cuisine (which includes samosas, tandoori chicken, and paneer).

3) What type of regional cooking do your recipes feature?

The recipes generally come from my parents' home state of Kerala - a tropical region located in southwestern India. (The word Kerala translates to "land of coconuts.") See my brother's blog for some beautiful photos taken in Kerala.

4) What tips do you have for buying and storing spices?

Purchase whole spices whenever you can. They retain their flavor longer than powdered spices and can be ground just before you prepare a recipe. Store them in airtight containers and place them in a dark, cool place.

TIP: Home cooks from my mother's generation often purchase spices in bulk and store them in glass jars that housed other items (such as jam, olives, or mustard). It is a good way to save money and to help preserve the environment.

5) Where do you shop for spices?

I head to Devon Street. My favorite store is Fresh Farm International Market (located at 2626 West Devon Street) which carries fresh curry leaves, integral to Kerala cooking, and a wide selection of whole spices and dhal (lentils).

6) Do I need special equipment to make your recipes?

Most of the recipes require basic kitchen tools. However, you will need either a mortar and pestle or a small coffee grinder to prepare spices. If you opt for a coffee grinder, dedicate it to grinding spices. (You will not want to grind coffee beans in the same grinder you use to powder cumin, fennel, and coriander! Ick!)


Friday, March 27, 2009

Strawberry Power Shake-No sugar added


Here comes a healthy and filling breakfast shake. Measurements are approximate.
Ingredients:
Strawberries-2 cups
Milk-1.5 cups
Dates-10
Almonds-a handful
Saffron-for garnish(optional)

Method:
Blend everything to a smooth and creamy shake. Chill and serve.
If the shake is very thick, you may add some more milk.

This is my entry to the following events:
FIC: Pink/Rose - March 31st event started by Sunshinemom and hosted by priya.
JZ's Lets Go Nuts: Almonds - March 31st event started by Aquadaze of Served with Love

Some of you already congratulated me for winning the first place in Magnificent Click event hosted by Gayathri. Thank you friends! Congratulations to other winners too! I am excited to receive this beautiful award from Gayathri. Thank you so much!This is very encouraging. I hope to learn more about food photography from my husband.

Thursday, March 26, 2009

Coffee Bun

Some say "roti boy" some say "mexican bun", whatever it is, I must say it's delicious! I think everyone will hardly resist the coffee smell when it's about to come out from the oven. For me, it is.
The buns are super soft and I didn't feel I've eaten two of it in a short time. I hardly tell the difference of the commercial one with these buns. Yes, we can get this kind of bun easily everywhere but I just feel good to make it myself and it's as good as the commercial one! Try it out!
(Recipe for 10 little buns)
For the dough:
250g bread flour
38g caster sugar
3g salt
4g yeast
1/2 beaten egg
135g fresh milk
30g butter
For the filling:
100g butter (softened)
1/4 teaspoon vanilla extract
35g brown sugar
For the topping:
50g butter
40g icing sugar
38g beaten eggs
1 teaspoon granulated coffee dissolve with 1 teaspoon water
pinch of cinnamon powder (optional)
50 plain flour
How I made it:
  1. For the filling, using an electric mixer beat the butter and brown sugar until light and pale until the sugar totally dissolved. Add in the vanilla extract for the final beating. Place the mixture into the fridge until it harden. Divide the harden mixture into 10 portions and sit in the fridge until ready to use.
  2. For the toppings, beat the softened butter with icing sugar until everything well combine. Gradually add in beaten eggs then the coffee mixture. Add in pinch of cinnamon powder with the flour and beat until everything well incorporate. Place the mixture into a piping bag and keep in the fridge until ready to use.
  3. For the dough, knead all the ingredients together except butter. When the dough become a smooth dough add in butter and continue the the kneading process until the dough become smooth and elastic but not sticky. I used a standing kneading mixer to knead for approximately 30 minutes at speed 2.
  4. Divide the dough into 10 little doughs and shape it into round ball shape. Let it rest for 15 minutes before add in the filling.
  5. Roll out each doughs to a flat disc and add the butter filling. Seal it tightly. (make sure you seal it tightly otherwise it will split out during baking)
  6. Place each doughs on a baking tray, make sure they sit a part from each other because they might stick to each other during the baking. Cover the doughs with cling film and proof for 50 - 60 minutes.
  7. Before the doughs place into the oven, pipe out the filling in a spiral start from the top center of each buns. Bake for 12 minutes at 200'C preheated oven.

Enjoy!

blog love

It's always great receiving comments here on the blog.  Recently, some nice things have come from additional sources, so we figured we'd give a shout'back - mostly because we appreciate them, but a little because narcissism is a completely natural way to feel.  For me. 

Yesterday the people at Modwalls' design blog featured Project Rowhouse and said some really nice things.  You can check it out here.  

Also, a few weeks ago Urban Discoveries Living interviewed us about the renovation for a House Tour feature on their site.  UDL is a sweet little blog about Baltimore city livin';

Charles & Hudson liked our trim work;

and our friends at Rehab or Die always have nice things to say - and they do some good work!

Thanks!

Happy Ugadi with Bevu Bella (Neem Jaggery) and Mangai Pachadi(Mango Jam)

Happy Ugadi with Bevu Bella (Neem Jaggery) and Mangai Pachadi(Mango Jam)

It was long long ago. So long ago when the whole of south India was known as The Deccan or The Carnatik. Many families from the Tamizh speaking areas moved on foot in quest of their fortune to the Mysore Samasthanam –the erstwhile Mysore Kingdom. With its patronage the families were firmly rooted, and spread their branches far and wide, thus giving rise to a new clan which can be named as the Tamizh Kannadigas.
My siblings and me, were born in the seventh generation of one such family and grew up on the waters of the Cauvery and moulded in the Kannada soil. Though our family retains Tamizh and its culture, it has also imbibed the culture and traditions of the Kannadigas, and I am proud of our hybrid culture.

Today is UGADI – the Kannada New Year’s Day. We celebrate it with great festivity with the Mavu (mango) and Bevu (Neem garlands) thoranas, Bevu Bella (Neem and Jaggery preparation), Mavinakai Chitranna (mango rice), Obattu, and Mangai Pachadi (mango relish).
Bevu Bella
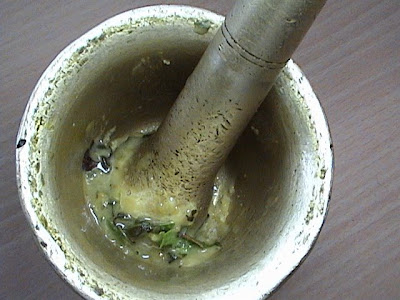
Tender neem leaves, neem flowers and jaggery are pounded in a pestle and made into tiny balls which are swallowed as the first thing in the morning on the Ugadi day. This is to remind us that life has to be taken easy, though it is a mixture of sweet and bitter experiences. The leaf should be dry, otherwise it will become watery - like mine, and cannot be rolled into balls!!
Neem cools down the system and helps in healing it. It also destroys worms.

Mangai Pachadi
INGREDIENTS:
Raw Mango – 1
Jaggery – 1 cup
Salt – ¼ tsp
Turmeric powder – 1 pinch
Cooking oil – 1 tsp
Mustard seeds – ¼ tsp
Red chillies – 2
Neem flowers ( dried or fresh ) – 1 tsp

METHOD:
1. Peel the mango and dice it into pieces. (Save the peel which can be used in chutneys or in mango rice).
2. Boil one cup of water in a pan and add the mango pieces.
3. Add salt and turmeric powder and cover with a lid.
4. Cook till the mango pieces are tender.
5. Add jaggery and cook till it becomes like jelly.
6. To seasons, heat oil and add mustard seeds.
7. When it splutters add the neem flowers.
8. Add the broken red chillies and add this seasoning to the mangai pachadi.

Savour the pachadi which is sweet , sour, salty, spicy and bitter- all at the same time. It can be relished with rice, dosas and chapattis.

Cornflakes Mixture and Roasted Chickpeas - Snacks in MW

Cornflakes Mixture


Cornflakes mixture is my attempt to make a low fat version of the popular South Indian snack, Mixture. Mixure predominantly contains the omapodi and boondi, apart from poha, fried gram dal, peanuts. There isn't much of a recipe here. Just throw in what ever you have and as the name suggests you get a mixture.

Ingredients
Cornflakes - 2 cups
Beaten rice(avil/poha) - 1 cup
Puffed rice(murmura/mottapori) - 2 cups
Split roasted gram dal (dalia/porikadala)- 1/2 cup
Roasted peanut - 1/2 cup
Raisins - hand ful
Curry leaves
Fennel seeds/saunf- 1 teaspoon
Hing - few shakes
Salt
Red chilli powder - 1/2 tspn
Kitchen king masala powder -1/2 tspn
Turmeric - a pinch
Oil- 2 table spoon

Method
Heat oil in a MW safe bowl for 30 secs. Add saunf,curry leaves and raisins. MW for 30 seconds or untill the raisins puff up. Add hing, salt, red chilli powder,masala powder and mw for another 30 seconds. Add cornflakes and beaten rice and mw for 2 minutes. Since these takes more time to get roasted compared with the other ingredients. So we add that first. Both would have roasted well by now. Care to be taken that it doesn't get burnt. Adjust the timings according to your oven. Add rest of the ingredients and toss well that the masala gets coated uniformly. MW for 3 minutes. Toss them once in between. Leave one minute standing time. It will turn crisp. Store in airtight container and enjoy with your tea/coffee.


Roasted Chickpeas
This is inspired by Madhuram's post on oven roasted chickpeas. I like her 'My Notes' section. Took a note of what is mentioned there. But instead of oven, I tried it in MW. I felt with microwave oven, time taken could be less. Though I wasn't sure of the results, decided to go ahead. I got crunchy, fat free snack and took only 12 minutes.
Ingredients
Cooked chickpeas - 1 cup
Olive oil - 1 tspn
Red chilly powder
Fennel seeds
Salt
Few shakes of dried oregano and hing
Toss all the ingredients together in a microwave safe bowl. MW for 12 minutes. Keep tossing for every 3 minutes or so. Allow 2 minutes of standing time. If you keep for longer time, it tends to go hard. Adjust accordingly. It stays crunchy on storage too.


I am sending these two snacks to MEC-Savoury Snacks hosted by Priya, an event started by Srivalli.
and the roasted chickpeas to MBP-Snacks hosted by Ashwini, which originated at SpiceCafe


Tuesday, March 24, 2009

Creamy Mushroom Pizza

I baked some 12 inches thin crust pizzas in the weekend, there are six different flavours. I would like to introduce the creamy mushroom pizza that my friends and I love it so much!
The pizza doesn't need tomato sauce for the topping as the creamy mushroom had its unique flavour with the mozzarella cheese. The recipe is very simple, pan fry lots of chopped garlic, then add in some chopped sticky bacon together with one big chopped yellow onion. Pan fry at low heat until the bacon caramelized with the onions. Stir in big chunky of fresh mushroom for about two minutes or so. Don't over cook it. Season with salt and peppers and add 5 tablespoon of cream and 5 tablespoon of milk. Add some dried oregano or italian herbs. Cook for another two minutes and it's done! Top on the pizza dough and go with some mozzarella cheese and bake until the cheese melt. Delicious!
I've also baked another chiffon, pumpkin chiffon. It's beautifully baked!

Milagu Jeeram Podi & Milagu Rasam - Black Pepper Powder and Soup

MILAGU JEERAM PODI (Black Pepper & Cumin Powder) and MILAGU RASAM (Black Pepper Soup)

We loved to visit my uncles place which was nestled amongst the ancient temples of Tanjore and its green paddy fields and lush lily ponds. Mama (maternal uncle) was ever ready with an agenda to guide us through the various temples, forts and the river and sea sides around his small village which housed a mammoth temple for Lord Mahalinga Swami. Mami (aunty) was eager to welcome us with a well stalked kitchen and she treated us to her yummy native dishes. We drooled over her delicious pitlays, rasavangis, tanjavoor kadambam rice, cashew uthappams and the special tanjavoor milagai vattal.
On one such pleasant visit Mama took us to the temple town of Thirukkadaiur. Every town, village or even a small settlement in Tanjore district turned out to be a temple town and we had to get down from the car at the drop of the hat to view the great architectural wonders of yore.
The presiding deity at Thirukkadaiur is Lord Amruthaghateswarar and His consort is Goddess Abhirami. Markendeya was Lord Shiva’s ardent devotee and was blessed with only 16 years of life in this world. At the appointed time the Pasa (Noose) of Yama Dharma ( God of death) which was meant for Markandeya who was clutching the Lingam, fell over the Lingam as well. Enraged at this, the Lord exterminated Yama. Later Yama was revived and Markandeya was blessed to stay 16 all his life and justice prevailed.

After offering our prayers for a long life for each and every member in the family we went round the expansive temple appreciating each and every piece of sculpture without heeding the heat of the blazing sun. The broad and lengthy paved path ways around the temple and the kalyani ( Pond) had become so hot that even chapattis would have puffed up just at the touch of the stone. Unable to bear the heat and hunger any longer we ran out of the temple to wear our foot ware. This was a long time ago- almost 35 years- when there were no hotels or restaurants in the small place. The benevolent temple priest offered to feed us for which he would not quote any price. His house was next to the temple and his wife cooked for us. We were amazed when she served us hot rice, hot (spicy) milagu jeeram podi (black pepper and cumin) and hot (spicy and hot temperature wise!) milagu rasam (black pepper soup) within such a short notice. We were more wonder struck when she served roasted papads which had imprints of advertisements on them! We were all sweating and red in the face due to the heat of the sun and the excellent meal. Never did we taste such a lip smacking meal in all our lives.

MILAGU JEERAM PODI (Black Pepper and Cumin Powder)

INGREDIENTS:
Pepper – 4 tbsps
Cumin seeds – 4 tbsps
Salt – ½ tsp

METHOD :
1.Dry roast pepper until it starts cracking
2.Add cumin seeds and roast till it gives out a pleasant aroma.
3.Powder it coarsely with salt when it cools down.
4.Store it in a dry container.

TO SERVE - take some hot rice in a plate. Add the powder and salt to taste on top of the rice. Heat ghee until the ghee has melted and is hot. Pour the hot ghee over the powder. Enjoy the sizzling noise as the powder gets instantly fried. Now mix thorougly with the rice. This is very good for digestion and also alleviates flatulence, and tastes excellent as well!

MILAGU RASAM (Black Pepper Soup)
INGREDIENTS:
Tamarind – 1 small lemon size
Salt – 2 tsps
Asafoetida – ¼ tsp
Curry leaves – a few
FOR THE POWDER:
Coarsely grind the following into a powder. No roasting is required.
Pepper – 1 tbsp
Cumin seeds – 1 tbsp
Coriander seeds – 1 tbsp
Bengal gram dal – 1 tbsp
FOR THE SEASONING:
Ghee – 1 tsp
Mustard seeds – ¼ tsp
METHOD:
1. Soak tamarind in warm water and extract the juice.
2. Add salt, asafoetida and curry leaves.
3. Boil until the raw smell disappears.
4. Grind the four ingredients into a slightly coarse powder.
5. Add the powder and add water immediately to make one litre of rasam.
6. Let the rasam be on low flame.
7. Cover it with a lid to preserve flavour.
8. Keep watch by sliding the lid now and then.
9. Switch off flame when the rasam is just about to boil.
10.Heat ghee and add mustard seeds, and add the seasoning when the mustard splutters.

Drink the hot rasam as an appetizer before a meal. Or enjoy with hot rice with a spoon of ghee. You can even chill it and have it just like that as a beverage – like jal jeera.
Both these dishes go to Think Spice -Think Pepper Event at Divya's Dil Se blog. Here are more details about Think Spice event, in Sunita's site.

Beet Treats

Beetroot in my kitchen, is often cooked as a side, for my usual traditional lunch of sambhar, morukootan etc. Sometimes its added along with other veggies prepared for sandwich filling. I came across the beet juice at Tarla Dalal. At the same time, Viji Akka of Vcuisine (private blog) posted the recipe for beet syrup. The syrup recipe interested me and decided to make it. I didn't quite follow Viji Akka's recipe exactly. On searching for the benefits of beets, I found the following info.

Never drink beet juice by itself. Beet juice should always be mixed with other vegetables and/or apple juice. Pure beet juice (from the bulb or greens) can temporarily paralyze your vocal chords, make you break out in hives, increase your heart rate, cause chills or a fever. Consider mixing beets with apples, cucumber, carrots, etc.

Beets are best used in small amounts. Use moderately. Both the roots and greens are powerful cleansers of the body. Beets are said to really cleanse the blood and kidneys and this is why it is suggested you use beets moderately.

Ingredients
Beet roots - 2 big

Medium carrot - 1
Citric acid -1/4 tspn ( can use lime juice instead)
Brown sugar - 1/4 cup (I used damerara sugar)
White sugar -1/4 cup
Water -1/4 cup
Dried ginger powder (Chukku) - 1/2 tspn

Method
Wash, peel and cut beetroot and carrot into cubes. Take juice of beetroot and carrot by adding
water. Strain and keep it aside.
Mix both the sugars with 1/4 cup of water and prepare sugar syrup. Add juice, ginger powder and citric acid. Simmer for 5 minutes. Skim the foam on the top. Bottle it and refrigerate.

Beet Drink

To make beet drink, add 3 parts of cold water to one part of syrup and serve. Makes an excellent summer cooler loaded with vitamins. You can add soda instead of water and you will not for Coke again.


Now some other ways you can make use of the beet syrup.
Carrot cucumber in beet yogurt

Stir in a tablespoon of syrup in a cup of yogurt. Whip well and mix in grated carrot, cucumber and a slit green chilly. Add salt and pepper to taste. Garnish with fresh coriander. A yummy salad is ready.


Beet flavoured milk.

Stir in a tablespoon of beet syrup in a glass of cold milk and enjoy. I am not sure if it will curdle when added to warm milk. To this if you add a drop of rose essence, it will make delicious rosemilk.


Beet Lassi

Curds - 1 1/2 cup
Milk - 1/2 cup
Beet syrup - 1 tablespoon
Water - 1/2 cup

Whip all the ingredients with a blender until smooth. Serve Chilled. Adjust water according to how smooth you want your lassi to be. No need to add extra sugar.

All the preparation with beet syrup tasted very delicious. Its very versatile and you can use it according to your creativity. Let me know any other ways, this can be used. I will be glad to try those.

I am sending the three pink treats to FIC: Pink/Rose hosted by Priya, an event started by Sunshinemom.


Monday, March 23, 2009

Berries Cream Puffs

A sweet lady bought me super sweet and giant size of strawberries last week. Normally I find big size of strawberries would not be so sweet however these package of strawberries really super sweet. I need four big bites to finished a strawberry and imagine how big it is and I love strawberries crazily.
To appreciate her lovely thought, I quickly tuck into my kitchen to make some cream puffs to sandwich the strawberries and some leftover blueberries for her. The berries cream puffs was very refreshing in this hot and humid weather.
Recipe for 20 puffs:

For the Puff: 70g plain flour/3 beaten eggs/100g water/60g unsalted butter/Pinch of sugar and salt

For the custard: 3 egg yolks/200ml milk/60g sugar/20g plain flour/10g unsalted butter/1 tsp vanilla extract

How I made it:
  1. For the puff, boil the water, butter and pinch of sugar and salt in a cooking pan until its bubbling. Off the heat, add in all the plain flour and mix with a wooden spoon until well combine and become a smooth dough.

  2. Add half of the beaten eggs and mix (this stage is a bit hard work but please patient and keep stirring until the egg mix into the dough.) Once the eggs completely mix with the dough, you will find it quite dry and hardly to mix. Add the beaten eggs little by little into the dough and continue mixing. You might not finish using the beaten eggs. You will need to have a smooth and silky consistency of the mixture. When you spoon up the mixture, it should drop back to the pan very slowly. The mixture should not too dry or too wet.

  3. Once you get the right consistency of mixture, transfer it into a piping bag and pipe out about 20 dollops of mixture on a baking tray with baking paper.

  4. Dip your fingers with some water and gently touch the top of the mixture. This is to prevent it over burning while it's baking in the oven. Then spray some water on the mixture surface. (Not too much)

  5. Bake at 200'C preheated oven for 15 minutes until it puff up then turn the temperature to 170'C and bake for another 15 minutes. Transfer the puff on a wire rack to cool down.

  6. For the custard, boil the milk with sugar until sugar dissolve but not boiling. Meanwhile, mix the egg yolks and flour a thick paste but no lumps. Add two tablespoon of milk if you find it too dry to mix.

  7. Pour the dissolve warm sugar milk into the egg yolks mixture, pour little by little and mix with a hand whisk until everything combine. Then, pour back the mixture into the cooking pan. Cook in very low heat and keep stirring until it thicken.

  8. Once the mixture thicken, remove from the heat and keep stirring until the heat slightly cool down but slightly warm. Then add in the butter and vanilla extract. Continue stirring until well combine.

  9. Transfer the custard into a plate and cover with cling film. Make sure the cling film touch on the mixture, this is to prevent it from skin forming on its surface.

  10. To assemble the berries cream puffs, squeeze in some custard then sandwich some strawberries and blueberries. Chill in the fridge before serve.