Wednesday, November 30, 2011

Spring Onion Soup


I am not fond of soups but I prepare whenever the husband demands for it instead of tea or coffee during winter season. I learnt few simple soups for him where cabbage and tomato soups are the frequent visitors of my kitchen. I have tried this spring onion soup once and everybody at home liked it. but with no reason, I forgot about it. Last week, when we got spring onions from the market, the husband reminded me of this soup and prepared it again on a rainy day. We enjoyed it and hope you will also like it. You can see the slight difference in texture here that is because I used milk instead of heavy cream. Use heavy cream for smooth texture.


Basic Information:
Preparation and Cooking Time: 20 minutes + 10 minutes for cooling
Serves: 2


Ingredients:


Spring Onions - a bunch

Onion - 1/4 cup, finely chopped (optional)

Garlic - 2 big cloves, finely chopped

Olive Oil - 2 teaspoons

Heavy cream/Milk - 1/2 cup

Water/Vegetable stock - 1 cup

Salt - to taste

Crushed black pepper - 1 teaspoon


Method:


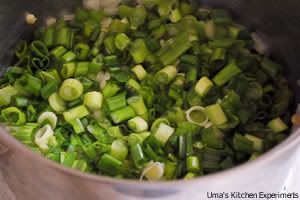
1) Wash and chop spring onions top and bottom part separately.

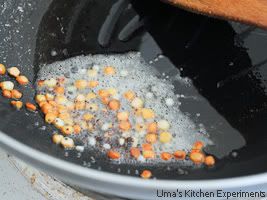
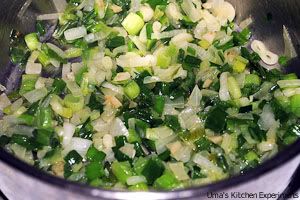
2) In a sauce pan, heat olive oil. Add chopped garlic and fry for few minutes.


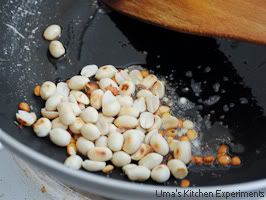
3) Add chopped onion and bottom part of the spring onion. Saute till the onion gets translucent.


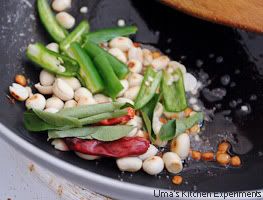
 4) Add spring onion top part and saute well without changing the colour. Once it is done, allow it cool completely.


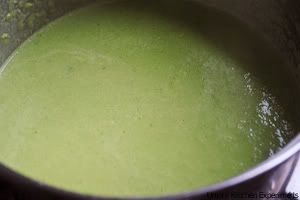
5) Blend the mixture to a smooth paste and transfer to sauce pan again.

6) Add vegetable stock or water and milk. Simmer it for 5-7 minutes. Add salt and pepper.


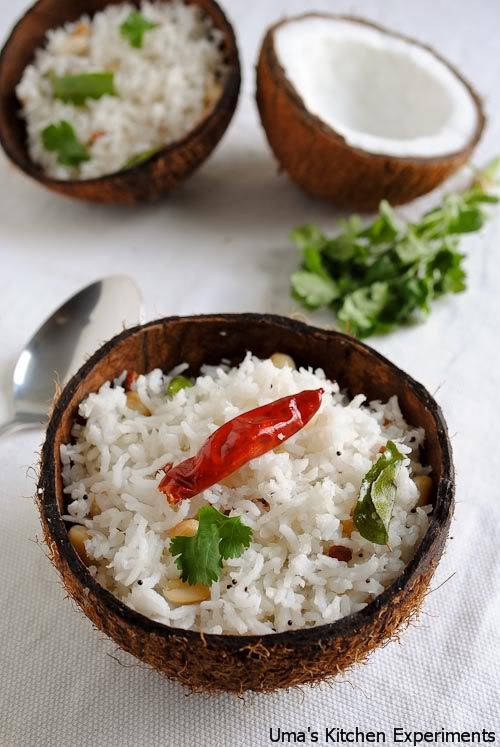
7) Pour in bowl and serve hot with croutons.


Note:

1) Make sure to fry the onions till the raw smell goes off.

2) Add cooked fresh or frozen peas while blending to get another variation.


Sending this recipe to Herbs and flowers - Spring Onions event hosted by Kaveri.

Avocado Paratha with Cranberry Pickle


I am very excited about this post, as one of my blogger friends Nupur of "UK Rasoi" has asked me to be a guest of honor for her first event. Am really feeling very happy and proud to write the guest post and thank Nupur for giving me this oppurtunity. She has a wonderful space with healthy and easy recipes. Though I am not the best in whatever I do, I admire her for appreciating my recipes and blogs/blog posts and in making me feel proud of myself, where I try to focus more on healthy recipes, modify recipes with addition of healthy ingredients and make easy recipes as much as possible. 

She asked me to come up with one recipe which should be vegetarian. So I thought of making these two recipes, combined in one and keep it healthy as always - being loyal to my blog :) and as well as to myself.

I have created two different posts for each recipe and combined it here, providing the links.......

1. Avocado Paratha
2. Cranberry Pickle
(Click on the recipe links to view the complete recipe....)


I hope you all like it too, N'JOY! :)

Sending this to Nupur of "UK Rasoi" for her Event: Be My Guest and to blog hop hosted by Radhika of "Tickling Palates" - this week paired with Kalyani of "Sizzling Tastebuds"

Cranberry Pickle - Instant and Easy


This time of the year is the best buy for fresh cranberries. I love these berries, which is loaded with lot of nutrients and antioxidants. I previously made cranberry chutney and it was a big hit and can be stored in the fridge for a long time. This time I was having friends at home for normal get together dinner, so thought of trying this recipe, Indian style.

I served this pickle with Avocado Paratha (Click the link for the recipe....) and yogurt, believe me this combination was so good, and of course finger licking and definitely healthy! :)  


Nutritional Information about Cranberries:
--------------------------------------------
Raw cranberries have moderate levels of vitamin C, dietary fiber and the essential dietary mineral, manganese, as well as a balanced profile of other essential micronutrients.

Raw cranberries are a source of polyphenol antioxidants, phytochemicals under active research for possible benefits to the cardiovascular system and immune system, and as anti-cancer agents, such as in isolated prostate cancer cells. Although polyphenols have antioxidants effects in vitro, they can act as pro-oxidants in others. In addition, it is uncertain whether polyphenols and flavonoids account for the benefits of diet rich in plant-derived foods.

Ingredients:
-------------
1 pkg fresh Cranberries washed and patted dry with kitchen towel/paper
1/2 + 1 tbsp cup whole Mustard seeds
1/3 cup Chili powder
2 tbsp Paprika powder
1 tsp Turmeric powder
1 1/2 juice of Lemon/Lime
Salt as needed 
1 Sprig Curry leaves
4-5 Dry Red Chilies
1/4 tsp Asafoetida
Oil as needed ( I used very less oil - about 1/4 cup.

Method:
----------
1. In a mixer or spice mixer add the 1/2 cup mustard seeds and pulse to bread the mustard to coarsely ground mustard just enough to bread open the seeds.
2. In a kadai/sauce pan add oil and when it's hot enough add the mustard seeds and when they start to sputter add dry red chilies and asafoetida and curry leaves.


3. Now reduce to flame to low add the turmeric powder, salt, chili powder, paprika and mustard powder and mix well.
4. Add the cranberries, mix well and off the flame.
5. Now add the lemon/lime juice and mix well and let it come to room temperature.


6. Now transfer it to a glass jar which is sanitized and dry.


7. This pickle is so easy and can be stored in the fridge for more days/months. Transfer the amount of pickle needed before eating and rest of it can be stored in fridge.
8. I served this pickle with Avocado Paratha (Click on the link to view the recipe....) and yogurt, it was so good and a perfect combo.

Avocado Paratha


I love avocado as guacamole and tortilla chips. It's quite healthy and fills your stomach. Sometimes we eat it as dinner to keep it light and healthy.
Few days back I got two avocados and wanted to try some new recipe. I saw the use of avocado in roti in one of my blogger friends post and wanted to try the same recipe. 
These parathas turned out so soft and fluffy and it was awesome. I served these parathas with yogurt and Cranberry Pickle (Click on the link for the recipe...) that I made before. The combination was so perfect and packed with healthy ingredients.


To know more about Avocado Nutrition and as to how cut an avocado, please read my earlier post which focuses on a salad recipe using avocado, nutritional information about avocado and a Video on how to cut an avocado. (here is the LINK......)

Ingredients:
------------
1 cup Avocado mashed with fork
2 cups Wheat Flour/Atta
1/8 tsp Oil
Water as needed

Method:
----------

1. In a large mixing bowl add mashed avocado, flour and start kneading the dough, when it gets hard to knead add water as needed and make a dough as the regular chapati dough. As the avocado is like buttery....the kneaded dough will be bit softer than the usual dough.


2. Keep the dough aside for about 5-10 mins, applying a bit of oil, so that the dough does not dry out. Keep it covered by a kitchen/paper towel.
3. Now make lemon size balls.
4. Meanwhile take pan and bring it to a medium to high heat.
5. Take each ball of dough, dip it in flour and roll it to a small and thick roti, apply some ghee or oil and sprinkle little flour and fold it to a triangle and dip again in flour and roll again to a paratha triangle shape or any desired shape you want.


6. Then place the paratha on the pan, when you see small white bubbles over the top of the paratha, turn it once and it but have some very light white/brown spots.
7. When the paratha rises, press on the fluffy part so that the steam inside will help the other part of the paratha to fluff up.


8. Flip the paratha again to the other side and repeat again the step 7.
9. Now remove the paratha after few seconds, add ghee or butter if you want it to me more rich. I did not add any ghee or butter. For kids, it will be more nice and soft if you add ghee or butter.

10. I served it with Cranberry Pickle (Click the link to view the recipe....) and yogurt, this combination worked so well together and happy that I kept it all healthy! :)

Pathiri and Sukhiyan, Kerala Special For Blog Hop Wednesday

This Week for Blog Hop Wednesday, i m paired with Vidhya of Sugar N Spice. She has a Good collection of Kerala Special Recipes.  I tried her Pathiri  and Sukhiyan, came out very well. Bookmarked her Erisseri too, but due to time constraint, i couldn't make it.

Pathiri is a Pancake made out of Rice Flour. A Very Popular Dish in Kerala. Crushed Rice is made into dough and baked on pans. After preparations they are soaked in Coconut Milk to enhance their flavour (info source : Wiki)

Pathiri
Ingredients :(i used small Katori)
1 cup Rice Flour
2 Cups Water
a pinch of chilli powder
Salt to taste

Method
  • Dry Roast the Rice powder. It should feel warm when touched.
  • Heat water in a pan, Add chilli powder and salt.
  • When the water starts boiling, Keep the flame low and add the roasted rice flour.Give it a quick stir and switch off the flame and keep the pan closed.
  • When it is warm enough to touch, knead it well to make a soft dough.
  • Divide the dough into equal balls.
  • Place a ball on a flat surface and Patt them to make small discs/pathiri, Repeat the same for the rest of the dough.
  • Heat a Non-stick Tawa, cook each pathiri on both sides and Serve Hot with your Favourite Curry.
Sukhiyan
This is another Popular Tea Time Snack in Kerala. Moong Dal Cooked in Jaggery, coated with maida batter and Deep fried. I have replaced a part of maida with Wheat flour. The taste was awesome.

Ingredients (i used small Katori)
1 Cup Moong Dal
1 Cup Powdered Jaggery (Loosely filled)
2 Pods of Cardamom, Crushed
3 tbsp Maida 
3 tbsp Wheat flour
2 tbsp Ghee/Clarified Butter
turmeric a pinch
Salt to taste
little water to make a thick batter
Oil for frying

Method
  • Pressure Cook Moong Dal with just enough water to soak the Dal for 3-4 whistles,
  • Once the Dal is done, Melt jaggery in a non-stick pan,  strain and remove impurities.
  • Take the strained jaggery to flame again, when it becomes a little thick, add the cooked moong dal and mix well.
  • When the mixture starts thickening, add ghee little by little.
  • When the mixture comes together and leaves the sides, put off the flame.
  • Cool the Mixture. Divide into equal balls. I got about a dozen.
  • Mix maida and Wheat flour, add little water and make a thick batter, Consistency must be in-between Idly and Dosa Batter.
  • Heat Oil in pan, Dip Each moongdal-jaggery ball into the batter and Deep fry them in Oil.
  • Keep the flame low, this ensures even cooking.
Both the recipes came out very well. Pathiri was a real hit, as i was making it for the first time, Hubby dear enjoyed it a lot.

How to Detect A Roof Leak

How to Detect a Roof Leak


As most people know the roof of your home or business is vital to the protection of the assets and belongings within.  The most obvious sign of a roof leak is water on the floor of the structure, however their are other ways to find a roof leak before it gets to that extreme.  When a roof is leaking bad enough that water is making its way to the flooring system, their is probably already a lot of other damage to other aspects of the building.  Most structures have a ceiling and insulation between the roof and the living space to help improve the energy efficiency of the HVAC system.  If a roof is leaking bad enough to make it through the insulation and ceiling material, then you have probably incurred a lot of damage already.  By this point your not only looking at the cost of a roof repair, but also cost to replace damaged insulation, sheetrock, and maybe even structural repairs as well.

In this blog post we hope to educate customers on how to detect a roof leak before it gets extreme.  We are going to list common signs of a roof leak, common causes of a roof leak, how to prevent roof leaks, and reasons why you should use a roofing contractor instead of hiring a handyman to work on your roofing system.  The first thing we want to talk about is how to detect a roof leak.  There are a lot of ways homeowners can inspect their home without getting on the roof.  Here are some signs we look for when inspecting roofs for homeowners.

  1. Checking the plywood or underside of the roof sheathing material for dampness or water stains. This is the easiest way to spot a roof leak, as the plywood will retain water for a short period before it starts to make it through into the structure.
  2. Checking the side walls or gable ends for water stains coming down the wall, especially where there may be a change in elevation on your roofing system.  If you have a leak in this area, your probably not going to see it on the ceiling in the home because it may be going all the way down the exterior wall of your home causing major damages.
  3. Looking for missing shingles, damaged tile, blown off metal, or any breaks or damages to the roofing material on the roof. These are obvious signs, but the underlayments on the roofing system will protect the home for a short period, however these repairs should be made immediately because underlayments are not designed to be exposed to the elements.
  4. Water marks on the ceiling of your home. Even though most leaks that make it this far into the structure can cause a lot of damage, if you catch it on the first time then you can save a lot of money by having your roof repaired immediately.
These are just a few ways to routinely inspect your home for roof leaks. Generally a roof leak can almost be detected immediately, however if a roof is installed properly, the underlayment will often offer some short term protection against a lot of water coming in your home.  When we say short term, we mean until the rain stops the same day you find out you have a leak.  Roof leaks come from a variety of causes, and can happen anytime, even after you get a new roof if your not using a qualified and licensed roofing contractor.  Flashing, underlayment installation, vent installations, and other penetrations on the roof confuse a lot of handymen leading to an improper install of your roofing system.  Not only will this require another trip from the contractor to repair the already new roof, it can also negate the roof warranty that most roofing material manufacturers offer with their products. Regardless of the age of your roof, a leak can happen at any time and for a variety of reasons.  Here are some of the most common causes of roof leaks:
  • Storm/Wind Damage - One of the most common causes of roof leaks on a properly installed roofing system still within the warranty of the roofing product.
  • Old Roof - Over the life of a roof, exposure to the elements begin to deteriorate the roofing system leading to failures in the product.
  • Improper Flashing - If steps in the roof, chimneys, skylights, etc. are not flashed properly then water will eventually find its way into the home. Flashing around these areas correctly are very important to installing a quality roof, so its important that you hire a roofing contractor that has the experience to know how to do this.
  • Missing Shingles/Damaged Tile/Raised Metal Panel - Sometimes roofing systems may be damaged by a neighbors limb, an animal, or a number of other reasons and obvious sign that your home or structure has a roof leak.  Also some roofing systems can be damaged from walking on the roof improperly as well.
  • Skylight Damage - A number of our roof repairs come from damage or aging of a skylight. Skylights have a lot of different problems over the life of the window, so sometimes roof leaks either get in through the skylight, flashing around the skylight, and sometimes condensation. In these instances the skylight should be repaired or replaced immediately.
We hope this blog post has been informative, and helps you in preventing roof leaks and major damages to your home or business.  The best way to prevent roof leaks if properly maintaining your roof system according to the roofing products manufacturer's recommendations such as cleaning the roof and keeping it free of leaves and debris. Maintenance recommendations vary from product to product, but the main thing is to keep your roof clean. Routine inspections, proper maintenance, and hiring a qualified and licensed roofing contractor can help make your roof last a long time and protect your home from the elements of the outside world.  The owner Retro Solutions Construction Company of Myrtle Beach, SC has been in the roofing business for 20+ years and we look for the same qualities in the people we hire as you should as a homeowner.  Training and hiring quality roofers is what makes us a successful and top rated roofing contractor in North Carolina and South Carolina.  If you live in North Carolina or South Carolina and would like a free roof repair estimate or a free estimate on a new roof then contact us through the information listed below.  Check out our other blog post for more home improvement ideas, product reviews, and other information on keeping your house in top notch shape.

Retro-Solutions Construction Company
Myrtle Beach, SC 29577
Phone: 706-951-0158
http://www.scroofingcontractors.com

Energy Efficient Roofing Systems | Spray Foam Insulation | Wall Foam Insulation | Crawl Space Encapsulations | Solar Energy Powered Hot Water Heaters | Solar Energy | Energy Monitoring | Standing Seam Metal Roofs | Tile Roofs | Slate Roofs | Historic Home Retrofits |

Tuesday, November 29, 2011

Eggless Chocolate Cake, using Chocolate Cake Mix - Day 6, BM #10


The Last day of Blogging Marathon, It was great fun blogging these 7 days. The Previous week, i had a Big Shopping gig for the Marathon. I was just hunting The Ready Meal section of 3  Supermarkets and got most of my Products from Al Adil Trading. 
Though these products do come handy at the need of hurry, they also a contain lot of preservatives to improve their shelf life. So, let's use them only when we dont have any other options of healthy eating. :)
Today i m posting Chocolate Cake Recipe using Instant Cake Mix.

Ingredients
1 Pack Readymade Chocolate Cake Mix (Many brands are available, i have used pilsbury)
1/4 Cup Vegetable oil
1 Cup and 3 tsp Water
3 tbsp Flaxseed meal with 9 tbsp of warm Water. or  3 eggs

Method
  • Preheat Oven to 180C. Grease the Cake pan, I Have used 2 Souffle Dish and 2 Ramekins.
  • Mix Flaxseed meal with warm water and keep ready.
  • Mix Water and Oil and Flaxseed-Water mixture and Mix well.
  • Add the Cake Mix little by little and Mix well without any lumps.
  • Fill the Batter in the prepared dish and Bake for 30-40 minutes or until a toothpick inserted in the middle comes out clean.


The Cake was good. I felt the Sugar was way too high. For those who want to bake from  a Eggless Cake Mix, You can try Tarla Dalal Brand Eggless Cake mixes. 

Bake Time differs from Oven to Oven. So, Bake according to your time settings.


COFFEE - 20 Unusual but Very Useful Uses


I read this article in Yahoo news and was amazed reading the usual but very useful uses of coffee. I knew only few of them, but when I read all the 20 uses, I definitely thought of sharing with you all so that you can benefit and use it in your daily life too......


Can you imagine life without coffee? We'd all stumble around like drones for hours every morning, lost without our precious fix. We love coffee for its flavor, its aroma and of course its pick-me-up, but there are at least 20 more compelling reasons to stay stocked up. These tips will give you surprising and unusual uses for fresh coffee beans or grounds that have gone stale, the pounds of used grounds you toss out every week and the dregs at the bottom of your cup. 

Kill fridge odor
 Wouldn't you rather smell coffee than two-week-old leftovers, half-rotten produce and spoiled milk? If your fridge is a nightmare of foul odors, place a bowl of fresh, unused coffee grounds inside and leave it for a day or two. The coffee will absorb the odors and you'll crave a cup whenever you open the door. This odor-killing trick works for practically anything else as well - just place the item in a sealed plastic bag along with an open can of coffee grounds and bye-bye stank. 

Reduce cellulite
 Pricey cellulite creams almost always have one major ingredient in common: caffeine, which supposedly enhances fat metabolism, reducing the appearance of these fatty pockets under the skin. To make your own coffee cellulite treatment at home, mix warm used coffee grounds with coconut oil and rub it onto your skin in circular motions for a few minutes before rinsing. 

Erase smells
on your hands Garlic, salmon, cilantro - there are some things that smell delicious when cooking, but aren't so pleasant hours later when they linger on your hands. Get rid of them by rubbing a handful of used coffee grounds on your hands and rinsing with warm water. 

Make rich
compost There's a reason so many gardeners swear by adding used coffee grounds to compost. The grounds are rich in phosphorous, potassium, magnesium and copper, they release nitrogen into the soil as they degrade and they're a little bit acidic, which is great for certain soils. If you compost on a large scale, you can get used grounds for free at your local coffee hot spot or mom-and-pop cafe. 

Get shiny hair
 Who doesn't want shiny, healthy-looking hair? Coffee is often recommended as a simple, natural treatment to make hair extra-glossy. Brew up an extra-strong pot, let it cool and apply it to your dry, clean hair. Leave it on for at least twenty minutes, then rinse. Keep it up once a week or so for best results. 

Natural dye The natural pigments in coffee make it a great natural dye for fabric, paper, Easter eggs - even your hair. Brush paper with strong brew and let it dry, or soak fabric items in hot coffee. The results won't be color-fast, and may bleed out onto other items, so it's best to use this on items that won't be washed very often if at all. Using coffee as a hair shine treatment, as previously mentioned, may temporarily lend a rich, dark tint to your hair. 

Reduce fireplace mess
 Want to clean your fireplace without causing a dust storm? Wait until the embers are cool, sprinkle damp coffee grounds all over the ashes , let them sit for about 15 minutes and then scoop out the whole mess into a metal ash can. The coffee grounds cling to the ashes, so they don't spew dust nearly as much as they would otherwise. 

Pin cushion filler
 Dried, used coffee grounds are the perfect filler for homemade pin cushions. Just wrap them in some scrap cloth, tie it off with a rubber band and place the cloth in an egg cup or other small container. The grounds will keep your pins from rusting, too. 

Exfoliate skin
 The same properties that reportedly enable coffee to reduce the appearance of cellulite can smooth and tighten your skin, and the texture of ground coffee will buff away dead skin cells, too. Make your own coffee-based scrub by combining a tablespoon of coffee grounds with half a tablespoon of olive oil and, optionally, a drop of your favorite essential oil. 

Repel ants
 Sprinkle dry, used coffee grounds in problem areas where you notice ants in your home or yard and they might just pick up and leave. To tackle huge ant mounds, pour an entire pot of brewed coffee right on the mound. 

Fertilize plants Acid-loving plants will thank you for sprinkling your used coffee grounds around their roots. Azaleas, blueberry shrubs and rhododendrons are just a few of the plants that flourish when treated with coffee thanks to all those nutrients. You can also dilute the leftover coffee in your mug and pour it right into your potted plants (as long as you don't use cream and sugar, of course!) 

Keep cats out
of your garden To you, that little garden in your yard is a beautiful source of fresh herbs, fruits and vegetables, but to seemingly every cat in a five-mile radius, it's a giant, irresistible litter box. Just use the trick mentioned above, sprinkling used coffee grounds on the soil, and cats will want nothing to do with it. 

Scrub all kinds of surfaces
 Mildly abrasive and acidic, coffee grounds are great for scrubbing surfaces like countertops, cooking ranges and refrigerators. Use them alone or mix them with a little dish soap. 

Auto air freshener
 Next time you accidentally spill coffee grounds on the floor, don't just sweep them up and toss them in the trash. You can use them to make an all-natural DIY air freshener like this one at Instructables. Try to use an old ripped pair of pantyhose and spare string to make this an even more eco-friendly project. 

Grow mushrooms
 Used coffee grounds are an ideal medium to grow many kinds of mushrooms, including oyster mushrooms. You can actually purchase mushroom-growing kits from a company called Back to the Roots which includes reclaimed coffee grounds, mushroom roots and a mini spray bottle. The kit can produce up to 1.5 pounds of oyster mushrooms within 10 days.


Repel fleas
 Rub used, damp coffee grounds through your pet's fur after bathing to repel fleas without questionable, likely-toxic chemical treatments. If nothing else, it will at least improve that post-bath wet-dog smell that gets all over your furniture. 

Pretty vase fillers
 Stale or dirty coffee beans are still a thing of beauty. Use them as vase fillers, or in cups or jars full of pens and pencils. Not only are they pretty, they continue to smell good for quite a while, too. 

Start vermicomposting
 Red wriggler worms, the sort used in vermicomposting systems, love coffee almost as much as we do. It's not really clear why, but if you want a thriving community of worms to devour all of your kitchen waste (and those nasty little things really are amazingly efficient), be sure to add used coffee grounds to their bedding on a regular basis. 

Secret recipe ingredient
 Just a little hint of coffee can be the ingredient that becomes your undisclosed "magic touch" in foods like chili, ice cream and chocolate cake. Use a little bit as a marinade for steaks and not only will it make them unbelievably tender, it'll also provide a hint of deep, smoky flavor. 

Touch up furniture
scratches Scratches on wood furniture disappear almost instantly by simply rubbing in a little bit of instant coffee dampened into a paste with hot water. Repeat if necessary until the scratch matches the surrounding wood. 

Monday, November 28, 2011

Coconut Rice / Thengai Sadam


Coconut rice is the one which I prepare very often as it is very simple except the time taking for grating the coconut. When I see fresh, tasty coconuts immediately my mind will think about making some coconut burfi or this rice. During my school days, We used to get a bag of coconut from our fields and My mom used to make many dishes using it among which coconut rice and coconut burfi are my favourite.


I usually prepare this coconut rice (thengai sadam) in 3 different ways but I have blogged one of them here and have given the notes for other two methods. Now enjoy the recipe!


Basic Information:
Preparation Time: 15 minutes
Cooking Time: 15 minutes (30-40 minutes including to cook rice)
Serves: 3


Ingredients:


Cooked Rice - 1.5 cup

Grated Coconut - 1 cup/half shell

Dry red chilli -  2 nos

green chilli - 2 nos, slit

Salt - to taste

Roasted unsalted peanuts - 1 tablespoon

Channa dal - 1 teaspoon

Mustard seeds and Urid dal - 1/2 teaspoon

Curry leaves - 1 string

Asafoetida - a pinch

Oil - 2 teaspoons

Coriander leaves - for garnishing


Method:


1) Take a pan and heat oil in it. When it is hot and not smoking, add channa dal.

2) When channa dal turns slightly brown colour, add mustard seeds and urid dal.  Allow them to crackle.


3) Add asafoetida and roasted and peanuts and saute for a minute.


4) Add green chilli, dry red chilli and curry leaves. Saute for a minute.


5) Add grated coconut and fry for few minutes. Make sure the coconut is moist while doing it. Add salt.


6) Reduce the flame to low and add rice. Mix well till the rice gets warm.


7) Garnish with coriander leaves and serve hot.


Note:

1) Instead of peanuts, you can also add cashew nuts.

2) If you are using freshly cooked rice, then spread over the wide plate  to cool and then add to the fried coconut.

3) For rich taste, cook 1.5 cup rice with 1 cup of coconut milk and 2 cups of water.

4) Mix grated coconut with cooked rice and add only the seasoning.  This is another easy method.

5) Use coconut oil for seasoning to get nice flavor.


Sending this recipes to Kavi's Healthy Cooking Challenge - Healthy Lunch Event.

Instant Schezwan Bhel and Schezwan Maggi Noodles - Day 6, BM #10


Day 6 of Blogging Marathon, i m posting Chat items using Instant or ReadyMix.  First one is Schezwan Bhel and Schezwan Maggi Noodles. Yes, Maggi Noodles with a Twist!!!!

Schezwan Bhel
Ingredients
1 Ching's Schezwan Bhel Pack
Handful of Sev
2-4 Bhel Poori's, Crushed

Method
  • The Pack Comes in a Tall Plastic Tumbler with lid. It has 2 Pouches, a tissue and a Spoon
  • Empty the Bhel, sev and crushed bhel poori's into the Plastic Tumbler.Cut open the Sauce Sachet and Pour it on the Bhel.
  • Close the Lid and Shake, Shake, Shake.
  • Delicious Schezwan Bhel ready, Eat immediately or else it will turn soggy.

Schezwan Maggi Noodles
Ingredients
1 Maggi Noodles Pack
1/2 Capsicum, thinly sliced
1 small onion, chopped
1 spoon schezwan sauce
1/2 spoon tomato sauce
a pinch of Chilli Powder
a blob of butter
handful of spring onions for garnishing

Method
  • Cook Maggi Noodles with its masala in 1.5 tea cups of Water, as usual.
  • In a Pan, add little oil, add onion and saute.
  • Next Add capsicum and saute. Add Schezwan sauce and 1/2 Cup of water.
  • Add Tomato sauce and a pinch of Red Chilli Powder.
  • Let them all cook in a medium flame. 
  • When it is almost dry, add the cooked maggi to it and mix well.
  • Add butter and switch of the stove.
  • Transfer it to a bowl, garnish with spring onions and serve hot.

I always love maggi, love to cook them with lots of veggies. Our Friend Mr.A gave me this recipe long back, wanted to try this today, so called him again and confirmed the recipe. It tasted so Good.
Schezwan Bhel was also good. I felt the sauce was too much for a single serving,so added a handful of Sev and Bhel Poori's to it. Good Snack to take along while travelling.