Saturday, January 31, 2009

Snake Gourd in the Milk of Knowledge

Podalangai Pal Koottu & the Milk of Knowledge!
Snake Gourd in a Milky Gravy

My uncle and aunt visited us after a very long time, and the recap of all the events in our families were exchanged with great enthusiasm and gusto. We sat around the huge dining table for a grand dinner spread, chatting and passing the dishes to one another. Uncle then told us that his son-in-law attended a Vipassana Meditation session. The Vipassana Meditation technique is taught over a 10-day period, where attendees follow a very stringent code of discipline, including not speaking, avoiding any kind of entertainment and so on. Attendees could only eat the simple vegetarian food provided. Podalangai or Snake Gourd, he said, was served very often, as it was believed to expand ones Gnana or Knowledge. As we listened in solemn attention, my brother suddenly took the moment to a lighter vein with a “Pass me some of that Gnana Koottu”. Laughter broke out at the spontaneous new name given to the Podalangai Koottu (Snake Gourd Gravy) that was prepared by my sister-in-law. The name turned out to be all the more apt, as the koottu happened to be a rather unusual ‘Pal Koottu’ or Milk based Koottu, and Uncle remembered the following story.

The sthala poorana (literally means history of the place) at SIRGAZHI in Tanjore district, states that Goddess Parvathi breast fed an infant who lay crying at the temple pond with ‘Gnana Pal’ or the 'milk of knowledge'! Eventually the child became none other than the child saint Thiru Gnana Sambhandar.


Well Gnanam or Agnanam (opposite of Gnanam), like any other native vegetable, snake gourd too possesses great medicinal properties!


Snake gourd can be used to prepare a variety of dishes. Among them, a dish with a black colour base, and one with a white colour base, on the same table may kindle ones curiosity. Follow the recipe here to prepare a pepper and tamarind gravy, and add sautéed snake gourd, to make Podalangai Milagu Kuzhambu.

Here is the recipe for the white Gnana Koottu or Podalangai Pal Koottu.

INGREDIENTS:
Snake gourd – 1 large (2 cups when chopped)
Whole black pepper -. ½ tsp
Cumin seeds – ¼ tsp
Salt – ½ tsp
Milk – 1 tea cup
Rice flour – 1 tsp
Cooking oil – 1 tsp
Curry leaves – a few

METHOD:
1.Chop off the ends of the snake gourd and slit it lengthwise. Scrape off and discard the fibre and seeds from the centre. Chop the snake gourd into pieces.
2. Heat oil and add coarsely crushed pepper and cumin.
3. When the pepper is fried, add curry leaves and the snake gourd.
4. Stir in only a pinch of salt, cover with a lid and cook on low fire. This ensures that the lovely green colour of snake gourd is retained.
5. The vegetable must be cooked but still a bit crunchy.
6. Mix the rice flour into the milk, and add to the snake gourd .
7. Let it boil for a minute, and then blend in the remaining salt.

Remove from fire and the Gnana Pal Koottu is ready.

Re: It's the Economy Stupid

Just ran across this article, at Kitchens.com. It's a synopsis of a discussion by a group of economists at the 2009 International Builders Show.

One paragraph caught my eye:


• Getting a home equity line of credit (HELOC) for a remodel is tough, Nothaft (Frank E. Nothaft, chief economist of Freddie Mac) said, because banks don’t want to offer what amounts to a second mortgage. Depending on when you bought your home, you may want to consider a cash-out refinance of your first mortgage instead.

This says it all for homeowners who plan to remodel but don't have all the cash they need to accomplish the task.

Peggy

Palakkai Kootu (Tender jack fruit gravy) for RCI:Chettinad

When RCI-Chettinad was announced, I didn't do much googling, since I knew where to head, to get some authentic Chettinad recipes. On googling, I found more of non-veg recipes. At Solai Achi's kitchen there are wonderful choices of vegetarian recipes. I tried Kathirkkai mallipachadi from there. It too, was tasty, but could not take pictures. Its the season of tender jack fruit or idichakkai as it is called, here. Normally it is cooked as stir fry at home and occasional as semi-gravy with black eyed peas called 'puzhukku'. When I saw a sambhar like recipe using jack fruit, I wanted to try it. Though the ingredients look similar to sambhar, the taste is unique, probably because of the jack fruit in it. Above all, this a one dish gravy and can be cooked in less than 20 minutes. The only pull back factor is chopping the tender jackfruit which is quite a messy job. For those of you who have the option of buying chopped, frozen packets, then this gravy can be cooked in a jiffy.


Ingredients
Tender jackfruit chopped into small pieces - 1 cup
tuvar dal 1/2 cup
turmeric a pinch
sambar powder - 2 tspn
Onion - 1
tomato -1
water - 2 cups
slit green chilly -1 nos


Method

Chop onion and tomato into small pieces. Take the tender jackfruit pieces, chopped onion and tomato, green chilly,tuvar dal, turmeric powder and sambhar powder in a vessl. Add water to cover the ingredients. Pressure cook for one whistle and cook for 10 minutes on low flame.


When the pressure is fully released, take out the vessel. Stir well. Add salt. You can add some chilly powder if you want it spicier. I did not add any. Bring to a boil and simmer for few minutes. Season with mustard, cumin seeds, red chilly and urad dal. Garnish with curry leaves and coriander.

Serve with rice. It can make a good side for rotis too.

This is my entry to RCI-Chettinad Vegetarian hosted by Srimathi at Few Minute Wonders.


Friday, January 30, 2009

New GE Compact Fluorescent Light Bulb

This just in from from LightNOW.

GE has created a compact fluorescent light bulb (CFL) shaped exactly like an incandescent light bulb. The first one is 15 watts (60 watt equivalent).

They did it by covering the spiral with a glass bulb. They say it was a real "ship in a bottle" trick.

Here's a picture:


They are already available at Target, and expected at Ace Hardware this month. Broader availability is expected by Earth Day (April 22, 2009).

Between April and June 2009, GE plans to introduce 9W and 20W versions as 40W and 75W equivalents, respectively. The 20W CFL will have a slightly taller profile that mirrors a standard incandescent 3-way bulb. A 100W equivalent, meanwhile, could be introduced as early as 2010.

Peggy

Thursday, January 29, 2009

Puttu with kadala curry ~ Kerala Special


Puttu and kadala is an evergreen breakfast combination of Keralites. Steaming puttu and appam served with kadala curry is the popular breakfast particularly in small roadside tea stalls 'Chayakada') of Kerala. In most Kerala homes, when unexpected guests come for breakfast, puttu is the natural choice, since puttu powder will always be in stock and can be made instantly. Then the side dish may vary since black channa needs pre-soaking. Whole moong comes to the rescue. Or some simple sides like banana,sugar,roasted papad (papadam) is enough to relish the hot puttu.

But puttu was not part of the menu in my home,during my chidhood days, may be because it did not feature in the Kerala Iyer menu. We get to taste puttu from our neighbor V aunty. We had developed an instant liking to puttu. Later Amma got a puttu maker and started making it for us. But my parents never had a liking for this. Amma made it for me and my sister.Post marriage, I found my husband's love for puttu and it not making frequent appearance in the
kitchen and the story is not different from mine. My MIL had a puttu maker to be used on the cooker in place of the cooker weight. Since marriage, puttu and kadalai combo makes it to our breakfast table , almost on all Sundays.
Puttu is made is using coarsely grounded rice. Now a days, you get various types of puttu powder based on rice, corn, raagi and wheat. I normally make rice and wheat and raagi and corn make occassional appearance. My mom used to make the puttu powder at home. And there wasn't any other option too. But I never bothered to make it at home and its always store bought for me.

You need
Puttu powder - 2 cups
salt to taste
water - 1/2 cup
grated coconut - 1 cup

Mix salt in 1/2 cup of water. sprinkle handful of water on the rice powder. Mix well so it resembles bread crumbs. Again add water and crumble it well. The powder should be moist enough so that when held in your fist, it should hold the shape and not crumble. Take the puttu maker.Add a tablespoon grated coconut. Fill nearly half of it with the powder. Again add coconut and then fill the rest with rice powder and finish off with little coconut.So the order is coconut-rice powder-coconut till you fill the puttu maker. Full your cooker with 3 cups of water and close the lid. Place the puttu maker on top of the lid in place of weight/whistle. Steam cook for 10-12 minutes. Remove and gently push from the small opening behind using the skewer and log of steaming, delicious puttu comes out.

For kadala curry (Black channa masala)
Black chickpeas/channa/kadala - 2 cups
Coconut - 1/2 cup
Turmeric - a pinch
salt

For roasting
Onion - 1 medium
Coriander seeds - 1 tblspn
Red chillies - 3 nos
Cinnamon - 1 inch piece
Cloves - 4 nos
Oil - 2 tblspn

To Season
Oil
Mustard seeds

Curry leaves to garnish
Wash and soak the channa overnight or for 6 hours. Pressure cook the channa with little turmeric till soft. Roast coriander seeds, red chillies, cinnamon and cloves till you can smell them and the coriander seeds starts browning.Remove the roasted spices and saute sliced onion in the same kadai till light brown. When cool, grind the roasted ingredients, sauteed onion and coconut to a smooth paste. Add necessary water to grind. Boil the pressure cooked channa with salt. Stir in the ground mixture and bring to a boil. Season with mustard seeds and garnish
with curry leaves.
This curry goes well with dosa and appam too apart from puttu. You can add potato/cauliflower too to this curry. If you feel there is too much of coconut, you can reduce it in the curry and grind some cooked channa and add to the gravy to thicken. Alternatively you can use a combination of grated carrots,moong sprouts and little coconut as filler in puttu, in place of using only coconut

I am sending the bowl of kadala curry to JFI :Chickpea hosted by Sometime Foodies
and the seventh helping of My Legume Love Affair hosted by Srivalli, an event started by Susan.
And since I make this specially for my husband, this goes to the Just for You event hosted by Alka of Sindhirasoi


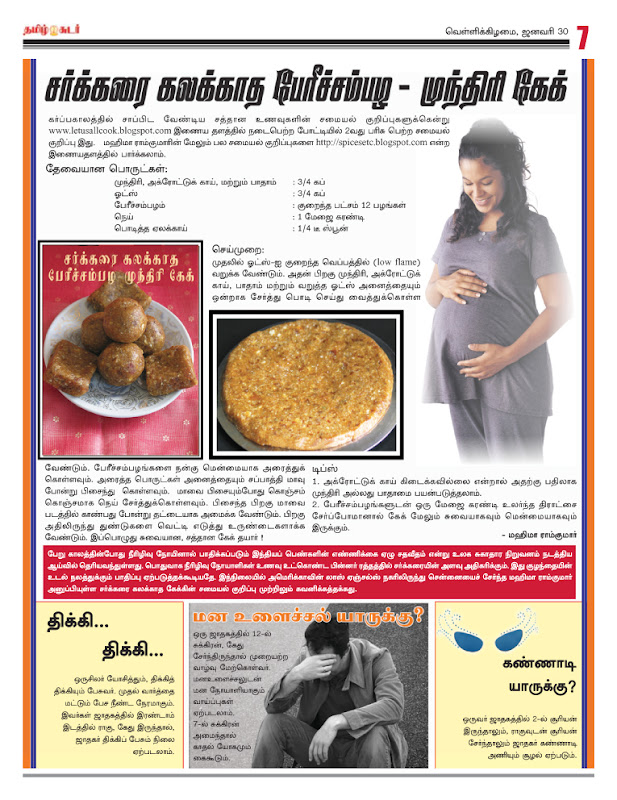
My first recipe published in Tamil Sudar newspaper (Friday supplement)


After winning the second place in Eat-healthy during pregnancy event, my father's colleague emailed me regarding publishing a recipe from my blog in Tamil Sudar (Daily News paper, Tamil Nadu, India) . I was thrilled about this prospect. I accepted the offer without having any second thoughts. I let him choose the recipe and picture and he chose dates and nuts cake as it was a winning recipe. I adapted the idea of making sugarless cake from Anudivya's Nutty energy power balls and prepared it according to my taste. I wish I was in Chennai to buy an issue and see my name printed on it. I hope I get more opportunities like this in the future.

I thank my parents and friends for all the support and encouragement!

You can access Tamil Sudar online here:
www.tamilsudr.com

Click Red - Play Pool(Billiards) with Tomato Balls


I did not want to miss participating in "click" photography contest this time. After much thought, I came up with this idea of playing pool(billiards) with tomatoes. Anyone interested in joining me? :) It will be fun!

I also have some lemon balls in case the tomatoes break while playing.

Click here to see what red means to others.

This is my first entry to Click-RED photography contest hosted by Bee & Jai of Jugalbandi.

Wednesday, January 28, 2009

Semiya Idli for MBP


During my growing up years, I never liked idli, which we had nicknamed as 'white tablets'. But after marriage, idly featured in my breakfast twice in a week. Since there is no elaborate preparation provided you have the batter handy and breakfast for the family is ready in one batch. Here is an idli recipe from Chitra amma's kitchen.


Vermicelli – 2 cups
Beaten Curd – 1 cup
Green chillies – 3
Ginger – 1 inch wedge
Mustard seeds – ½ tsp
Oil – 2 tbsps

Heat oil in a pan. Add mustard seeds. When it splutters, add finely chopped ginger,green chillies. Add the vermicelli and roast till it turns golden. Mix the roasted ingredients in beaten curd while warm. Add salt and mix well. Leave it for 10 minutes and spoon them into greased idly moulds. The batter consistency is slightly thick. Steam cook for 10-12 minutes. Serve with any chutney of your choice.

Variations: You can add some grated carrot/capscium/fresh corn too.

We enjoyed these idlis, which was a change from the usual semiya upma. Thanks Chitra amma for this tasty recipe.


This is off to MBP hosted by EC, an event started by Coffee


Carrot kheer

My aunty gave this gheer for me first time,after that i starts to Prepare this one regularly.Those who don't like carrot also start to love this kheer.Taste is so good.Iam sure Kids like to drink this Kheer.


Ingredients:

Carrot-3
Milk-1/2 lit
Sugar-6 tsp
Cardamom-3
Cashew-8
Kismis-10
Badam -4(optinal)
Ghee-1 tsp

Preparation Method:

1. Cut the carrot into pieces,add 1 cup of water,pressure cook for 3 whistles.
2. Grind the boiled carrot into smooth paste.
3. Boil the milk,add sugar mix well,add powdered cardamom also.
4. Mix the grounded carrot paste along with milk,simmer the flamefor2min,
switchoff the stove.
5. Heat the ghee,add cashew,kismis and grated badam,fry well.
6. Mix along with carrot kheer,serve hot.
7. Refrigerate the same for cold gheer.serve it cool.

Cabbage kottu


Ingredients:

Cabbage-1 cup
Boiled channadhal-1/2 cup
Onion-1
Tomato-1
Ginger garlic paste-1/2 tsp
Chilli powder-2 tsp
Turmeric powder-1/4 tsp
Salt-requried

For seasoning:

Mustrad-1/2 tsp
Curry leaves-10

Preparation method:

1. Heat the pan,add 3tsp of oil,add seasoning ingredients,allow it to popup.
2. Add onion,g.g paste and chopped cabbage.saute well.
3. Add masala powders and salt.saute well.
4. Add chopped tomato and cook until it will become soft.
5. Add 2 cups of water and allow it to cook the cabbage.
6. Finally add boiled channadhal and mix well.
7. Allow it to cook for 5 min and garnish with coriander.
8. Serve hot with roti or rice.

Tuesday, January 27, 2009

Urulaikizhangu Podimas - Potato Lime Curry

URULAI KIZHANGU PODIMAS
Potato Lime Curry

One of the most common and all time favourite curry in South India, our blog would be incomplete without a post on the simple Urulaikizhangu Podimas. This post is also for my daughter’s friend who says that she lives in ‘white bread country’, and has no access to these dishes, unless she tries cooking herself!

The literal meaning of podimas is ‘mash’. Urulaikizhangu podimas is the name given to mashed potatoes. Indian kitchens are always equipped to convert any bland dish into a very tasty delicacy with just a dash of the right spices, and mashed potatoes are quickly transformed into this delicious and versatile curry.

My children loved to eat urulaikizhangu podimas curry rolled in chapattis during their tea breaks at school. It also makes delicious filling for sandwich toasts. Combined with a scoop of sautéed onions it becomes an irresistible filling for the masala dosas. It goes very well as a side dish with poories, and although an unusual combination, it goes very well even with the hot spicy bisibele bath!

This very same curry goes into the making of the famous potato buns baked at all Iyengar bakeries as well. Whenever I visit my close friend she welcomes me with a plateful of potato buns which is her ever favourite dish. We chat and chat for very long hours while the quartered potato buns add spice to our conversation!
INGREDIENTS:
Potatoes – 6 medium size
Lime – 2
Salt – 2 level tsps
Turmeric powder – ¼ tsp
Cooking oil – 1 tbsp
Mustard seeds – ¼ tsp
Black gram dal (Urad dal) – 1 tsp
Bengal gram dal (Channa Dal) – 1 tsp
Asafoetida – 1 pinch
Curry leaves – a few
Chopped Green chillies – 3
Coriander leaves – a little
METHOD:
1. Wash and cook the potatoes in the pressure cooker. Or you can boil it until it is soft and can be easily mashed.
2. Once the potatoes cool down, remove the peels.
3. Crumble the potatoes one by one by, by gently pressing it between the palm and the thumb.
4. Potatoes should not become mushy, and neither should there be very large lumps.
5. Extract the juice of the lime, and add salt and turmeric powder and keep it aside.
6. Heat oil in a pan and the mustard seeds.
7. When it splutters add the dals and fry till they are golden in colour.
8. Add asafoetida and the chopped green chillies.
9. Add curry leaves, followed by the lime juice, salt and turmeric mixture.
10. Stir once and switch off flame immediately. This is done to remove any raw smell from the turmeric. Be careful to switch off within a second, as prolonged heating will make the lime juice bitter!
11. Now add the crumbled potatoes and blend with all the seasoning.
12. Garnish with chopped fresh coriander leaves.

Enjoy the urulaikizhangu podimas curry in any of the combinations you like.

This post goes to FIC Yellow event at Tongue Ticklers.

Mozart's Hidden Kitchen

It's Mozart's 253rd birthday today.

That got us thinking about a Hidden Kitchen story we did two years ago when impresario and activist Peter Sellars created the New Crowned Hope Festival in Vienna to commemorate the 250th Anniversary of Mozart's birth. Peter agreed to produce this Festival as long as there was not a note of Mozart in it. Instead, he wanted to present people from around the world who are creating art in the revolutionary spirit of Mozart -- musicians, dancers, filmmakers, sculptors, installation artists, farmers, chefs, school lunch ladies...

It was the part about the farmers, chefs and school lunch ladies that made us travel to Vienna to see how culture and agriculture link to each other and to the beauty and vision of Mozart.

"Mozart's Hidden Kitchen & The Tables of New Crowned Hope"

Have a listen


Home Expos Closing

Home Depot announced yesterday that it's upscale Home Expo stores will be closed across the country.

I am sad for all the people who will be losing their jobs.

Since Home Depot will still be around, customers should have no concern about their pending orders.

However, Home Expo is by far not the only entity on shaky ground in the current environment. We can expect to see lots of other retail outlets in the home improvement supplies business to go under in the coming months.

My advice to consumers looking to purchase products that require hefty down payments is to look before you leap. Question the financial stability of the companies where you plan to do business. Question pressure to buy today and prices that seem too good to be true. Better to go with a company that will still be there when your ordered products arrive than one that will take your deposit into bankruptcy.

Be careful too about contractors. Many of them will go under as well. You don't want to be the consumer that has your contractor fail on your job. Ask for bank references and check them.

Only the strong and savvy will survive this downturn. They will survive because they socked away a nest egg to help them through the bad times. Even credit lines that might have saved businesses have been cut off. Cash rules! Ask them to "Show you the money"!

Peggy

Monday, January 26, 2009

Click Red - Cocktail Garnish

Half a holiday, over 100 snaps, battery recharged twice, wasted chillies, a missed lunch and heaps of frustration! I did not send in any of these attempts for the event.
I finally settled on this snap that I had clicked 'just like that' some time ago, for the recipe here. So here goes our entry - Cocktail Garnish - for Click Red 2009


Saturday, January 24, 2009

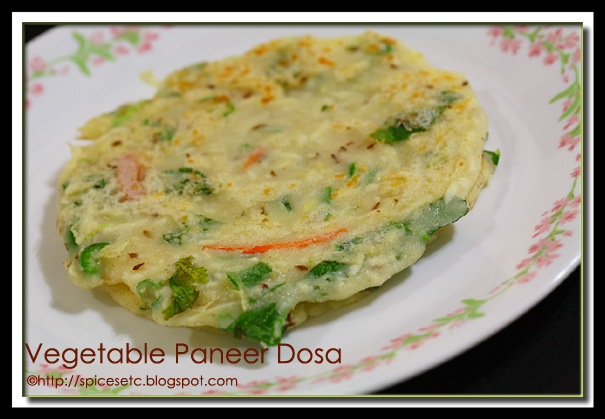
Vegetable Paneer Dosa-Instant


Vegetable paneer dosa is incredibly soft as a sponge. I tried it for the first time and didn't expect it to be so tasty. It is nutritious and can be made in a jiffy!

Ingredients:
Sooji/Rava-1/2 cup
Rice flour-2 tbsp
Hing-a pinch
Green chilli-chopped
Coriander leaves chopped-1 tsp
Jeera-1 tsp
Grated paneer-1/3 cup
Finely chopped spinach-1 tbsp
Very finely chopped cabbage-1 tbsp
Grated carrot-1 tsp
Pepper powder-a pinch
Water- to make batter
Salt

Method:
Mix all the ingredients together. The batter should be of dosa batter consistency.
Prepare dosas the usual way.
Serve with podi/chutney/sambar.

Friday, January 23, 2009

Maddur Vadai - A fried snack from Maddur

Maddur Vadai

In the 1940 – 50s, my grand father was employed in the Southern railways. Adorned in kakhi half trousers, a well pressed full sleeves shirt, brown belt and brown boots, stockings pulled up to the knee, and a hard bonnet like hat he looked every inch like a star from the western movies He was a very handsome old man with his bright set of real pearly teeth and an immaculate smile. As a child, I enjoyed traveling with him in the trains and felt very proud when all and sundry greeted my grandfather with great respect. Our family of six enjoyed the privacy of the first class compartment, and grand father never forgot to buy us the idly and maddur vadai parcels as soon as our steam engine pulled up into the Maddur railway station. The aroma of Maddur vadai filled the compartment even before we could unwrap the parcel made of news paper lined with dried muttugada yelae (a dried leaf which is used to wrap food). I still can not forget the aroma and the heavenly feeling which I experienced when the hot Maddur Vadai melted in my mouth .

My father too, never forgot to take a diversion to the Maddur Railway Station hotel to get a parcel of the vadais when ever he drove to or from Mysore. Later when the popular eatery - Maddur Tiffanys came into existence, we had an easy royal access to the Maddur Vadais right on the side of the high way. It has been 55 years since I started relishing Maddur Vadais. Yet I feel that nothing can beat the taste of the vadais, which grand father bought for us. I used to wonder with horror when my uncle teasingly said that the vadais I ate, were prepared out of engine oil and hence the taste!

There are various recipes with different proportions of the ingredients to make Maddur Vadais. Dibs has prepared the vadais with her version of ingredients and she said it turned out very well and melted in the mouth as it should do. I missed the taste but at least contented with the look of the virtual Maddur Vadais, which has brought out the old memories from my heart.
- Chitra


Ingredients
Fine chopped onions – 1 cup
Chopped Green Chillies – 2
Curry Leaves – a few
Cashew nut – 6 pieces broken into pieces
Plain unbleached flour or maida – 1 tbs
Rice flour – 2.5 tbs
Semolina (rava) – ½ cup
Salt – ¾ tsp or to taste
Unsalted Butter – 1 tbs (about 15 grams)
Sufficient Oil for deep frying

Method
1. Mix onions, green chillies, curry leaves and cashew nuts in a large bowl
2. Add plain flour and rice flour and salt.
3. Next , add the semolina and toss everything together.
4. The butter should be straight out of the fridge, and not soft. Cut it into pieces and add it to the mixture.
5. Combine the butter with the ingredients, such that the mixture resembles bread crumbs. (If you are using salted butter, adjust the amount of salt you add in step 2 accordingly)
6. Now add just ½ tsp of water and combine everything into a smooth dough. Be careful, while adding water and add drop by drop – as even a drop of extra water will make the vada mixture dilute in seconds!
7. Heat oil in a pan.
8. Take a lump of batter and shape it like a ball. Then flatten it to about ½ cm thickness, and drop it into the oil. Wait until the vadai is firm, and then turn the side.
9. Fry until reddish brown and place it on a paper towel, to absorb any excess oil.


Note:I tried this vadai for the first time, and it was a little softer than the original Maddur Vadai! However its tasted superb. The next time I will probably avoid butter and use heated oil! While the butter makes the vadai very yummy, it made it very heavy too!

- Dibs
***

I am updating this to send to the Just For You event at Sindhi Rasoi! It was just for my mom, aunt to remember their grandfather (my great grand father!), and of course, I really made this for my hubby who had never heard of this vadai before!
- Dibs

Thursday, January 22, 2009

Twisted Cheese Bread

As I was preparing to back home for Chinese New Year, there were still had some leftover cream cheese in the fridge that I should use it before it expired. So, I've chosen this bread recipe just to used-up the cream cheese.
Here is my first attempt on this cheese bread recipe which I really like to share it with you because it's beautifully baked and taste really good. When I cut out a portion from the bread, it gave me a "love" piece of bread. That I feel so lovely.
I know it's nothing related to CNY but you may try it when the "hurricane" is gone. Wish all of you have a blessed new year and all the best!

Recipe:

(A) 200g bread flour / 35g sugar / 1/4 tsp salt / 3g yeast / 125g water / 15g butter
(B) I50g cream cheese / 1/4 tsp lemon juice / 10g bread crumbs or biscuit crumbs
(C) 10g almond flakes

Method :
  1. Mix ingredients (A) except butter at low speed using a dough hook mixer, then turn to medium speed until it become a smooth dough.

  2. Add in the unsalted butter and knead with low speed until the butter combine with the dough. Turn to medium speed for the kneading process until it become a smooth and elastic dough.

  3. Place the dough into a clean bowl and cover with cling wrap to proof for 80 minutes.

  4. While waiting for the dough, mix the ingredients (B) until it become a smooth paste.

  5. Divide the dough into 2 portions and round them into small balls. Let them rest for 15 minutes.

  6. Flatten the dough to a round disc and spread the filling at the center. Roll the doughs into round shape and rest for 5 minutes.

  7. Use a rolling pin and gentle roll the dough out to a flat disc. Use a scissor to cut 2 inches at the edges for 12 petals. Twist in two petals face to face and you will get six pairs of petals. Let it proof for 30 minutes.

  8. Egg wash the doughs and sprinkle over the almond flakes on the center of the flower shape doughs. Bake at 190'C preheated oven for 22 minutes until golden brown.

Wednesday, January 21, 2009

Inauguration Day Potluck

We are full. Full of hope and wonderful food from our OBAMA Inaugural celebration potluck dinner last night. This Obama Jello American Flag was one of the many great dishes that arrived. If you had a potluck too - send us your photos and tell us your story. We'd love to hear from you.

What do you hope for? What's the change you wish to see in the world? Kiss the Paper is gathering your hopes and dreams.


Tuesday, January 20, 2009

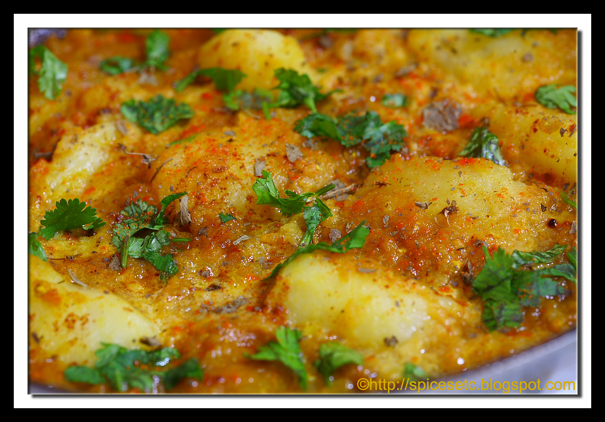
Dum Aloo


Any dish made of potato is always a hit. Isn't it? I have never made dum aloo before. I took the recipe from Nags of cookingandme. I basically used the same ingredients and cooked the gravy for a longer time than she did. It was very yummy.

Ingredients:
Potatoes-3 small(pressure cooked, peeled and cut into big pieces)
Salt
Oil-2 tbsp
Curd/Yogurt-2 tbsp
coriander leaves- to garnish
Kasuri methi(optional)-a pinch(crushed)
Lime juice-from 1/2 lime(optional)

Spice powders(adjust the quantities according to your taste)
Turmeric powder- 1/4 tsp
Kitchen king masala-1 and a half tsp
Garam masala powder-1/2 tsp
Coriander powder-1 tsp
Red chilli powder

To grind(without adding water) into a paste:
Onion-1/2 cup
Ginger-1 inch piece
Garlic-2 pods
Green chilli-1

To grind separately into a paste:
Tomatoes-2 medium sized or 3 small

Method:
Heat oil in a pan. Add onion-ginger-garlic paste. Fry for 5 minutes.
Then add tomato paste and spice powders and salt. Bring the mixture to a boil. If the mixture is too thick, add water and bring it to a desired consistency. Simmer and cook until the raw smell is gone. It will take at least 30 minutes approximately.
Add yogurt, potatoes and cook for 5 more minutes. Garnish with coriander leaves, kasuri methi and squeeze lime juice. Serve with rotis.

Note: Add curd in the end and cook no longer than 5 minutes on very low flame to prevent the gravy from curdling.

Kaalan - Kerala Special

Kaalan is another signature dish of Kerala. Kaalan is equally famous like Avial. This is also a must for any Kerala sadhya (feast). Kaalan is semi sold gravy of raw plantain and yam cooked in yogurt-coconut mixture. The preparation of Kaalan will be started the previous day of the feast, since it takes longer time. We say kurukku kaalan. i.e. kaalan has to be cooked to semi solid consistency. Ingredients for kaalan and avial is almost the same but the way of cooking makes it entirely different in taste. The gravy consistency of avial can be thick or thin as is required. But when served for sadhya, it is always thick. Kaalan has a semi solid consistency. Though it is served as side, it goes very well with rice and can be used as main course. Kaalan with a simple vegetable stir fry or fried papad and hot rice is divine. I might be ready to trade anything for that comfort meal.
My grandma makes the best kaalan ever. Though my mom has inherited her culinary skills, still me amd my sister rate my paati's the best. Kaalan should be made in the right way, else it will taste like morkootan/morkuzhambu. Kaalan is distinct from all the curd/yogurt based gravies. For those of you who have not tasted it, do give a try and you will be hooked. This is one dish, where you cannot compromise on the quantity of coconut used.

You will need
Raw banana - 1 Yam(chena/chenai) - 200 gms

Black pepper powder - 1/2 tspn
Turmeric - a pinch
Sour buttermilk - 2 cups
Grated coconut - 1 1/2 cup
Green chilly - 3 nos
Salt
Seasoning
Gingely oil - 1 tblspn
Mustard seeds - 1 tspn
Red chilly - 2 nos
Fenugreek/methi seeds - 1/2 tspnc
Curry leaves - few.

Peel the skin of raw banana and yam. Cut them into 1 inch cubes. Wash and cook with turmeric and black pepper powder in a cup of water. I normally pressure cook them. Make sure it doesn't turn mushy. The pieces should remain firm on cooking. Take a thick bottom vessel or a kadai. Add the buttermilk to it. Bring to a boil and let it simmer till it reduces to 3/4th of the original volume. Since sour buttermilk is used, it doesn't curdle.Thick curd can also be used in place of buttermilk. Beat the curd well. It doesn't require to boil the curd, since it will curdle.

Grind coconut and green chillies to a coarse paste.Use minimum of water while grinding. The taste of pepper must be more prominent than the green chillies in kaalan.

Combine cooked vegetables, simmered buttermilk or beaten curd and ground coconut-chilly paste. Add salt. Cook on low flame till it reaches semisolid consistency.

Heat a tablespoon of gingely oil. Add mustard seeds. When it splutters, add red chillies broken into two, fenugreek/methi seeds and curry leaves. When methi seeds starts browning, pour over the cooked mixture.

Kaalan tastes best the next day and stays fresh for 2 days without refrigeration. No need to heat the kaalan before serving.


This is my entry for FIC-Yellow hosted by Sunshinemom


Monday, January 19, 2009

Re: Home Renovations on Sale

Money Magazine and CNN Money.com recently published an article by Donna Rosato, Money Magazine senior writer entitled Home renovations on sale

"Materials costs are plunging, and contractors are begging for work. Suddenly that long-postponed remodel is looking like a smart idea."

A lot of the things the article states are true. No doubt about it. But I have differing opinions on how well homeowners might fare if they embark on a bargain-hunting kitchen remodel in the near future.

While they may save a bit on some materials and be able to buy bargain priced products from companies on the brink of, or in, bankruptcy; most of the most expensive products for mid to high end kitchens have just INCREASED in price.

I have done some surveys of cabinet and appliance dealers in the San Francisco Bay Area, and the manufacturers of their products have all done their usual first of the year price increases.

I have also called some quality remodeling contractors, told them about the article, and asked how they are handling the slowdown. None said they were prepared to cut their prices to deal with it.

Instead, they are likely to take an extended vacation, work on their own homes or properties, or even retire.

The last time we had a recession that affected remodeling in the Bay Area was 1989-1994. Our recession hit here later than the rest of the country and lasted longer.

There was very little work to be had and lots of competition from builders, who were also out of work and coming in from the Central Valley in droves.

I went back to school and learned how to use AutoCAD and run a computer, in 1991, during the worst of that period. Certainly better than twiddling my thumbs waiting for new customers to come into the cabinet department of the company that employed me.

Many of the best remodeling contractors retired, and lots of new blood was introduced as younger contractors filled the vacuum. The experienced contractors never really dropped their prices, they were just replaced by inexperienced contractors.

We are far from that situation now. High-end remodeling is still going strong and keeping vendors above water.

But there are signs we could be heading in that direction: A few local vendors are going out of business. The middle class (my clientele) has pretty much stopped remodeling as they watch their 401Ks and home values fall.

On the other hand, there are a whole bunch of newly minted homeowners buying foreclosed properties at the new lower market prices, most of which need remodeling. Those new homeowners also have equity, because they had to pay substantial down payments to buy with credit frozen the way it has been.

That bodes well for the future of remodeling in the Bay Area.

We'll see what happens next...Tomorrow Obama is inaugurated.

Peggy

Too Full To Eat

We recorded this story in Washington, D.C. on the eve of the inauguration and wanted to share it. Listen to Martha's story.

Baked Banana Cheesecake

I bake this banana cheesecake for many years and still it's one of my favorites cheesecake. This is something can be made in advance, keep in the fridge and serve casually for my guests without any hassle.
Recipe for 9 Inches spring form pan

Bottom base:
155g Digestive biscuits
75g butter

Fillings:
500g cream cheese, softened
90g caster sugar
1 teaspoons vanilla extract
1 ½ cups mashed banana (700g overripe bananas)
3 eggs

How I made it:
  1. To make the base, process the biscuits in the food processor to make rough crumbs and add the melted butter. Process again until it makes damp, clumping crumbs and then tips them into a 9 inch springform tin. Press the biscuit crumbs into the bottom of the tin to make an even base and put into the freezer while you make the filing.

  2. Preheat the oven to 160’C. Put a kettle on to boil.

  3. Beat the cream cheese to soften it and then add the sugar. Mix in vanilla extract and mashed banana till combine.

  4. Mix in the beaten eggs one at a time till just combine. (Do not over beat or mix)

  5. Take the springform tin out of the the freezer and line the outside of the tin with a good layer of clingfilm, and then another layer of strong foil over that. This will protect it from the water bath.

  6. Sit the springform tin in a roasting pan and pour in the cheesecake filing. Fill the roasting pan with just-boiled water to come about halfway up the cake tin, and bake in the oven for 45 minutes to an hour.

  7. The top of the cheesecake should be set, but the underneath should still have a wobble to it. Peel away the foil and clingfilm wrapping and sit the cheesecake in its tin on a rack to cool.

  8. Chill in the fridge once it’s no longer hot, and leave to set, covered with clingfilm, overnight.

Sunday, January 18, 2009

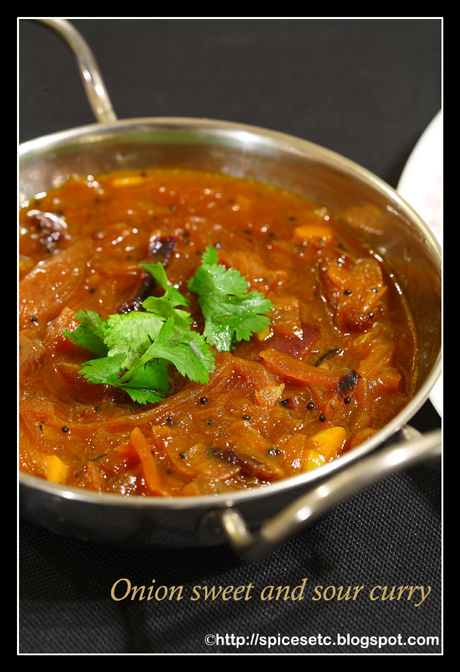
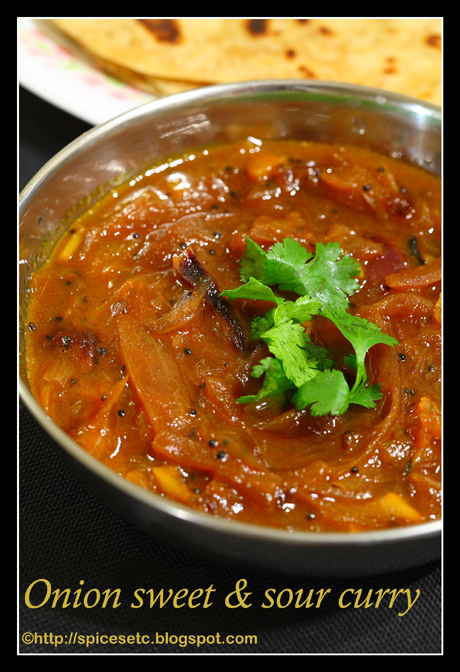
Onion Sweet, Sour & Spicy curry


Don't have any veggies in the fridge? Then try this hot and sour, sweet and tangy curry. I saw this recipe in Indosungod's blog. I tried it right after I saw her post. It was so tasty. It goes great with chapathis or pooris. I followed her recipe verbatim. Thank you for posting such a lovely dish! Onion lovers should definitely try it.


Ingredients:
Onions-2 small(thinly sliced lengthwise)
Mustard seeds-1/2 tsp
Oil-2 tbsp
Chopped garlic-2 pods
Chopped ginger-1/2 tsp
Salt
Turmeric powder-1/4 tsp
Red chilli powder
Tamarind-small lime size
Jaggery-1 or 2 tsp

Method:
Soak tamarind in 1/2 cup of warm water and set aside.
Heat oil in a pan. Tamper mustard seeds. Add sliced onions, ginger and garlic. Sprinkle some salt. Fry till onion turns golden brown. Extract water from tamarind. It should be thick. Add it to the onions. Add turmeric powder, red chilli powder, more salt and allow the mixture to cook for about 10-15 minutes or until the raw smell of tamarind goes off and oil starts to float on top.
Finally add jaggery powder and mix well.
Serve hot with chapathis/pooris.

I am excited to tell you all that I won second place in Eat-healthy during pregnancy event.

Sangeeth did a great job hosting this event. I thank her for giving me an opportunity to participate in this event.

Many thanks to all my friends and relatives who voted for me. I really appreciate it. I feel very encouraged and motivated.

I also thank Anudivya for sharing her version of sugarless laddoos. I modified her recipe and made to suit my taste. You can find the winning recipe-dates and nuts fudge/cake in the menu.

Last but not the least, I thank my father and his colleagues for voting and taking so much interest in following the results till the last minute. One of my father's colleagues sent me an email to congratulate me.

Blog Birthday and Announcing the 'Kitchen Masterpiece' Event

Blog Birthday and Announcing the 'Kitchen Masterpiece' Event
It is a year since my daughter, Dibs, goaded me into publishing a recipe blog. Since I was a novice in the field of computer technology, I hesitated a lot to get down to it, and there were many apprehensions. She persuaded me by saying she would create the Chitra Amma’s Kitchen blog, and publish all the posts, until I felt comfortable enough doing it myself. Since then, there was no looking back, (although she still continues to do all the posting!) Thanks to all my fellow bloggers, this blog is celebrating its first anniversary on 19th January 2009! We decided to celebrate the anniversary by announcing an event. What better way to celebrate than with Food, Art and Craft our all time favourite hobbies!

What can be submitted?
Create any form of art or craft, made of either raw or cooked food products. Since this is a veggy blog, please use only vegetarian items. Examples include vegetable carvings, sugar craft, coconut carvings, ginger bread men and so on. It does not matter whether your masterpiece is eatable or not! For example a kolam made of rice flour, or a rangoli made of raw grains cannot be eaten, but are most welcome for the event! None of us are Picassos or Ravi Vermas (or maybe few of you are!), so please don’t hesitate in taking part! Blog about your art or craft work, and include pictures or videos of your masterpiece. Write about how you made it, what inspired you and so on kin your post.

The Kitchen Masterpiece Logo
This logo comes from a masterpiece that was made by my bright little granddaughter Dhrithi, who is all of seven years old. It is a fairy made from dosa! She made me make the dosa, and then did all the decoration! You can see more art work, poems and essays by Dhrithi here!

Prizes!
Prizes are really exciting aren't they? We were thinking about making this a contest - but then who are we, or anybody else for that matter, to judge your masterpieces! Every work of art is an outlet for creativity, and brings joy and positive emotions to the artist and to others. So instead of a contest we decided to do a lucky draw with names of all participants. A few lucky folks will get some nice gifts! Once we have the lucky winners, we will announce the results on the blog during the round up, and let you know by mail as well.

What do you need to do?
- Make a fresh and independent post on your blog. Link back to this event in Chitra Amma's Kitchen. We’d be happy if you used the logo, but it is optional!

- Ensure that your entries do not violate any copyright laws.

- Drop us a mail with a link to your post at chitra.ammas.kitchen@gmail.com or chitra(dot)ammas(dot)kitchen(dot)com, with the following details.
Your Name:
Name of your post:
URL / Link:
You need not send any details or photos, as we will directly pick it up from your post.

- You may send as many entries as you wish.

- In case you do not have a blog, you are still welcome to participate. You can simply send your entries to our e-mail address at chitra-ammas-kitchen@gmail.com or chitra(dash)ammas(dash)kitchen(dot)com.

- This event is open till 19th February '09, midnight, Sydney, Australia Time (so those in the West actually get almost a day in addition!). The round up will be posted a few days later.

- Feel free to contact us via mail or in the comments section if you have any questions.

So get the creative juices flowing, and we really look forward to seeing your Masterpieces!

Saturday, January 17, 2009

Dramatic Kitchen Oil Fire Video

This just in from my friend Alexander.

It bears posting - Most residential fires occur in the kitchen - on the stovetop.

Be safe.

Peggy


KITCHEN OIL FIRE......... I never realized that a wet dish cloth can be a one size fits all lid to cover a fire in a pan!

This is a dramatic video (30-second, very short) about how to deal with a common kitchen fire...Oil in a frying pan. Read the following introduction, then watch the show... It's a real eye-opener!!

At the Fire Fighting Training school they would demonstrate this with a deep fat fryer set on the fire field. An instructor would don a fire suit and using an 8 oz. cup at the end of a 10 foot pole, toss water onto the grease fire. The results got the attention of the students.

The water, being heavier than oil, sinks to the bottom where it instantly becomes heated. The explosive force of the steam blows the burning oil up and out.

On the open field, it became a thirty foot high fireball that resembled a nuclear blast. Inside the confines of a kitchen, the fire ball hits the ceiling and fills the entire room.

Also, do not throw sugar or flour on a grease fire. One cup creates the explosive force of two sticks of dynamite.


Friday, January 16, 2009

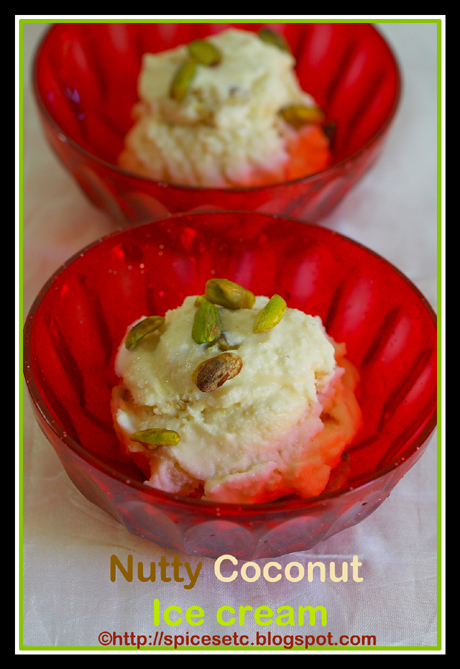
Nutty Coconut Ice cream(kulfi)-Perfect for this weather!(In LA I mean)

Would you like a single scoop or a double scoop?


I have made kulfi before. But this method is slightly different. I followed Ramki's recipe and was very satisfied with the results. He has given 1001 variations to regular kulfi which is amazing. I picked coconut flavor this time to try. I like Nutty coconut ice cream from Baskin Robbins and so does my hubby. So I made it on his birthday.

Ingredients:
Heavy cream(or half and half or whole milk)-1 cup(Remember thicker the milk, creamier the ice cream)
Evaporated milk-2 cups
Condensed milk-3/4th-1 cup(based on how sweet you want the ice cream to be)
Desiccated Sweetened Coconut flakes(not fresh or frozen)-a handful
Chopped nuts of your choice-a handful
Cardamom-a pinch

Method:
Mix all the ingredients together. Pour in kulfi moulds or a container and freeze for 5-7 hours.
Yummy ice cream is ready.


Variations: You can substitute coconut with the following:
1. Mango pulp-for mango kulfi
2. Ground pistachio, saffron and cardamom-for kesar pista kulfi

Note: The ice cream tends to become hard after freezing. Keep it out at room temperature for 15-20 minutes before serving(depends on where you live. If you live in Chennai, you don't have to worry about this.. because the ice cream never sets in the first place. just kidding!).

This goes out to Alka's Just for you event!