Sunday, February 28, 2010

Beetroot and Peanut Vegetable Cutlet

BEET ROOT AND PEANUT VEGETABLE CUTLET
As children we had tasted Vegetable Cutlets for the first time when father took us on long tours during our holidays. That was the only time when we were off 'home food' for so many days, and virtually 'Ate out', every meal, everyday. Father taught us how to eat the piping hot cutlets using a fork and knife. We thoroughly enjoyed the experience, eating a strange but yummy snack, in a strange ambience, using stranger instruments!
The origin of the cutlet is attributed to many countries, but this lip smacking snack has entered all households in various avatars, containing diverse ingredients. Vegetable cutlets have a special place even in the most traditional and conservative of kitchens in South India. In fact, I was astonished and pleasantly thrilled, when vegetable cutlets were served instead of vadais in a traditional feast served on banana leaves, at a friend's place soon after my wedding.
Amused by my fascination for Cutlets, my husband made it customary to stop at 3ACES, a popular restaurant on M.G.Road in the 1960s - 70s, during our evening drives. The taste of the gorgeous cutlets which were served with an assortment of salad vegetables and mint chutney still remains fresh in my mind.
This nostalgia was triggered off by just looking at the yummy vegetable cutlets my daughter had prepared two days ago, for a party. The beetroots and peanuts which she had included in the recipe, rendered a special taste to her cutlets.

INGREDIENTS
Potatoes - 4 large
Beetroots - 4
Carrots - 2
French Beans - a fistful
Coarsely crushed Roasted Peanuts (skin removed) - 2 tbsps
Cumin seeds - 1/4 tsp
Coriander powder - 1 tsp
Star anise - 2 (powdered)
Grated fresh ginger - 1 tbsp
Finely chopped green chillies - 2
Chopped coriander leaves - 1/2 cup
Lime juice (optional) - 2bsps
Salt - 2 tsps
Black pepper powder - 2 tsps
Corn flour - 3 tbsps
Bread crumbs - 250 gms
Oil - for deep frying
METHOD
1. Pressure cook potatoes. Peel them and set aside.
2. Peel and chop beetroots and carrots. String the beans and break into small pieces.
3. Boil the chopped vegetables and peanuts with just enough water, until they become soft. (Or cook to three whistles in a pressure cooker). The vegetables should be completely cooked, but not mushy. They should retain their individuality in the cutlets. Allow the vegetables to cool well.
4. To prepare the seasoning, heat 1 tbsp of oil in a kadai and add cumin seeds, grated ginger, chopped green chillies, followed by coriander powder, star anise powder.
5. Switch off the flame, and add the corriander leaves, salt, pepper powder (and the optional lime juice) . The seasoning is now ready.
10. Add potatoes to the seasoning, and mash and mix well with the prepared seasoning.
11. Next mix in the cooked vegetables and peanuts with the potato mixture.
12. Take two tablespoons of the vegetable and shape into roundels (or any desired shape) and keep aside. (We could make 40 cutlets with the amount of ingredients given above)
13. Make a thin batter of water and corn flour in a deep vessel.
14. .Spread out the bread crumbs evenly on a tray. (To prepare home made bread crumbs, toast about 6 bread slices into a golden brown colour. Break them into pieces after they are cooled and run in the mixer to get a coarse powder.)
15. Dip the cutlets in the the batter one at a time, and place the coated cutlet on the bed of bread crumbs. Cover the cutlet well with the crumbs on all sides keeping the shape in tact.
16. Arrange all the cutlets with out overlapping, on a flat tray and place in the refrigerator.
17. You can keep the cutlets in the fridge for at least for two hours, or till you are ready to serve them. This will allow the cutlets to firm up, making frying easier.
18. When you are ready to fry the cutlets, heat oil in a heavy bottomed vessel.
19. We used 1/2 litre of oil in a large kadai. Slide in four cutlets (or more if the vessel has space) at a time into the hot oil.
20. Using a ladle take the hot oil from around the cutlets and pour on top of them and cook for at least 3 miniutes without disturbing the cutlet.
21. Gently flip over and cook on the other side of the cutlets. When the cutlets are evenly browned on all sides to a copper brown in colour they are ready.
22. .Remove them onto paper towels to drain out excess oil.
Serve the cutlets hot and crisp with fresh mint chutney and tomato sauce.

Saturday, February 27, 2010

Mixed Vegetable Upma


Serves 2-3

Ingredients:
Semolina/Sooji/Farina - 1 cup
Water - 2 cups
Oil - 3-4 tbsp
Mixed Vegetables - 1 cup (very finely chopped onion, carrot, peas, potato, beans)
Garlic - 1 pod (optional)
Curry leaves - a few
Ginger chopped - 1/2 tsp
Green chilli - 1
Hing - a pinch
Turmeric powder - 1/2 tsp (optional)
Mustard Seeds - 1/2 tsp
Urud Dal - 1/2 tsp
Coriander leaves - to garnish
Lime juice from 1 small lime

Method:
Heat 2 tbsp oil in a pan. Add mustard seeds, curry leaves, urud dal, hing, green chilli and ginger.
When mustard seeds crackle, add garlic and mixed veggies.
Sprinkle salt and turmeric powder and fry till the veggies turn soft. Remove from heat and set aside.
In the same pan, heat 2 tbsp oil. Fry semolina on low flame till it turns light golden brown. This step is very important.
Simultaneously, bring water to rolling boil in another vessel.
When semolina turns light golden brown, add the veggies.
Pour water gradually and stir continuously. Add salt if needed.
Simmer and cook for 5 minutes.
Squeeze lime juice and garnish with coriander leaves.
Serve hot with chutney or sambar.

Friday, February 26, 2010

Regular Septic System Maintenance is a Must!

There are more than 25 million homes in America that have a septic system. If you live in one of them, you may already know that regular maintenance is the only way to keep your septic tank functioning properly. Thankfully, maintaining your septic system is pretty easy, so long as you remember to be consistent with a schedule of treatment and preventative care.

A septic tank is actually a sophisticated waste management method that stores and removes waste from your home. Bacteria in the septic tank break down sewage and keep the system functioning properly. When there aren’t enough organisms present in the septic tank, sewage builds up much faster than normal and can cause clogs in the system pipes that force waste back-ups.

The easiest and most effective way to ensure there are enough bacteria and enzymes in your septic system is to use a natural additive like Rid-X or Liquid Plumr Septic System Treatment, which is usually poured straight into a toilet and flushed into the tank. These and other substances like them will add billions of waste-destroying bacteria to your tank without harming the existing enzymes or polluting ground water.

Most septic system manufacturers require once-monthly treatments to guarantee the best results because as water flows into the septic tank each time a toilet it flushed or a drain is opened, it washes away the bacteria and enzymes in the system. Replenishing these bacteria regularly will help your septic system maintain an appropriate amount of beneficial organisms. So mark your calendar, set an email reminder, or leave a big note on the fridge—do whatever it takes to remember this one simple step and you can save yourself a lot of trouble down the road.

Over time, septic tanks and pipes can deteriorate and weaken, tree roots can infiltrate the system causing cracks, and waste matter can form blockages that bacteria can’t reach. Just like you should see your doctor for a physical each year, your septic system should have regular appointments with a dedicated septic system expert to make sure there are no underlying, unseen problems that could lead to serious damage. Septic tank repairs can be pricey, but these costs are nothing compared to the expenses that will surely start to add up if something goes wrong. Then, you’ll be looking at not only extensive repairs to the septic system itself, but also the additional charges associated with clean-up, ground water testing, sanitization, and more.

You should have your septic tank pumped at least once every couple of years (even if you’re religious about monthly additives); an expert with a high-powered pump can remove a lot more waste at a much faster speed than a billion microscopic bacteria working for a full month.When it comes to septic systems, prevention is much easier and more cost efficient than dealing with problems as they arise. Setting a regular septic system maintenance schedule and sticking to it will save you the expense and embarrassment of a messy septic malfunction.


More From Horizon Services...

Thursday, February 25, 2010

Noritz vs. Navien; Round 2!

Well, at least I know that SOMEONE is reading some part of this blog!

I received an anonymous comment about the blog I posted (was it only yesterday?!) entitled "Noritz vs. Navien". The commenter was not happy with my blog.

He or she (it was anonymous, after all) told me that, for him (I will make this assumption), the site loaded right away. He also told me that Navien is located very near to us and that we obviously didn't know this (I am paraphrasing).

Let me say that we were not trying to offend, just report an experience that we had. If the person who commented would like to respond... what's the opposite of anonymously?

(I looked it up and the opposite of anonymous is identified.)

Anyway, if you will give me a place where I can e-mail you, or even call you, I will do so, and we can discuss this issue. I was only reporting an experience that we actually had, I was not saying that Navien stinks and Noritz is great.

I appreciate someone telling me what they think, pointing out when they disagree, etc. That's called conversation, and I enjoy it. If you wish to continue the discussion, either through commenting on this blog, or any other method, I would invite that.

I hope this came out friendly and inviting. I was not trying to chastise or insult in any way.

Take care!

Wednesday, February 24, 2010

Proper Disposal of Used Air Conditioners or Old Appliances

Got an old air conditioner or other appliance you're thinking of getting rid of? Don't just put it out with the garbage..or worse, dump it somewhere off the beaten track. Old, household appliances like air conditioning units, refrigerators, freezers, washers and dryers contain components and substances that can potentially cause harm to the environment if not disposed of properly.

The release of toxic chemicals, greenhouse gases and heavy metals are all real threats when these appliances make their way to landfills and garbage dumps. Proper recycling and disposal greatly reduces the risk of environmental contamination.


What Can Be Recycled?

Refrigerators, freezers, dehumidifiers and air conditioners contain chemical refrigerants and insulation that release ozone-depleting substances into the atmosphere when they are thrown away. Older models can even contain mercury and PCBs. Federal laws require proper removal and disposal of refrigerants to reduce the possible effects of these chemicals.

If you need to get rid of an old refrigeration appliance or air conditioner, check your town’s bulk trash pick-up program. Some municipalities offer these “big item” collections a few times a year or allow residents to make arrangements to have large items picked up upon request.

Electronics like computers, stereos and televisions contain recyclable materials and toxic substances like lead, mercury, zinc and brominated flame retardants. Many of these materials can be reconditioned for other applications, so long as the appliances are disposed of properly.

Many major electronics manufacturers and retail stores have programs that let consumers trade in old equipment in exchange for discounts or rebates on new products. Items are collected and disposed of in compliance with federal environmental laws.

The Environmental Protection Agency also maintains local e-waste recycling or donation programs. Check the EPA website for details about programs in your area.

Fluorescent lights contain harmful CFLs that classify them as toxic waste. Because they also have small amounts of mercury, many states ban disposal of lighting equipment in normal household trash.

Many towns do offer safe, environmentally responsible lighting disposal at recycling centers or waste transfer stations. Requirements and opportunities vary from state to state so check the EPA website for more information about programs in your area.

If you have old lighting fixtures that were manufactured before 1979, you are required by federal law to get rid of them properly. Visit http://www.lamprecycle.org/ for a directory of national recyclers.


Can I Get Money for My Old Stuff?

Rebates and discounts are a popular motivation that lots of utility companies and local municipalities use as an incentive to comply with waste disposal regulations. Commonly, rebates are offered for trade-ins of old appliances and are distributed in the form of cash payments or credit toward the purchase of a new Energy Star-qualified replacement. Companies may provide haul-away services or may sponsor drop-off events. The most popular target for these kinds of programs are old refrigerators, though some offer rebates for portable air conditioners, computer equipment and electronics.

If your appliances are still in good, usable condition, you can always offer them to the highest bidder on websites such as Ebay or Craig's List. Other websites, such as FreeCycle and SwapTree will let you list items you wish to simply give away or trade with others.

The most important thing to remember is that many household appliances, particularly older model refrigerators, air conditioners, televisions and light fixtures, can be classified as hazardous waste. It is your responsibility—or the responsibility of your contractor—to handle, dispose of or recycle these items properly to reduce the risks to your health and the environment.


Can I Just Give My Appliances Away?

Sure. Many charitable organizations will take your old appliances, provided that they are still functional and safe. You may even qualify for a charitable tax deduction. Some organizations to consider include:


Related Information...

Rebates from the State of California

Splash Plumbing has recently learned that you can now get a rebate from the state of California for installing high-efficiency fixtures in your home.

The rules are strict, and it is for a limited time, but here is the gist of it.

- You have to go to http://www.bewaterwise.com/
- Click on “Rebates” at the top of the page
- Click on “Residential Water Customer Rebates”
- Click on “Qualifying Products” to see a list of products

We have included a link to this page here, for your convenience.

- You have to fill out the proper form
- You have to send in the form, the sales receipt, and a copy of your water bill
- You have to have it postmarked on or before 5/31/10
- Your purchase must have been made between 9/21/09 and 5/31/10

Some of the items that qualify are:
* High-efficiency clothes washers
* High-efficiency toilets
* Weather-based irrigation controllers
* Rotating irrigation sprinkler nozzles
* Synthetic turf

As a plumbing company, we will focus on the toilets.

Click this link to see the 18-page list of qualifying toilet models.

If you wish to buy it yourself, we can install it for you. Or, we can do all the work. Just contact us and we can buy it, bring it to you, and install it!

According to the website, rebates for toilets start at $50.00!

So, the benefits are:
- You save money on having a new toilet installed
- You save money on your water bill
- You have a brand new toilet that looks good and works well
- You have a brand new warranty!

The rebates are first come, first served, so don’t wait too long. As soon as they run out of the money they allocated to this program, they will no longer be paying rebates.

If you need a new toilet, or have any other plumbing needs, contact Splash Plumbing today! We service all of Orange County, 24-hours a day. We handle residential, commercial, industrial, and restaurant plumbing. We say:

"If Water Goes Through It, We Do It!"

888-HEY SPLASH

The Name Game!

"What's in a name? That which we call a rose by any other name would smell as sweet."

Ah, Shakespeare! You gotta love him! He really summed it up in this line from Romeo and Juliet!

So, why am I quoting Shakespeare? Because AB&R Plumbing is changing to Splash Plumbing!

It's only a name change, though. We still have the same great people, the same excellent service, the same affordable prices. We still offer 24-hour a day service to all of Orange County, CA.

So why did we change our name? AB&R Plumbing stands for Advanced Backflow & Rooting Plumbing. It's long and cumbersome, and it makes people focus on the backflow and rooting part, instead of the plumbing.

With Splash Plumbing, you'll think of plumbing - ALL plumbing - not just one or two things we do, it's a little more catchy, it looks better on our trucks, you'll be able to remember our toll-free number more easily (I can't even remember the one for AB&R!!).

C'mon, if you see a big white truck roll by, with Splash Plumbing on it, and it says
888-HEY-SPLASH
aren't you going to remember that?

And giving someone my e-mail address was terrible with AB&R...
"It's A-B, then spell the word "and", a-n-d, then R, Plumbing, dot com".

Now, with Splash Plumbing, it's, "at Splash Plumb dot com." Easy!

We're still making changes, so the website and this blog will say AB&R for awhile. Soon, though, it will be Splash Plumbing all the way! (And, if you go to http://www.splashplumbing.com/, it will take you to the AB&R website, until we change it!)

So AB&R Plumbing is now Splash Plumbing. Same great people and services, just the name has changed.

Noritz vs. Navien

Hey …. It’s “Dan the Plumber” blogging again!

Here at Splash Plumbing, you know we are fans of Noritz tankless water heaters, and have installed many of their models in Orange County cities like Laguna Beach, Mission Viejo, Newport Beach, and Costa Mesa.

Splash Plumbing is a full service “affordable plumbing” company, and we pride ourselves on keeping up to date on plumbing technology, especially when it comes to tankless water heaters. But, when I received a phone call from a potential client in Laguna Beach, asking for a Navien Tankless Water Heater, I was stumped. I never heard of them... how embarrassing is that?

Here I thought we were one of Orange County's best tankless water heater installers and I did not even know of this manufacturer… What a shot to my ego!

As I spoke with the caller, I explained that we only install Noritz Tankless water heaters and while I was doing so, I looked up Navien Tankless Water Heaters on the internet. Indeed, I did find them at http://www.navienamerica.com/, and thought I could surf their website while talking to the caller… at least that is what I thought (with good intentions).

It literally took 3 minutes to load their HOME PAGE! What do you think I was doing while the remainder of their site was loading? Yeah that’s right, I opened a new tab on my browser and went straight to http://www.noritz.com/ and directed MY NEW CLIENT to do so as well.

The Noritz website loaded in 3.5 seconds, I was able to show my client the model I had picked out for her Laguna Beach home, and an agreement was made!

Well the deal was made, Splash Plumbing has a new client, and there is another Noritz tankless water heater installed in Laguna Beach. Whatever happened to http://www.navienamerica.com/ you ask? Honestly, their website did not fully load and from what I saw, I was not impressed.

Here are the primary reasons why we select Noritz Tankless Water Heaters for all of our clients in Orange County:

- HUGE selection
- Versatile installation
- Availability
- Stainless Steel tankless water heaters
- Direct contact to our manufacturer
- Outstanding customer support
- Gi-nor-mous (yes… it’s a word) showroom for our clients to visit!
- Fast, clean and informative website

There you have it. As far as we are concerned, Navien Tankless Water Heaters still seems to have a lot of work to do in comparison to Noritz Tankless Water Heaters … but then again, that’s only my opinion.

Oh, how is my personal Noritz Tankless Water Heater, that I installed in my Mission Viejo home working? With 4 women in my house, I still have lots of hot water!

Tuesday, February 23, 2010

Aapam - A Kerala Delicacy

The soft,spongy dosa which is slightly thick in the centre and lacy edges is truly an irresistable breakfast dish. Yes, I am talking about aapam, which is a very common breakfast of Keralites apart from puttu. The popular combo is Aapam and Potato stew or Kadala curry. Both the sides tastes awesome with aapam. In Tamilnadu, coconutmilk is usually served as a side which is also a good match for the soft aapam. There are umpteen recipes which guarantee you the best aapam. My recipe is a simple straight forward one, which I have adapted from my Amma. I have eliminated an additional step which Amma follows. Amma uses only raw rice and coconut for grinding. Then she will prepare a thick , but free flowing paste out of a tablespoon of batter mixed with 1 cup of water. The cooked batter paste is then mixed to the batter and left to ferment.  This is to get soft aapam. I omit that step and instead add a handful of urad dal while grinding.

To prepare aapam, you need that special pan to get the perfect shape for aapam - with a dome in the centre and lacy edges.  Now a days you get the non-stick aapam pans which makes aapam preparation a breeze. Earlier, amma used to use the deep kadai for this and had to struggle lifting the appam from kadai. If you don't have an appam pan, you make it on regular dosa tawa. You don't get the shape. But cover and cook only one side.


You need

Raw rice - 2 cups
Split urad dal  - handful
Grated coconut - from half of a coconut
Salt to taste
Cooking soda - 1/4 tspn


Method

Wash and soak rice and urad dal together for 5 hours or overnight. Grind together rice, urad dal and grated coconut till smooth. Add salt and leave to ferment for 6 hours. The batter consistency should be thinner than dosa batter. Add cooking soda and leave it for 10 minutes for the soda to act.  If you are not using the whole batch, divide the batter before you add soda. This way you will have fresh batter to start with the next day. With soda added batter, I feel you don't get the same result the next day.


Keep the aapam pan on the stove and smear little oil on the pan. Take a ladle of the batter and pour, starting from the outer edge to the centre of the pan. Hold the handles of the pan and give a gentle swirl so that some batter from the edges will flow down to the centre. This method will leave only a thin layer of the batter at the edge which will turn crisp on cooking. Cover with a lid and cook for 2 minutes on moderate heat. If you like a crisp exterior, you can conitnue to cook for few more seconds for it turn brown else remove.

I served with the chettinad tomato chutney which went very well with aapam.


Aapam is regular for breakfast at home and I have been thinking of posting this for a while. But will forget to click the picture everytime. My R.Manni (co-sister) has been asking for this recipe, for quite a long time and fianlly a mail from my reader prompted me to do the post at the earliest.


Monday, February 22, 2010

Green Plumbing at Home

Innovative Plumbing Solutions That Can Save The Earth AND Save You Money!

One of the best arguments for making your home green is that a few simple changes can save you lots of money on utility costs. While green plumbing solutions can be a bit more expensive up front, the long-term savings are significant enough to warrant serious consideration of some of the following products.

The gold standard for energy-efficient appliances, electronics, lighting, and yes, even plumbing fixtures, remains the Energy Star label. You can find this designation clearly marked on qualifying products. However, green innovation is an evolving industry and there are lots of exciting new options on the market these days.


Toilets:

Composting toilets do exactly what you think they do. Without water or a septic/sewer connection, these units collect solid waste and convert it to—ahem—organic fertilizer. Worried about the smell? Several companies offer odorless models.

Low flow toilets or dual flush toilets are hot items right now in green home construction and remodeling. They use significantly less water than traditional commodes and dual flush toilets let you choose how much water to use depending on the type of waste you need to dispose of.

Waterless urinals are odorless, hands free devices that use scent-blocking biodegradable chemicals to filter liquid waste and force it down the drain. They claim to be not only cleaner and more environmentally friendly, but also easier and cheaper to maintain.


Showers and Sinks:

Low flow aerators are popular and easy additions to green your faucets. These small metal devices attach directly onto the head of the fixture—no special tools needed—and allow you to adjust the flow of water out of the faucet. The best part is that aerators don’t affect water pressure in the slightest.

Low flow showerheads are similar to aerators—you can modify rate of water flow without sacrificing pressure. There are several models on the market; look for those with non-aerating spray, which can shorten the time it takes for water to heat up and will save energy.

Motion sensor faucets are really popular in new commercial restroom construction. We’ve all used them—put your hand under the faucet and the water comes on; move your hand away and the water shuts off. There are now several models appropriate for residential use.


Water Heaters:

Instant spigots provide hot water on demand, saving energy because water does not have to be kept continuously heated in a storage tank.

Solar water heaters harness the power of the sun’s UV rays—which are completely free, by the way—and convert them to usable energy. There are many different types of solar water heaters out there; a qualified dealer can help you find the one that’s right for you.

Point of use water heaters are actually a series of small tanks only where you need hot water. Rather than store and heat enough water for an entire home’s worth of various uses, these miniature units hold just enough water for a specific task like taking one shower or doing a load of laundry.


Related Plumbing Information...

Chettinad Onion Tomato Chutney ~ SpotlightBlog Recipe

Here comes the last recipe from this month's spotlightblog, Shoba's Anubhavti. The  fourth recipe I tried is a creamy, delicious chettinad chutney. I could eat spoonfuls of the chutney all by itself. It was that tempting.With out many ingredients in the list, with just few tomatoes and onions, and urad dal for the texture and red chilly for heat, you get a simple chutney. Don't forget to add the coconut milk which is the star ingredient, that takes this otherwise ordinary chutney to the next level.


You need

Onion - 1 no

Ripe tomatoes - 3 nos

Red chillies - 3 nos

Light coconut milk. - 3 tblspn

Salt

Curry Leaves.


Seasoning:

Oil - 2 tspn
Mustard - 1/2 tspn
Urad Dhal - 1 tspn
Curry Leaves.

Method

Chop onions and tomatoes and keep it aside. Heat a kadai with the 2 teaspoons of  oil.  When hot add mustard seeds and wait for it to crackle. Add urad dal, red chillies and curry leaves. Saute for few seconds and add onion and suate till they turn pink. Add chopped tomatoes and salt and continue till the tomatoes are well cooked and left with less moisture.  Grind all the ingredients together till smooth. Add coconut milk and blend well.  I mixed half a tablespoon of coconut milk powder in 2 tblspoon of warm water.

The creamy chuntey with a slight hint of sweetness from the coconut milk is an excellent side for dosa/idli. It makes good sandwich spread too.


Shoba, I enjoyed the virtual tour of your kitchen, selecting recipes. And from next Monday, its another blog  on the spotlight.


Sunday, February 21, 2010

Mixed Bean Salad

Looking for different variety of salads, so that i too can have some variety in my DIET!!! Come on yaar, Variety is the Spice of Life, So, why not have it in dieting too.

Had some Horsegram @ home, so Sprouted it this weekend, Have made this Sundal/Salad for Navrathiri, tastes good.

Sending this salad to MLLA-20, Event Hosted by Rachel of The Crispy Cook, Event started by Susan of The Well-Seasoned Cook.

Ingredients
1 tablespoon sprouted horse gram
1 tablespoon Chana Dal/Bengal Gram
1 tablespoon Peanuts
1 Red Chilli
1 tablespoon fresh grated coconut
Salt to taste
Asafoetida a pinch

Method
Cook sprouted horse gram, chana Dal and Peanuts together until soft. Heat oil, Add Chilli and asafoetida Add cooked Mixture. Add Salt, Mix well, Take it off the flame and add freshly Grated Coconut.

This Salad gives you a very good filling feel. you dont get that hunger pangs after having this.With a bit of chilli and coconut it tastes great!!!

I Checked for the Calories too, not too much, so no guilt while munching.


Calories 135 (1 serving)


Total Fat 7.6g   12%
Saturated Fat  2.2g   11%
Trans Fat  0.0g
Cholesterol   0mg   0%
Sodium   588mg  24%


Total Carbohydrates 12.4g   4%
Dietary Fiber 4.8g   19%
Sugars 2.0g
Protein 5.9g


Vitamin A 0% • Vitamin C 9%
Calcium 2% • Iron 8%


* Based on a 2000 calorie diet


Nutritional details are an estimate and should only be used as a guide for approximation.

Kunuku - Crispy lentil fritters


Kunuku - Does the name sound funny? I am not a big fan of kunuku. But I like to have it once in a while for a change.We usually make it when we have some left over adai(savory crepes) batter.  Instead of deep frying,  I used a kuzhipaniyaram (appe) pan and shallow fried the batter.

Ingredients:
Left over thick adai batter-Click here for recipe
Oil-To deep fry or shallow fry

Method:
If you are deep frying, heat sufficient oil in a pan. Take some left over adai batter. Shape them into small uneven balls and deep fry till golden brown.
If you are using a kuzhipaniyaram pan, grease it with oil. Heat the pan. Drop some batter in each hole and drizzle oil around the corners. When one side turns golden brown, flip and cook the other side. It takes a while to become brown and crispy. So do not be in a hurry to turn them around.
Serve hot with ketchup!

Veggie Dal

This Weekend we had to attend two birthday parties. So planned not to have a heavy lunch, so that we can actually enjoy the dinner well :). We can manage with some Fruit and Veggie Salad, But aha what to do for my son????? So, these times this Veggie Dal helps me a lot. Dal with lot of Veggies Cooked together, Makes a Great Meal with rice and a dollop of ghee, especially for Kids and No Guilty Feeling Mommy!!!!!!


Ingredients
Toor Dal - 1//2 cup
1 Baby Potato
1 small Capsicum
1 small carrot
1 small Tomato
1 Green Chilli (Dont Slit )
1 tsp Sambar Powder
Turmeric, hing - a pinch
Salt to taste

Method
Wash and Chop All the veggies, Mix with dal. Add Green Chillie, Turmeric, sambar powder, hing and salt. Add Water accordingly. I normally add 2 cups (1 cup for the dal and another 1 for the veggies). Pressure Cook for 4-5 whistles.

Take it out, Mix well with a spoon. Serve with Rice and Ghee.

Sending this to CMT-Daal/Kadhi/Sambar/Rasam Guest hosted by me, Event by Jagruti.

Saturday, February 20, 2010

Sprouted Green Gram Pakoda

Got this recipe from Aval Vikatan's Supplementary issue. I always keep Sprouted Green Gram Stock in my Fridge,tried this for the weekend, came out great. Doesnt take too much time to preapare also.

Packing this to MLLA-20 hosted by Rachel of The Crispy Cook Event Started by Susan of The Well-Seasoned Cook.


Ingredients
Sprouted Green Gram - 1 cup
Cumin seeds - 1 tsp
Green Chillies - 2 nos or Pepper - 1 tsp
Ginger - a small piece
1 Large Onion, thinly sliced
Curry leaves - 1 sprig
Salt to taste
Oil for frying

Method
Grind All ingredients, except onion Without adding water. No water should be added, since it will make the batter too watery. Add the sliced onions to the batter and mix well. Deep fry as pakodas.


Enjoy with a hot cup of coffee.


Fifth Anniversary of Kitchen-Exchange

Today marks the fifth anniversary of the day I started this blog on February 20th, 2005.

Kitchen-Exchange was one of the very first blogs dedicated to kitchen design. Since that day I have been joined by many talented blogging designers.

It seems very apropos today that the fifth anniversary gift is wood. I love wood in an almost visceral way. Always have, ever since I can remember. I love the feel of wood and its smell.

Today I toured the Palo Alto Net Zero House and saw a TorZo wood counter in the powder room. I was in LOVE! I really, really didn't want to leave that powder room.

Now. I must first say that I am NOT fond of wood counters in the kitchen unless they are completely separate from any sink or cooking surface. I have seen too many wood counters marred with mildew and burns to ever recommend one anywhere but where it can't be soaked or burned. They are so impractical!

But OH this Torzo! It is made of myriad wood chips in light and dark colors in an non-toxic acrylic resin. It is so deep looking, so rich. Pictures can't do it justice.


If I had a desktop of TorZo Orient, I would just sit here admiring it all day long and never get a thing done!

I have asked for a sample to test, since TorZo claims that their product is durable and resistant to water. I shall see about that and report back.

Thank you TorZo, for your gift of beautiful wood on my fifth anniversary.

Peggy

Friday, February 19, 2010

Cauliflower Ashgourd Soup And Diet Chart Week #1, Day ~ 3 & 4

The diet plan is going well. I don't get tempted easily and sticking to a plan is not that difficult.  Since I started on a diet plan, I make it a point to make soup daily. Though soups are considered to be appetizers, a bowl of soup is filling for dinner. Ash gourd is very good for weight reduction. Or you can use lauki or bottle gourd too. Since I use ash gourd, I have used that in the soup. You could make it with only cauliflower too for a more creamier soup. 


Ash gourd /Elavan , cubed - 1/2 cup

cauliflower florets- 1/2 cup

star anise -1

cinnamon - 1 stick

Milk -1/2 cup

salt & pepper to taste


Pressure cook ash gourd and cauliflower in 2 cups of water with whole star anise and cinnamon stick, for 2 whistles. Once cooked, remove the spices and puree till smooth. Add 1/2 cup of milk and bring to a boil. Add salt and pepper and serve hot.

Add less of pepper to bring out the flavor of cinnamon and star anise. The aroma of the soup is too good with a creamy texture. Without milk also, the soup will taste good.


Week#1, Day ~ 3


5:45 am - Ajwain + 1 glass warm water

7:15 am - 3/4 cup coffee without sugar

10:00 a.m - A bowl of savory oats porridge (Adapted Aparna's recipe) with radish chutney  (I added  carrot and cauliflower to oats )

1:15 p.m - Remaining oats porridge with molagootal and pachadi, 1 glass buttermilk

3:45 pm - Watermelon

5:15 pm - small cup of pappaya and 1 phulka

9:00 pm Drumstick soup + 1 phulka with avarakkai/broad beans thoran + 1 glass buttermilk

Sipped 2 glasses of salted lemon juice in between


Week#1 Day #4


5:45 am - ajwain + 1 glass warm water

7:00 am - 1/2 Cup coffee (No sugar)

9:15 am - wheat rava upma +steamed sprouts

1:15 pm - 2 pesarattu, tender jackfruit gravy + drumstick blossom kootu + 1 g buttermilk

3:30 pm - watermelon

6:30 pm - cucumber

8:30 pm - cabbage+moong sprouts soup + 2 wheat bread slices

Had 2 glass of lemon juice and 3 glass of buttermilk. But only 6 glass of water.


“Nowadays, everyone has something to say!”

I overheard this complaint the other day, while drinking my coffee. I was lucky to have the time to sit and listen to the explanation that followed.

To sum it up, apparently, this man’s complaint was that everyone talks, but very few people actually say something! As I thought about it, I realized that it was true.

Everyone you hear, whether on the news, award shows, American Idol, or anyplace where people are saying things live, they all seem to be talking in sound bites. They are all saying something that can be quoted.

When was the last time you saw someone interviewed and they said something that you thought came from the heart?

When was the last time a politician said anything that didn’t sound like a speech writer wrote it?

Most of the people whe see and hear on TV and radio either seem to be attacking justifying or making an excuse. (At least, that's what it seems like to me.)

It’s so hard to listen to people who talk, who aren’t really saying anything.

So, why did I bring this up? I’ll tell you…


On our website, we have a page for “testimonials”. I really like that word, because it has the same derivation as the word “testimony”. It always seemed to me that, when you give a testimonial, you need to tell the truth.

Not very many people go to our website and give us a testimonial, but some do. It’s much more likely that someone will call to tell me if they liked – or disliked – our service, but I have also received e-mails and, once, an actual letter!

So, what are people saying about our service? Here are a few examples:


Our company has depended on the honest diligent work of AB&R Plumbing, Inc. many times over the last 6 years. We find their service to be exact, dependable, and they have always made themselves available to help us when emergencies erupted.I would best describe AB&R Plumbing, Inc. as being of excellent work ethics, knowledgeable and trustworthy

That one is right on our website. Another says:

AB&R Plumbing is phenomenal. After suffering through numerous bad plumbers who performed shoddy work and less-than-perfect repairs, AB&R was a savior. Its plumbers have consistently proven to be skilled, reliable, honest and professional in all aspects of my plumbing issues.
From menial tasks to difficult-to-repair problems, AB&R has always come through for me. Odd as it may seem to be so effusive about a plumbing company, I’m sure I’m not the only super satisfied customer to sing praise. This company deserves all the accolades
.”

Again, this one is on our website.

Some testimonials that are not on our website are:

Just wanted to let you know that Juan M. is the man! He did a fantastic job fixing the plumbing issue on our rental property. Coming out on a holiday and crawling through mud so our tenants could have water was commendable. We really appreciate the fine job he did!”

That was a homeowner in central Orange County. We went out just after midnight on Thanksgiving morning!

Another one that is not yet on our website…

AB&R plumbing was recently referred to me by one of our material vendors. They did an amazing job of installing a Noritz tankless water heater at my Anaheim Hills home. They were friendly, tidy and efficient. I have already referred them to friends for after hours emergencies and they have also been impressed by AB&R’s clean work. We will definitely be using them on our projects in the future.

This one came from a construction company VP.

One of my favorites, that will soon be on our website is:

"I have been in building maintenance for many years and have worked with many plumbing companies. I have found AB&R to truly be the most helpful, responsive and reasonably priced company out there. They listen to me and my needs, they have responded quite well in emergency situations. I have full confidence in their abilities and their professionalism. I won't use anyone else."

Can you tell why this is one of my favorites? This is from the head of maintenance at a retirement community in south Orange County.

So, have people ever said bad things about us? Sometimes, but even when they do, we can usually discuss the situation with them and make them happy. Our philosophy is that it’s all about the relationship. Our customers are a huge part of our business (because, if we didn’t have them, we wouldn’t be in business)!

At AB&R Plumbing, we can handle almost anything that has to do with plumbing. From clogged drains, to leaky pipes, to backflow tests and repairs, to gas leaks, to water heaters… We even install and service softeners and reverse osmosis systems!

We have spent many hours working on our price book, trying to give you the most “bang for your buck”. We didn’t cut quality, just costs!

If you need a plumber, anywhere in Orange County, give us a call today. We will make the right repair, at an affordable price, and you will like our plumbers!

Thursday, February 18, 2010

Almond-Oats Chocolate Chip Cookies from A2ZVegetarian Cuisine

This Week i tried baking this Almond-Oats Chocolate Chip Cookies from Muskan Sadhana's A2ZVegetarian Cusine. The Cookies came out very well. I too had some, saying it doesnt have maida, so its ok.

The Original recipe has used Agave Nectar, but since i didnt have it i tried it using Soft Brown Sugar (1/4 cup + 1 tbsp) i think that 1tbsp has become a bit extra, will reduce while making it next time. Also i added a fistful of cashewnuts along with Almonds while grinding it to powder.

My Ingredients
Oats flour - 2 cups
Almond Flour - 1 cup (Added a Fistful of Cashews with this)
Semi sweet Chocolate chips - 4 oz (1/2 cup)

Butter - 4 oz(room temperature)
Soft Brown Sugar - 1/4 cup + 1 tbsp
Baking Soda - 1/4 tsp
Salt - 1/4 tsp
Vanilla extract - 1/2 tsp


The First Batch of cookies took 17 minutes to bake, While making the second batch, the dough has gone a bit dry so, i added 2 tbsp of milk and increased the baking time by 1 minute extra.  May be if i have used agave nectar, this wudnt be necessary.


The Cookies were dark in colour, this may be due to Brown Sugar.
Packing these Cookies to St.Valentine's Day Event by Priya of Priya's Easy N Tasty Recipes


Get To Know Your Sump Pump!

If you own property situated on land with low elevation or in an area with a high water table, chances are you’ve experienced flooding at some point. Homes located on floodplains are at greater risk for yard and basement flooding after heavy rain or snow melt, and it certainly doesn’t take much water to cause serious damage. Just a few inches of stagnant water in a basement or near a home’s foundation can result in thousands of dollars in repair, clean up and restoration costs.

The most effective way to prevent this kind of flooding is to invest in a good, quality sump pump.

Most homes have tile drains that wrap around the house and collect excess water from rainfall or melting snow. If the tiles become deluged the surplus water is diverted and collected in a sump, a small well or pit in the floor of the basement.

If the sump becomes too full, the well could overflow into the basement or seep through cracks in your home’s foundation due to the still-submerged tile drains surrounding the house. This is how basement and low level flooding happens.

A sump pump is a device specifically designed to draw excess water out of your home. When water that’s collected in the sump well reaches a perilous level the sump pump kicks in to flush it out through a pipe connected to your city’s storm drain system. The liquid is channeled away from your home, virtually eliminating the risk of flooding.

Sump pumps work on a float system, kind of like a toilet in reverse. In a toilet tank, the float detects when water in the tank has reached a certain level and stops the commode. A sump pump float senses when water has risen to a particular level and turns on the pump. There are a few different types of sump pump systems to choose from.

Pedestal sump pumps are placed over the well. The pump motor is out of the water where it can’t get wet, which makes the machine run much louder but also helps the motor last longer because it’s not submerged in water all the time. Pedestal pumps are usually the most cost effective option.

Submersible sump pumps sit inside the sump well and are covered over by water as it rises in the pit. The motor is sealed and completely waterproof, making it relatively durable and dependable. These types of sump pumps tend to be more expensive—about $300—but are usually the most highly recommended model for installation in finished basements.

Battery back-up sump pumps allow for continued operation even during a power outage. If you live in an area of the country prone to serious storms or frequent blackouts, a batter back-up pump ensures that water continues to be diverted away from your home even if you have no electricity. Having a batter backup system offers valuable peace of mind for homeowners who travel often or maintain seasonal residences. These models can be very expensive—$700 or more—but are able to handle thousands of gallons of water without needing a battery charge.


Related Information...

My Kid's Dinner Tantrum

My Little Angel Narasimhan, he is going to be 4 this june. Day before yesterday night dinner, i made Rasam (pepper water) saadam. He normally has the habit of peeping into the rice bowl to check what rice i going give him, when he saw rasam saadam in his bowl, thats it he started to cry out loud and say "No Amma, no Rasam saadam". I was bit surprised to see him behave this way, coz he never used to demand anything like this. I said i made only rasam da, so you pls have it today.
A Stubborn "NO" came the answer. Next, i asked him what else do you want? mmmm Muruganka Sambar (Drumstick sambar),. Oh ho, where will I go now and get Sambar, Its already his dinner time. I tried to pacify him saying i will make him tomorrow. No, He wasnt ready to accept it.

Poor Mommy!!!! Suddenly came the thought of Grand Sweets Vethakozhambu thokku. Made Rice with that thokku added a big spoon of Ghee. All this time my kiddo was standing behind me and checking whether i m making new rice or doing some adjustments to Rasam Saadam. When he a saw a new bowl with his Sambar(Thokku) saadam he was happy and had his dinner.

When i told my hubby what happened, he started smiling, that proud smile of a Father!!!! My Son is growing, so better dont do all the samalifications what you do with me, was the answer.

I too was feeling a bit proud and at the same time konjam sad, seeing my son is growing, soon he will start to have his own set of everything, Mommy will become a bit lonely.. Suddenly his first day of school came to my mind, i was jus thinking he is going to throw a big cry while getting into his school bus and i was rehearsing how to handle that, But @ the end, he waved me Bye with a Big smile on his face and i was the one Crying cing my son going to school. :( .  I think this happens with every Mom. Kids Grow up very very fast!!! But we as parents remain the same.


Wednesday, February 17, 2010

Cakes & Cookies-Part 2

Here comes cakes and cookies-level 2 recipes. Let me know if I missed out any entry. The last part will be posted next week. Keep you entries coming for Cooking Basics Event! 

Madeleines-- Cookie or Petite Cakes?
Adding Zest to your Cooking

1/2 cup unsalted butter, melted
1 cup (130 grams) all-purpose flour
1/2 teaspoon baking powder
1/8 teaspoon salt
3 large eggs, at room temperature
2/3 cup granulated white sugar
1 teaspoon pure vanilla extract


1. First, melt the butter and allow it to cool while you make the batter.
2. In a small bowl place the flour, baking powder and salt and whisk until well blended.
3. In the bowl beat the eggs and sugar at medium-high speed until the mixture has tripled in volume and forms a thick ribbon when the beaters are lifted (about 5 minutes). Add the vanilla extract and beat to combine.
4. Sift a small amount of flour over the egg mixture and, using a spatula, fold the flour mixture into the beaten eggs to lighten it. Sift the rest of the flour over the egg mixture and fold in being sure not to overmix or the batter will deflate.
5. Whisk a small amount of the egg mixture into the melted butter to lighten it. Then fold in the cooled melted butter in three additions. Cover and refrigerate for at least 30 minutes until slightly firm.
6. Position a rack in the center of the oven and preheat to 375 degrees F (190 degrees C). Grease the madeleines pans. (Make sure the pans are well greased or the madeleines will stick and be hard to remove.)
7. Drop a generous tablespoonful of the batter into the center of each prepared mold, leaving the batter mounded in the center. (This will result in the classic "humped" appearance of the madeleines.)
8. Bake the madeleines for 10-12 minutes, until the edges are golden brown and the centers spring back when lightly touched. Do not overbake these cookies or they will be dry.

Eggless Chocolate Indulgence Layer Cake
Sandhya's Kitchen


For the Cake:
Self Raising Flour:2 Cups
Baking Powder: 1 Tsp
Baking Soda: 2 Tsp
Unsweetened cocopowder    : 3/4th Cup
Granulated White Sugar    : 1.5 Cups
Low fat Vegetable Oil for lighter baking    : 1 Cups
Hot Coffee Decoration    : 1 Cup
Milk: 1 Cup
Vanila Extract    : 1 Tsp
Low fat stirred yogurt: 1 Cup

Ganache Frosting :
Butter    :2 Tsp
Chopped Dark Chocolate    : 80gm
Chopped Milk Chocolate    : 100gm
Creme fraiche or ( Heavy Cream)    : 300ml
Vanilla essence    : 2 Tsp
Royal Icing Sugar ( Silver Spoon Brand)    : 200gm

Preparations:
    * Hot Coffee Decoration: Mix 1 tsp of Dogwe Egbert Instant coffee with 1cup of Boiling Water .
    * Yogurt Mix : Mix every 3 table spoon of stirred yogurt with 1 table spoon of water.

Method:
Cake Preparation:
Method for any cake preparation is the same..Preheat the oven . Mix all the dry ingredients & wet ingredients separately. Prepare a well and incorporate the wet ingredients slowly  into the dry and blend well.We follow just the same process here too.

    * Preheat the oven to 220 C . In a large mixing bowl , mix Self Raising Flour , Baking Powder , Baking Soda  & Granulated Sugar . Swift them well with a spatula and make a well kind in the center.
    * Add the butter at room temperature , Hot coffee mix , Milk , Vanilla essence  & stirred yogurt one by one with regular mixing after each incorporation.
    * Using an hand blender , wisk the mix for about 1-2 minutes until all the lumps are gradually gone.
    * Grease the Cake tin with a lil butter and dust a bit of coco powder all around. Pour the cake mix in the tin  upto 3/4th and place it in the oven.  Remaining mix could be poured into a muffins mould.
    * Bake for nearly 1h -1.10h until a wooden skewer inserted comes out neat. (My cake wasnt done in 30 minutes like most recipes said.)  Let it rest in the wire rack for a while( about 30 minutes) until the cake cools.This is a highly impatient period when we cant wait to see out results of our efforts.

For Frosting :

    * Heat the sauce pan filled upto 3/4 full of water in a medium flame and place another vessel over it.
    * Add 2 tsp of butter and once it begins to melt , add  the broken chocolate pieces in batches and keep stiring until they all melt. Incorporate Creme fraiche and a couple of drops of vanilla essence and keep stiring for 30 seconds. Include the icing sugar and stir for another 2-3 minutes.
    * Keep this indulgent frosting aside for 30 minutes (room temperature) until it cools a bit and starts holding itself.

Assembling:

    * Carefully turn the cake upside down from the baking tin and place it in a large plate. Since I didnt use 2 separate cake tins , I had to carefully slice it horizontally with a large knife and keep it aside in another large plate. This gives us 2 layers. We will need aditional flat spatula's to move and lift the cake coz there is a tendancy to break.This procedure requires FRAGILE handling.
    * Now over one of the cake layers , spread the frosting with a knife and allow it to flow in the sides.
    * Gently and carefully place the second layer over the first . Pour the frosting all over the cake and gently spread over the top and sides.
    * I didnt have any decoration... Wasnt prepared with it.. SO used  Dark Chocolate chips to do the decoration bit.. and  my Indulgence chocolate cake was ready to be served.
    * Allow the cake to cool and settle and serve after an hour or the next day.

POM Shortcake
Nishaskitchen
ShortCake(Original Recipe GHK Mar 09):
Orange - 1
Unsalted Butter - 1 cup
Sugar - 2 cup
AP Flour - 2 cup
Egg - 5 large

Filling(Modified Recipe):

Pomegranate Seed 1/4 cup
Sugar - 1 tbsp
Vanilla extract - 1/2 tsp
Whipping Cream - 1 cup
POM Juice - 1 Cup

1. Position rack in the center of oven and preheat oven at 350 F.
2. Grease two 9 inch round cake pans dust with flour, tapping out the excess set aside.
3. Prepare Shortcake :
3.1. From Orange grate 2 tbsp peel and 3 tbsp juice.
3.2. With electric mixer on medim high speed beat butter until pale yellow.
3.3. Add sugar and beat until light and fluffy.
3.4. Reduce speed to low,add flour and mix until just blended.
3.5. Add orange peel,juice and one egg at a time,beat well after each addition.
3.6. Divide the batter into equal portion into the prepared pans.
3.7. Bake 25 min or until toothpick inserted in the center comes out clean.
3.8. Cool cakes in pans on wire rack for 20 min.
3.9 Invert layer onto racks ,carefully peel off the wax paper and cool completely.

Cherry almond Cake
Malaysian Delicacies
200gm ghee,diced
160g castor sugar
3 large eggs
1 tsp vanilla essence
50g ground almonds
320g self raising flour
150ml milk
150-200gm glazed cherries,halve
30g almond flakes
Grease a loaf tin and line with non stick paper.Preheat oven to 180C.

Combine all the ingredients except cherries and almond flakes in a mixing bowl.Usin g a beater,beat at medium speed until ingredients well combined.Stir in halve cherries and pour on the baking pan.Sprinkle with almond flakes.Bake for 40 to 50mins or until cake is done.Dust with icing sugar if desired.

Walnut 'n Chocolate Chip Cake
Gourmet Affair
Eggs - 4
Powdered sugar - 1 cup
All purpose flour - 1 cup
Baking Powder - 1 tsp.
Unsalted Butter - 1 cup, softened
Vanilla Essence - 1 tbsp.
Ground Cinnamon - 1/2 tsp.
Milk - 1/2 cup
Chopped Walnuts - 1 cup
Chocolate Chips - 1 cup

Sift flour with baking powder and keep aside.
Beat eggs and sugar nicely till the eggs look fluffy. Add vanilla essence and ground cinnamon.
Add butter to the egg-sugar mixture and mix well.
Gradually fold in flour till all the flour is used. Add milk to get a soft dropping consistency.
Fold in nuts & chocolate chips.
Grease the baking dish and pour the batter in it.
Preheat oven to 190°C and bake for 35-40 minutes.
Let it cool before removing from the baking dish.

Dates Prunes and walnut bread
Sumi's Kitchen
1/2 cup walnuts
1 cup chopped and pitted dates
1 cup chopped and pitted prunes
1 cup boiling water
1 tsp baking soda
2 cups All purpose flour
1/2 cup light brown sugar
11/2 tsp baking powder
1/4 tsp salt
1/2 tsp cinnomon powder ( I used 1 tsp)
1 tsp  vanilla extract
1/2 cup cold butter
1 egg

Add the dates and prunes to 1 cup of boiling water, along with baking soda and allow it to cool(at least 1 hr)
Preheat Oven to 180C. Grease and prepare a bread loaf tin for baking.

Beat the egg and vanilla essence in a seperate bowl
In a separate bowl add the flour, sugar, cinnamon and baking powder. Mix well to combine.
Add the cold , soft butter to the flour mixture and using a electric beater or food processor, mix, till the mixture resembles coarse bread crumbs.
Add the fruits along with the liquid.Add the chopped walnuts .Mix well to combine
Pour the mixture to the greased bread tin and bake in the preheated oven for 50 - 60 minutes.

French King Cake 
Priya's Easy N Tasty Recipes
 2nos Puff pastry sheet
1cup Almond powder
2nos Eggs
1/4cup Sugar
1/4tsp Almond essence
1/4cup Butter (room temperature)
1no Yellow egg yolk
1tbsp Milk

Beat the butter, sugar together in a bowl until they turns soft, add the eggs one by one and finally add the almond powder & almond essence, mix everything well and keep the bowl in fridge for half an hour..Preheat the oven to 400F, line a baking tray with a baking sheet, add the milk to the yellow egg yolk and beat well...place a puff pastry sheet ,brush the edges of the pastry sheet with the egg-milk mixture..pour the already prepared almond mixture over the pastry sheet and spread them evenly, don't spread over the brushed egg mixture...place the another pastry sheet over and give a press over the edges,so that they get well stick...
Make a small hole in the middle of the pastry sheet and with a knife make some lines over the pastry sheet as ur desire, brush now the pastry sheet with the remaining egg-milk mixture and bake in middle rack of the oven for 20-25minutes or until they turned brown..
Serve warm!! 

Marble Cake
Aathidhyam
All purpose Flour : 2 cups
White Sugar : 1 cup
Butter, softened : 1/2 cup
Baking powder : 2 Tsp
Salt : 1/2 Tsp
Vanilla Extract : 1 Tsp
Milk : 1 Cup
Roasted Cashew & almond bits-handful
Unsweetened Cocoa Powder : 2 Tbsp

Pre-heat oven to 350 degrees.Grease and flour the cake tin.Place flour, baking powder, salt, sugar, butter or margarine, eggs, vanilla, and milk into mixing bowl. Beat slowly to moisten, then beat with an electric mixer at medium speed for about 2 minutes until smooth.Add roasted nuts and mix.Reserve 3/4 cup batter; pour the remaining into pan.Stir cocoa into the 3/4 cup reserved batter. Drop by spoonfuls over top of white batter. Using a knife, swirl the cocoa batter into the white batter to incorporate it in a marble effect .Bake in preheated oven for 30 to 35 minutes, until an inserted wooden pick comes out clean.

Chunky Apple Cake With Cream Cheese Frosting
My Culinary World
Ingredients for cream cheese frosting:
1(8-ounce)package cream cheese(softened)
3Tbsp. Butter or margarine(softened)
1&1/2cups powdered sugar
1/8tsp.salt1tsp.vanilla extract

Ingredients for Cake:
1/2cup butter(melted)
2cups sugar
2 eggs
1tsp.vanilla extract
12cups all-purpose flour
1tsp.ground cinnamon
4 granny Smith apples(peeled and sliced)
1 cup chopped walnuts(toasted)

Preparation of Frosting:
Beat cream cheese and butter at medium speed with an electric mixer until creamy. Gradually add sugar and salt, beating until blended. Stir in vanilla.

Cake Preparation :
Stir together first 4 ingredients in a large bowl until blend. Combine flour and next 3 ingredients; add to butter mixture, stirring until blended. Stir in apple and 1cup walnuts. Spread into a greased 13-x9’’ pan.Bake at 350F for 45min., or until a wooden pick inserted in center comes out clean. Cool completely in pan on a wire rack. Spread with cream cheese frosting; sprinkle with walnuts, if desired.

Eggless Fruit Cake
Subhojyam
  All purpose flour (maida) – 1 cup
  Powdered sugar – ½ cup
  Butter – ¼ cup
  Baking soda – 1 tbsp
  Dates – 5 - 10 pieces (cut into small pieces)
  Mixed Tutty fruity – ½ cup
  Milk – ½ cup
  Salt – 1 pinch
For Greasing:
  Butter – 1 tbsp
  Maida flour – 1 tbsp


Preparation of Mixture:
1.    Sieve maida, salt, baking soda and then keep it aside.
2.    Take a bowl, add powdered sugar and butter and beat well for 5 mins with a blender or with a spatula by hand for 7-10 mins.
3.    After it is mixed well, add the sieved flour mixture and mix it to form dough.
4.    Once it is mixed, add milk little by little to the mixture and mix it till it becomes like a thick paste.
Beat the mixture well for 2 mins.
5.    Now add the dates pieces and tutty fruity to it and beat for another 2 mins.

Preparation of cake in pressure cooker:
1.    Take aluminum or a stainless steel vessel. Grease it with butter and just spread the flour over it.
2.    Now pour water in a pressure cooker and heat it in high flame for 2 mins.
3.    Pour the mixture in to the greased vessel. Do not place the greased vessel directly into the cooker. Take a small bowl with little water in it and place it in the cooker. Now keep the greased vessel above the small bowl and close the pressure cooker without the whistle. Do not close the greased vessel.
4.    Now reduce the flame to low and leave it to cook for 35 – 40 mins.
5.    After 40 mins remove from flame and allow it to cool for few mins, then just invert the vessel so that the cake come out in a proper shape. Decorate it as you wish.

Additional Info:  
  After 30 mins open the pressure cooker lid and check whether the cake is cooked. You can do that by inserting a thin stick to it. When you take out, there shouldn’t be any sticky paste.
  Make sure it is not overcooked. 35 mins is perfect. If you feel it needs some more time keep it for 40  mins.
  If you have a hot plate, after you heat the cooker in full flame reduce the flame to 4 or 3 and leave the cake to cook for 30 – 35 mins.
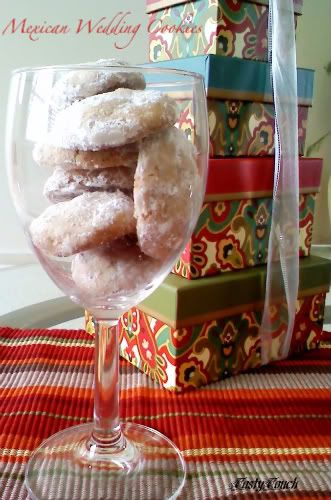
Mexican Wedding Cookies
TastyTouch
 2 sticks unsalted butter, at room temperature
2 cups confectioners' sugar
2 cups all purpose flour
1 tsp vanilla extract
1 tsp almond extract
1/4 tsp salt
1 cup Pecans ( about 3 3/4 oz)

    * Preheat the oven to 350F
    * Line two baking sheets with parchment paper
    * Pulse the pecan halves and a 1/4 cup sugar in a food processor or a blender.
    * Combine the nut mixture, flour and salt
    * Ina separate bow, beat butter, and 3/4 cup sugar on medium speed until light and fluffy
    * Stir in vanilla and almond extracts
    * Add the flour mixture and beat on low speed until well combined
    * Roll the dough into 3/4 inch balls
    * Place them in the baking sheets about a couple of inches apart
    * Bake them until the cookies are pale about 12 min
    * Let the cookies cool completely before vanishing them away!

Marble Cake
AdukalaVishesham
All purpose flour: 1 cup
Eggs: 2
Unsalted butter : 1/2 cup or 1 stick
Sugar: 1 cup
Vanilla essence: 1 teaspoon
Cocoa powder: 1 tablespoon
Baking powder: 1 teaspoon
Milk: 1/4 cup

Beat the butter and sugar until smooth. Add eggs one by one and beat well until ivory. Add milk, vanilla essence and beat well. Meanwhile sieve the all purpose flour and baking powder well. Slowly add the flour in small portions and mix well into a very smooth batter. Butter a baking dish and pour 3/4 of the batter into this dish. Add cocoa powder to the remaining batter and mix well.
Now gently pour the cocoa batter and make swirls to give the marble effect.

Fig Kuchen or Crumble
Tongue Ticklers
Ingredients:
7-8 fresh figs washed, de-stemmed and quartered
2 cups All purpose flour
2tsps. baking powder
1/4 tsp. salt
1 cup sugar ground with 1/2 a vanilla stick (is it bad to grind up the stick? I do not know!)
1/2 cup canned coconut milk + 1/4 cup if needed
1/2 cup sunflower oil or any other oil

for the crumble topping :
1/2 cup APF + 2 tbsp sugar + 1 tbsp oil

Put the flour, baking powder, salt and ground sugar in an airtight container twice in volume and shake up well to aerate the flour and mix up everything. Empty the flour mix in a mixing bowl.
Blend the oil and half of the coconut milk together in a mixer till it forms a thick yolky cream.
Pour this in the dry mixture and mix well with a wooden ladle in a cut and fold pattern.
If needed add the rest of the coconut milk (a tbsp. at a time) till the dough moves from a crumbly texture to a soft batter (not pourable but one that will fall in a single plop).
Pour this into the prepared tin and with wet fingers spread it evenly.
Arrange the figs pressing them a little.
Optional: Mix the crumble ingredients together with your fingertips till they just gather when held and break when left, into breadcrumbs.
Sprinkle this evenly on top of the cake.
Bake in pre-heated oven for 40-50minutes till golden on the sides and lightly brown on the top. The scent of figs are sure to pervade your rooms to let you know they are done!
Cool completely before cutting to wedges.

White chocolate,Orange and multi nuts cookies
Joy Of Cooking
•1/2 cup wholemeal flour
•1 1/2 cup AP flour
•White chocolate flakes(grated from the bar)
•Small piece white chocolate
•1tbsp Orange zest
•2 tbsp caster sugar
•5 tbsp Oil or Butter-she used oil
•1/2 tsp Baking powder
•1/2 cup single cream
•2-3 tbsp grounded nuts(almonds, walnuts and pecan nuts)

Rub the flour, sugar, baking powder, chocolate flakes and  zest till they turn into fine crumbs.
Mix it oil and cream. Fold in quickly till everything comes together like a soft dough.
Cover with the clingfilm and leave to rest.
Preheat the oven to Gas mark 4.  Make a small ball of the dough and place them on a baking tray.  Flatten the balls with placing a chocolate chip on them.
Bake the cookies about 25 minutes or till golden.
Transfer the cookies on rack to cool.

Chocolate chip shortbread cookies
thayirsaadham
1. Instant espresso powder - 1 tablespoon ( I skipped this)
2. Boiling water - 1 tablespoon (I skipped this)
3. Unsalted butter - 2 sticks (8 ounces) (at room temperature)
4. Confectioners’ sugar - 2/3 cup
5. Pure vanilla extract - 1/2 teaspoon
6. All-purpose flour - 2 cups
7. 4 ounces bittersweet chocolate (plain, or a toffee variety), finely chopped, or 3/4 cup store-bought mini chocolate chips
8. Confectioners’ sugar, for dusting (optional - I did not use this)

Method
1. Dissolve the espresso in the boiling water, and set aside to cool to tepid.
2. Working with a stand mixer, preferably fitted with a paddle attachment, or with a hand mixer in a large bowl, beat the butter and confectioners’ sugar together on medium speed for about 3 minutes, until the mixture is very smooth. Beat in the vanilla and espresso, then reduce the mixer speed to low and add the flour, mixing only until it disappears into the dough. Don’t work the dough much once the flour is incorporated. Fold in the chopped chocolate with a sturdy rubber spatula.
3. Using the spatula, transfer the soft, sticky dough to a gallon-size zipper-lock plastic bag. Put the bag on a flat surface, leaving the top open, and roll the dough into a 9 x 10 1/2 inch rectangle that’s 1/4 inch thick. As you roll, turn the bag occasionally and lift the plastic from the dough so it doesn’t cause creases. When you get the right size and thickness, seal the bag, pressing out as much air as possible, and refrigerate the dough for at least 2 hours, or for up to 2 days.
4. Position the racks to divide the oven into thirds and preheat the oven to 325 degrees F. Line two baking sheets with parchment or silicone mats.
5. Put the plastic bag on a cutting board and slit it open. Turn the firm dough out onto the board (discard the bag) and, using a ruler as a guide and a sharp knife, cut the dough into 1 1/2-inch squares. Transfer the squares to the baking sheets and carefully prick each one twice with a fork, gently pushing the tines through the cookies until they hit the sheet.
6. Bake for 18 to 20 minutes, rotating the sheets from top to bottom and front to back at the midway point. The shortbreads will be very pale–they shouldn’t take on much color. Transfer the cookies to a rack.
7. If you’d like, dust the cookies with confectioners’ sugar while they are still hot. Cool the cookies to room temperature before serving.

Orange sable cookies and Pistachio-ginger melbas
Soulful Creations

Orange sable cookies
1 1/4 cups slivered almonds
1 cup confectioners' sugar
6 tbsp crisco and 6 tbsp unsalted butter
3 tbsp finely grated orange zest (2 to 3 oranges)
1 tsp clove powder
1/2 tsp freshly grated nutmeg
1 large egg
1 tbsp freshly squeezed orange juice
1 1/2 cups all-purpose flour
1 cup sanding or granulated sugar, for rolling

Pistachio-ginger melbas
1 1/2 cups all- purpose flour
1/4 tsp fine salt
1 cup sugar
1 tbsp packed grated lemon zest
2 tsp grated orange zest
4 large eggs
1 cup whole raw pistachios
1/2 cup chopped crystalline ginger

Orange sable
Method
Place almonds and confectioners' sugar in the bowl of a food processor. Process until mixture resembles coarse cornmeal; set aside.
Beat the butter and zest on medium speed until light and fluffy, 2 to 3 minutes. On low, add almond mixture; beat until combined, 10 to 15 seconds. Add egg and orange juice; combine. Add flour; combine.
Place two 12-by-16-inch pieces of parchment on a clean work surface. Divide dough in half. Form a rough log with each half; place on parchment. Fold parchment over dough; use a ruler to roll and press dough into 1 1/2-inch-diameter logs. Wrap. Chill for at least 3 hours.
Preheat oven to 350 degrees. Line two baking sheets with parchment. Spread sanding sugar in a baking pan. Unwrap logs; roll in sugar to coat. Cut into scant 1/4-inch-thick rounds; place on sheets, 1 inch apart. Bake until edges turn golden, about 15 minutes, rotating halfway through. Transfer to a wire rack to cool.

Pistachio-ginger melba
Preheat to 350°F. Grease a 9 by 5 inch loaf pan with Pam for baking with flour.
Whisk the flour and salt together in a bowl.
In another medium bowl, rub the citrus zests into the sugar with your fingers until the sugar is fragrant and takes on a bit of the fruit color. Beat the eggs into the sugar until blended. Stir in the flour mixture to make a smooth, sticky but pourable batter. Stir in the pistachios and  ginger. Pour the batter into the prepared pan, and smooth the surface lightly with a spatula.
Bake until the loaf is lightly browned and pulling away from the sides of the pan, about 40 to 45 minutes. A skewer inserted into the center should come out clean, and the loaf will look like a not so great pound cake. Let stand for 10 minutes, then remove from the pan and cool on a rack for 1 hour.
Wrap the loaf in plastic and freeze until firm, about 30 minutes.
Preheat the oven to 300°F.
Slice the chilled loaf as thin as you can — 6 to 8 slices to the inch. Lay the slices flat on 2 baking sheets and bake until brown, 10 to 15 minutes. (Take care — the cookies can go from pale to dark brown quickly.)
Let stand overnight or for at least 12 hours on a rack to cool and crisp up. Serve. Store in a well-sealed jar or other container.

Cherry Cookies
Homecooked
1 cup all-purpose flour
1/2 teaspoon baking powder
1/4 teaspoon baking soda
1/4 teaspoon salt
1/2 cup butter(room temp)
1/2 cup granulated sugar
1 large egg
1/2 tsp vanilla essence
1 tbsp maraschino cherry juice
1/2 cup chopped pecans or walnuts
1 cup corn flakes, crushed
15 to 30 maraschino cherries, halved, blotted dry

Line a baking tray with wax paper. Grease the paper lightly and keep aside.
Mix together the flour, baking powder, baking soda and salt. Set aside.
In large bowl cream together the butter and sugar until fluffy; add eggs,vanilla essence,cherry juice and blend well.
Stir in flour mixture until just mixed. Fold in the chopped nuts. If needed refridgerate for about half an hour.
Preheat oven to 350 degree F or 175 degree C.
Crush the cornflakes and place them in a bowl.
Roll the dough into small balls with your hands and roll them in the crushed cornflakes. Place them on the baking tray 2 inches apart.
Cut the maraschino cherries into quarters and place a couple on the top of each cookie and press it down  lightly.
Bake for 10 to 12 minutes or until nicely browned. Cool completely and store in an airtight container.

Apricot Orange Cookies
Monika's World
    * 3/4 cup whole wheat flour
    * 1/2 cup butter
    * 1/4 cup powdered sugar
    * 1/4 tsp baking powder
    * 1/4 tsp soda-bi-carb (I skipped this and put more baking powder)
    * 2 tbsp dried chopped apricots (
    * 1 1/2 tbsp chopped nuts
    * 2 tbsp orange flavored drink mix (I used Kissan sqaush)
    * 1/3 cup milk
    * 1/2 tsp butter for greasing

    * Combine all the ingredients together in a bowl and whisk to get a soft dough
    * Mould into medium sized balls, flatten and make a cross sign on the top with a knifefri
    * Bake in a pre-heated oven at 160 C for 20 minutes or till the cookies are golden brown in colour
    * Enjoy warm or eat after cooling
    * Can be stored for a long time only if they last

Cumin Cookies
In my passionate world.....:)
Maida/All purpose flour - 1/2 cup
Wheat flour(atta) - 1/2 cup
Pepper powder - 1/2 tbsp
Cumin seeds - 1 tbsp
Baking soda - a pinch
Salt - to taste
Oil - 3 tbsp
Milk - as reqd to knead to a stiff dough (I used 1/4 cup)

1.In a bowl, mix the flour, baking soda, sugar, salt and oil. Add the milk and knead to a stiff dough till its not sticky.
2.Roll the dough to about 2mms thick, but this didnt work out for me as I cudnt roll it evenly so what I did was to press it in the roti maker, this way it was easy and quick!
3.Using a cookie cutter cut into round shapes, I used a lid to cut it. Now bring together the remaining scrapings, roll out again and repeat the process till the entire dough gets over.
4. Pre heat the oven at 180 deg C for 10mins. Grease the baking tray, arrange the cookies and place the tray in the center of the preheated oven and bake for 20mins.
NOTE:The actual recipe says 20-25 mins but mine got baked in 20mins so keep an eye after 20mins.
5.Remove the cookies from the oven, allow it to cool and then store them in air tight containers.
They were crispy and little crunchy......The pepper & cumin flavour compliments each other well, making it perfect to munch during tea time!

Chocolate Chip Cookies
Queen of my Kitchen
1.5 cups walnuts
1.5 tbsp canola oil
1/2 c. brown sugar
1 tsp vanilla extract
3/4 c. oat flour
1/2 tsp baking soda
1/2 tsp salt
1/8 th tsp cardamon pwd

1 cup rolled oats
3/4 c. chocolate chips

- Preheat oven to 375F. Coat a large baking sheet with cooking spray.
- Mix the brown sugar with 1/4 c. water and bring to a boil. Take off heat.
- Add the walnuts, oil and vanilla extract to this. Blend till smooth.
- In a separate bowl, mix the oat flour, baking soda, salt and cardamon pwd. Stir this flour mix into the walnut mix.
- Then add the rolled oats and chocolate chips to the mix.
- Shape the dough into about 15 2 inch balls. Lay them on the baking sheet. Flatten the cookies with the bottom of a drinking glass dipped in water.
- Bake 10 -12 minutes till they begin to brown. Cool 3 minutes on the baking sheet, then transfer to a wire rack to cool completely.


Double Chocolate Chip Cookies
Cook-curry Nook
Whole Wheat flour - 2 1/4 cup (I used whole wheat flour to make it healthy. Feel free to replace with all purpose flour if you aren't feeling too health conscious!)
Cocoa powder - 2/3 cup
Baking Soda - 1 tsp
Salt - 1/4 tsp
Butter - 1 cup (softened)
Sugar - 3/4 cup
Brown Sugar - 2/3 cup(packed)
Pure Vanilla extract - 1 tsp
Eggs - 2  nos, large size (for the vegans, replace with 1 teaspoon of baking soda along with 1 tablespoon of white/apple-cider vinegar, for each egg to be replaced)
Dark Chocolate chips - 2 cups

Pre-heat oven to 180 C (350F).
Sieve the flour, cocoa, baking soda and salt together about 2-3 times to ensure even mixing. Set aside.
Beat butter, sugar, brown sugar and vanilla extract till it forms a peak consistency (The mixture should form peaks on the top surface).
Add the eggs, one at a time, beating well after each addition.
Gradually beat in the sieved flour mixture.
Stir in the chocolate chips with a spatula.
Using your hands, make small portions of the dough and form small balls.
Slightly flatten them with your palms and place them on the cookie sheet/tray, leaving at least 2 inches gap between the cookies.
Bake for 11 minutess or until the centers are set. Cool on the baking sheet for 2 mins, then remove to cool completely on wire racks.
Enjoy the heavenly treat with a nice, hot cuppa in the evening, or just with a glass of chilled milk to go along with your breakfast...you know, like I call it that 'Chocoholic Bliss'!! ;)

Traditional Fruit Cake
The Footloose Chef
Set I

Chopped dry fruits and nuts - 3 cups (I used dates, apricots, golden raisins, jumbo raisins, walnuts, cashewnuts, prunes)
Orange peel - 1 medium sized orange's rind with the white pith scraped out (cut into small pieces)
Rum (use any spirit you have at hand) - 2 cups

Set II

Self raising flour - 2 cups
Whole wheat flour -1 cup
Almond meal - 1 cup (1/2 cup of almonds powdered in a coffee grinder or mixie jar)
Baking powder - 1 teaspoon
Packed soft, dark brown sugar - 1 cup
Unsalted butter - 1/2 cup (about 100gms)
Canola oil - 3/4 cup
Egg whites - 5
Powdered mix spices (cardamoms,nutmeg, cloves, cinnamon) - 1 teaspoon
Vanilla essence - 1/2 teaspoon
Warm water - 1 cup
Whisky - 1/2 cup (for the final drizzle)

Put all Set I ingredients together in a skillet and toss till warm, and an aroma emanates. Close lid and let stand overnight. In the morning, I placed this in the fridge and let stand for another 10 hrs or so. Bring to room temperature before using in the cake.
Sift the flours and baking powder together for even mixing. Toss in the almond meal into the fruit mixture and mix well. Add the flour bit by bit and mix well.
Beat the sugar, butter, and oil together till frothy ( i used an electric hand blender). Add the egg whites and whisk again till soft (the more the merrier). Add the spice powder and vanilla essence. Pour in a cup of warm water. Add the flour and fruit mixture and blend in taking care that no lumps are formed (add in a little by little).
Pour into a cake tin double lined (2 layers) with baking parchment. Preheat the oven at 250° for 15 minutes. Place the cake tin inside and bake at 150° for 1 hour and 5 minutes. Remove from oven and gently ease in a skewer to check if done. Make tiny skewer holes throughout the body of the cake and drizzle in whisky (or any other spirit). Wrap with aluminium foil and allow to mature for about 10 hours.
PS: Don't worry if the cake that comes out of the oven seems very dry (it will be). That liberal splashing in of whisky and allowing the cake to mellow will make it soft.