Monday, April 30, 2012

Ghee / Neyyi / Tuppa or Clarified Butter

Making Ghee (Clarified Butter) at Home


This has been a long pending post, and  is especially for my cooking class students in Sydney!  Ghee (Hindi) / Neyyi (Tamil) / Tuppa (Kannada), is clarified butter, and very commonly made in Indian households. It is very simple to make,  yet tricky for those making it for the first time.

Indian food is incomplete without some absoloutely yummy delicious fragnant golden ghee! Its a very healthy saturated fat, unlike the yucky hydrogenated vegetable oils which are flooding the market, and even better than vegetable oils as well!   And before, my post swings away into why  ghee is better than oil,  I better get back to the recipe!

It is critical to use the best quality butter you can get your hands on to make good ghee. Ghee should be a nice yellow colour, granular (see close up  snap below), and aromatic.   The best ghee I have had is in my childhood. My grandparents had cows at home, who were revered and fed the best grass and hay. So the milk, butter and ghee where all made at home. I am yet to see ghee of that quality anywhere in all these years. 

The butter I've used below Lurpak unsalted butter. Its produces good ghee. However, my last batch was made with a grass-fed organic brand, which was far better in colour, flavour and aroma.

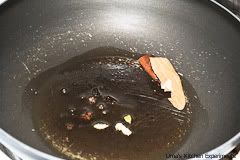
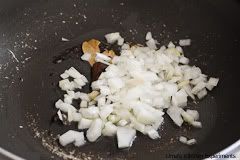
The recipe for ghee is simple:  Heat unsalted butter on a very low flame, and keep cooking until all the moisture evaporates, and the honey coloured clear liquid separates!   The pitures below show different stages.  The butter will first melt and start boiling. You can see the froth bubbling on top. After sometime, the froth may thin out, and if you gently blow on the surface you can see clear liquid below. At the base of the vessel you may find some white solids collecting as well. Once the white solids start turning pinkish brown, you must switch off the flame. You can add a pinch of salt, which helps the solids to stick  together, thereby making it easier to filter out the ghee. You can add flavourings such as cinnamon, cardamom, cloves if you want. In this case I added bay leaf (and no salt), which not only added flavour, but also helped gathering the solid particles to together. Addition of salt / bayleaf also helps in getting the desired granular texture of ghee. My grandmom used to say "Nalla neyyi manal madiri irrukanum"which means "Good ghee should be almost like sand"!!   Pour out the liquid ghee carefully into a clean dry glass or stainless steel container.  You can use a filter if you wish.  When the ghee cools, it will  solidify.  


500grams of unsalted Lurpak butter

The butter has melted.

The mositure is evaporating and froth is thinning out.

Clear honey coloured ghee is seen below the froth. Time to switch off the flame.

Bayleaves have been added.

Carefully pour out only the liquid in a dry steel / glass container.


Look at that amazing yummy ghee!


Notice the granular texture of this beautiful ghee!


Few Tips:
1. Use the best quality butter you can find. Grass-fed organic butter is good!
2. Use a fairly thick pan and a very low flame.
3. Make sure you don't overcook or undercook. Once ghee is made its a matter of minutes before it overcooks! The colour will turn dark brown, and it will smells burnt and bad. If the smell changes, discard the entire batch! Its bad for health, and spoils the taste of food. If ghee is undercooked and any moisture is present, it will go rancid!4. Store ghee in a dry glass / steel jar in your pantry. Use a dry spoon always. Never put your ghee in the fridge - this will reduce the life span of ghee, as the condensation in the fridge will again cause your ghee to go rancid quickly. If properly stored, your ghee will last for months - if you haven't already eaten it!

Event: CWS - SoyBean - 1st May to 31st May 2012


Hello Friends,

I am guest hosting a beautiful event "Cooking With Seeds" which was started by Priya of "Priya's Versatile Recipes". She has a beautiful space full of very delicious and awesome clicks of the recipes which are very inviting.

Well this month I am hosting her series event "Cooking With Seeds" and choose this months spices as "SOYBEAN". This guest event will start from the 1st of May and end on 31st May. So please send in your recipes to anu.healthykitchen@gmail.com or leave a comment.

Please link all you recipes to this guest event page and Priya's event page.

Make sure you send in your recipes with recipe name, your name, your blog/website url, recipe link and pic link.

Use of Logo is mandatory to participate in this event.

SoyBean:
----------
SoyBean is a healthy source of protein and oil. It is widely used in the form of meal, soy milk, tofu, soy sauce etc.,
To consume soybean must be cooked properly.
SoyBean is considered as a complete protein source. A complete protein is one that contains significant amounts of all the essential amino acids that must be provided in the human body because of the inability to synthesize them. For this reason, soy is a good source of protein, among many others, for vegetarains and vegans or for the people who want to reduce the amount of meat they eat.

so try to add it regularly in your diet and if at all you try any recipes this month....don't forget to link it here.. :)

Hope to see some innovative, creative and healthy recipes!

Announcing Serve It Series - Serve It - Preserved


The theme(s) we selected for the May Edition of 'Serve it' is Preserved. Remember the summer holidays back home when we go to grandma's place, meet all cousins and spend lot of time playing under the sun?? We used to make full use of the sun by getting scorched by the heat and getting back home only for our meals and drinks break - Rasna and lemon juice. Oh... how we miss those days. During

Link Ups

I love link ups they are a great chance to meet new blogging friends.

I also love so many of the blogs out there, they have great ideas, are fun and sometimes make me realise we are about as normal  here in the Kitchen as anyone else!! 

So today I have joined a link up at The Sasse Life. Check it out.

The Sasse Life

The second Link Up i want to tell you about is here:


I was featured, I was Featured by Addicted to Recipes


And a brilliant Blog Hop:


Sunday, April 29, 2012

Tomato-Okra Raita/Thakkali-Vendaikai Thayir Pachadi

Thayir Pachadi or Raita is a Definite Menu in a Festive Spread in every South-indian Home. It is served as an Accompaniment to the Vadai/Lentil Snack part of the Spread.  Mostly because Vadai/Lentil Snack taste awesome when served hot, but when it is cold, it gets somewhat dry and definitely needs a spicy dip to push it down the throat. 
Raita/Thayir Pachdi is easy to make and taste great with the mild spices in it. Amma used to make a large quantity of this coz, we three siblings used to have it with Curd Rice too. These 7 days Menu had a lot of Bhindi/Okra Recipe, i used it often, since it is easy to make anything out of it. This Raita or Thayir Pachadi is yet another recipe to prove the versatility of this slimy Vegetable.
This recipe can be made using Brinjal/Tomato/Ash gourd/Cucumber also.

Ingredients
8-10 Okra's/Lady's finger/Bhindi or any of the above given veggie.
1 Cup yoghurt, Whisked
1 small tomato 
Salt to taste

Tempering
1-2 tsp Oil
1/2 tsp Mustard Seeds/Kadugu
a sprig of curry leaf
3 nos green chilies, slited lengthwise
1/4 tsp turmeric powder
hing a pinch

Method
  • Wash and Pat dry the Okra's/Lady's finger with Kitchen Towel. Trim the head and tail and cut them into 1 inch pieces.
  • Heat a tsp of oil in a Non-stick pan, and Saute the Lady's finger in a low flame until it is cooked. The rawness of the vegetable must escape completely and it should be roasted on all the sides. This is will take about 10-12 minutes. Once done, Take it off the flame and Drain it on a kitchen towel.
  • Heat another tsp of oil in the same pan, splutter mustard seeds, add green chilies and saute, add hing, turmeric and curry leaf, saute everything for a minute or two.
  • Add chopped tomatoes and cook till it turns mushy and oil separates, add the sauteed okra's/Lady's Finger to this and mix well, sprinkle little salt for the veggies.Switch off the stove.
  • In a Deep Bowl, add yogurt and salt needed for the yogurt and whisk well. Add the sauteed okra-tomato mixture to this and mix well. Chill until served. Serve as a Dip.

Saturday, April 28, 2012

Nuggekaayi Tili Saaru - A Spicy Clear Soup With Drumsticks

NUGGEKAAYI TILI SAARU 

 We had to break our journey at a relative's place on our return trip after a great holiday. The hostess was my father's cousin and she made us very comfortable with her kind hospitality and treated us with a simple yet delicious dinner.
 The flavoursome and delicious saaru / rasam she served us  made us even more ravenous after the hectic journey.We hungrily waited for the next course, with rice already served on our plates.
 Once again the hostess plunged the ladle into the same saaru vessel. Out came the ladle with a thick nuggekaayi bele huli / sambaar which we thoroughly enjoyed with the hot steaming rice!
 It was amazing the way  the flavoursome tili saaru / rasam and the thick delicious bele huli / sambaar were cooked together in one and the same dish!
 Here is a recipe  for  Nuggekayi Tili Saaru.


INGREDIENTS


Drumsticks - 2 ( cut into three inch pieces )
Tamarind - the size of a plum
Tomatoes - 2 halved
Salt - 3/4 tsp
Curry leaves - a few
Asafoetida - 1 pinch
Coconut gratings - 2 tbsps
Pepper - 1 1/2 tsps
Coriander seeds - 1 tsp
Cumin seeds - 1/2 tsp
Fenugreek seeds - 1 pinch
Garlic - 2pearls
Ghee - 1 tsp
Mustard seeds - 1 pinch
Fresh coriander leaves - for garnishing

METHOD

 1. Soak tamarind and the halved tomatoes in boiling water.
2. Dry roast coriander seeds,  fenugreek seeds and pepper till the pepper crackles.
3. Add cumin seeds and roast till you get a pleasant aroma.
4. Crush the dry roasted ingredients coarsely using a pestle.
5. Add the peeled garlic pearls to the coarse powder, pound together and keep it aside.
6. Squeeze the soaked tamarind and tomatoes, extract the juice and add enough water to make 2 glasses.
7. Add salt, asafoetida, curry leaves, fresh coconut gratings and the cut drumsticks to the juice and boil till the drumsticks are tender.
8. Stir in the pounded ingredients and immediately add one more glass of water in a slow stream so that a foam is formed on top of the saaru.
9. Add chopped coriander leaves, cover with a lid and allow it to simmer on low flame. \
10.Turn off flame before the saaru boils over.
11. Heat ghee and add the mustard seeds and pour the seasoning over the tili saaru when the mustard seeds crackle.


Enjoy the hot Nugge Kaayi Tili Saaru before starting your meal.

Thursday, April 26, 2012

Upcoming: Press release to take place May 4th at 11am, at 2021 Ontario St. Located at the Low/Paul Martin house. All are welcome!

Quinoa Pilaf / Quinoa Coconut Milk Pulao in Pressure Cooker | Indian Quinoa Recipes


Looks like I have been posting at least one Quinoa recipe every month and I am happy about it. This time it is a simple and tasty Quinoa coconut milk pulao or Indian Style Quinoa Pilaf. This recipe is inspired by the Semiya pulao recipe of Chef Dhamu. I loved it very much. I made little tweaks to fit in my favorite quinoa in the same recipe and here it is. It is a one-pot meal and a perfect one

Wednesday, April 25, 2012

Kitchen - The Chef 's Paradise: Tips & Tricks

Kitchen - The Chef 's Paradise: Tips & Tricks:                                                                   Image Source: Graphics Fuel This page is all about tips and tricks in ...
Back in the day,  Low/Martin House.  1930's  Ish.

Tuesday, April 24, 2012

Croissant Chicken Pizza Bake


I had this when one of my friend bought this for lunch, it smelled so good and tasted awesome. So I wanted to try this at home and make my work easy. Wow, I bet it reduces a lot of hard work and this simple recipe is lot more tastier. You can choose any meat you want, I used little bit of ground chicken and turkey.

Ingredients:
------------
1 Croissant Roll
1 lb Ground Chicken
1 pod Garlic crushed
1/2 cup Grated Cheese ( I used cheddar, you can use any)
1/2 to1 cup Chips crushed (I used Fritos - Tapatio)
1 tsp Taco Seasoning or any blend of spices u want
Salt and Pepper to taste
1/2 tsp Olive Oil

Method:
---------
1. In a heavy bottom pan add oil and when it's hot enough add garlic, ground chicken and cook the meat first on high flame and break down the lumps with a wooden spoon for about 4-5 mins.


2. Now bring down the heat to a medium and cook until the meat is cooked and there is no water.
3. Off the heat and let it come to room temperature.


4. Now roll out the croissant dough on a greased baking pan and then spread the meat on top, then sprinkle with cheese and then finally top it with the crushed chips. (Note: you can do any variations in all the ingredients as you want it or even do with veggies)


You Might Also Like:
Veg (Potato) & Non-Veg (Chicken) Samosa - MADE EASY
Cajun Fried Chicken Fingers
Chicken Kabab

Mixed Dal Tadka

I have been so busy plus idle for the past few weeks. I am craving for good home food prepared by Mom. But life as a wife in America is all about food cravings and missing dear ones. Left with no choice I had to prepare some yummy but simple food for myself and DH. What better dish could be comforting than making Dal and Rice. I made this yummy dinner for the both of us and trust me..It was so very relaxing!!


Ingredients:

Toor Dal - 1/4 cup
Moong Dal - 1/4 cup
Masoor Dal - 1/4 cup
Turmeric powder - 1/8 tsp
Medium Tomato - 1 - Chopped
Mustard seeds - 1/4 tsp
Cumin seeds - 1/4 tsp
Red chillies - 3-4
Curry leaves - A few
Red chilli powder - 1/4 tsp
Asafoetida - A pinch
Cilantro - To garnish
Oil / Ghee - 1 tbsp
Salt - To taste

Method:

  • In a vessel combine the three dals and add a pinch of turmeric powder and salt and pressure cook it for 3 whistles.
  • In a wok, heat oil/ghee. add the mustard seeds, cumin seeds, red chillies and curry leaves.
  • Once they crackle and splutter, add the chopped tomato and cook on medium heat until the tomatoes are cooked well.
  • Add asafoetida, red chilli powder and turmeric powder to the tomato mixture.
  • Mash the cooked dal and add the dal to the tomato mixture. 
  • Mix it all well.Garnish it with cilantro.

  • Serve hot with Rice and Roti.. Enjoy the simple and comfort food that gets ready in no time.

Sending in this entry to Serve It Series - Serve It - Pressure Cooked. This is my first entry for any activity in the blogging world. Hope to participate in many more such entries..


Kitchen Tip 3

Sticky glue left over from when a label or sticker has been taken off can be removed with peanut butter. 
Smear some peanut butter over the sticky glue, leave for a few hours and wash off.
 The glue comes off with the peanut butter!

Monday, April 23, 2012

Corn and Peas Pulao


Eight to Ten years ago. I don't  remember exactly which year. I first prepared pulao at my aunt's kitchen based on her instructions.


After 2 continuous attempts, I was able to bring up the taste but not the texture of pulao. Those days, I was a beginner and didn't even know to cook rice correctly.


So I skipped the part of cooking rice along with vegetables and I cooked both seperately and mixed them together. Most of the time, my aunty cooked rice and helped me to prepare pulao. Till now I am following this method for making pulao to maintain the pulao texture even though I have gained some experience to perfectly cook rice.


Basic Information:

Preparation Time: 15 minutes

Cooking Time: 20 minutes + 20 minutes to cook rice

Serves: 2-3


Ingredients:


Oil - 3 teaspoons

Cardamom - 2 nos, roughly crushed

Bay leaves - 1 no

Cinnamon  stick - 1 inch length

Cloves - 2 nos

Onion - 1/4 cup, finely chopped

Ginger - 1 inch length

Garlic - 3 cloves

Green chilli - 2-3 nos

Corn - 1/4 cup, fresh or frozen

Green peas - 1/4 cup, fresh or frozen

Coconut milk - 1/4 cup - 1/2 cup

Rice - 1 cup

Water - 2 cups

Salt - to taste


Method:


1) Wash the rice 2 - 3 times and add 2 cups of water. Microwave or cook in pressure cooker or choose your perfect way of cooking rice. Pick any the above to cook the rice. Make sure to cook rice correctly and It shouldn't stick with each other.

2) Spread the cooked rice in a wide plate and allow it to cool.

3) Meanwhile, take a wide non-stick pan and heat 3 teaspoons of oil in it. You can even use more oil if you prefer.

4) When the oil is hot, throw the spices. Make sure to crush the cardamom and cloves to avoid bursting.


5) When the spices spread nice aroma in the kitchen, add onion and saute.

6) Make sure not to brown the onion and saute without changing the colour. Onion has to be soft and translucent and should not turn brown.


7) Make a paste using ginger, garlic and green chilli. Add this paste to the sauteed onion. Fry for 2 minutes.

8) Add corn and peas to the pan. Stir well.

9) Add coconut milk. Cover and cook till corn and peas cook well. It might take 4-5 minutes.


10) Now, open the pan and cook till the coconut milk completely evaporates. Add salt and mix well.

11) Add cooled rice and gently mix well.


12) Serve with any of your favorite side dish. We had it with cauliflower dry curry.


Note:

1) If you are using basmathi rice, follow the cooking instruction given in the pack and cook the rice as per the instructions.

2) You can also cook rice along with corn and peas. But you will find the above method is easy.

3) Increase or decrease the corn and peas quantity as per personal preference.

4) Try to use fresh/frozen corn and peas for best results of this pulao.

5) Kindly ignore the noise in few pictures. I have noticed it only during publishing the pictures.

CRAB CURRY


This is my 100th post here!!

This crab curry belongs to my native place. My mother as well as my mother in law cooks in this delicious way. The spice powder they make with rice, fennel, and peppercorns enhances this dish nicely. That is the secret of this dish’s taste. There is no need for a separate kuzambu as this gravy goes well with hot rice.


ண்டு குழம்பு 

Ingredients: 

Crabs-5

Finely sliced onion-3

Finely chopped tomato- 1 cup

Ginger-garlic paste- 1 tsp

Curry leaves- a handful

Chopped coriander- 4 tbsp

Salt to taste

Oil- 4 tbsp

Turmeric powder- half tsp

Chilli powder- 1 1/2 tbsp

Grind the following ingredients to a fine paste:

Shredded coconut- 1 cup

Fennel seeds- 1 tsp

Dry roast the following ingredients to golden brown and powder them finely:

Fennel seeds- 1 tsp, peppercorns- 1 tsp, raw rice- a handful, cumin seeds- half tsp 

Procedure:

Clean the crabs well and cut each crab in to two pieces.

Heat a big pan and pour the oil.

Add the sliced onion and the tomatoes with the ginger garlic paste and the greens.

Cook on medium fire until all the water evaporates and the oil floats on top.

Add the crab pieces, ground paste, turmeric and chilli powders with enough salt.

Let the kuzambu boil for some minutes until the crabs are cooked.

Finally sprinkle the fried powder little by little.

Mix well and let the kuzhambu boil for some more minutes.

The spicy crab curry is ready to serve now!!


BRINGING IT BACK!