Monday, May 31, 2010

Cabbage Vadai - T&T Zlamushka's Spicy Kitchen

Have a become Quite a Back Bencher in Blogging now-a-days :(. Posting 2 posts @ midnight for the Events on the last day, hmmm Lazy girl. Cabbage Vadai from Zlamushka's Spicy Kitchen, bookmarked them the day Ms.Lakshmi announced the event, but made them only this weekend. Came out great and first time i m using Red Dal, it was quite good. May be will try for other Vadai/Fritters also.
I m not posting the recipe again, Pls check for the Original Recipe . This Vadai goes great for the Afternoon Lunch or Evening Tea.

Sending this to T&T Event Hosted by Ms.Lakshmi Venkatesh of Kitchen Chronicles, Event by Zlamushka


Eggless Apple Banana Choco Muffins

Eggless Apple Banana Choco Chips Muffins -Uff!!! that's a Longgggg Name! Chuck the name, the taste of these muffins, were great. This is a Adaptation of Priya's Eggless Banana Choco Bread, I have just tweaked it a bit. I think i made some justice to the Original Recipe.

Ingredients
1/2 cup All Purpose Flour
1/2 cup Wheat Flour
1/4 cup Thick yoghurt
1 Ripe Banana, mashed
1 Small Apple, finely shredded
1/4 cup Oil
1 tbsp Flaxseed meal
3 tbsp Hot water
1/2 tsp Baking powder
2 fisful of Choco Chips

Method
Preheat the oven @ 350F/180C for 10 minutes. Grease the muffin tin. Sieve AP flour, Wheat flour and baking powder together in a bowl. Take yoghurt,sugar and oil in a large bowl and whisk until soft.  Mix flaxseed meal in hot water into a thick paste. Mix mashed bananas and Flaxseed paste to the yoghurt mixture and beat well for few minutes. Now add the flour mixture to the yoghurt mixture slowly, add thegrated apple and  choco chips ,mix well. 

Spoon this mixture to the muffin cans and bake for 25-30 minutes. Enjoy with your Evening tea or Great for Morning Breakfast too.
Sending this CFK-WWF, hosted by Priya (Yallapantula) Mitharwal, Event started by Sharmi


Sunday, May 30, 2010

Wholesome Blacky Bread


What is in your mind when you look at this bread? Yes, healthy and...... must be a solid or hard texture bread, right? At first, I thought it is but I don't care as I was thinking to get all the goodness for my body. 


Somehow the outcome surprising me with a very soft texture like those milky bread and it stay soft until the third day. I deeply falling in love with this recipe because its wholesomeness and softness had encouraged me  to bake this more often. 


The bread consists of whole wheat flour,  黑八珍 and some walnuts. I use to drink this 黑八珍 for breakfast that contains eight kind of goodness in it. There are 黑芝麻, 黑木耳, 黑米,黑豆,黑枣,黑麦,黑糖,灵芝. all blended into powder which can be easily melted in hot water for breakfast. All these are good for ladies if you know all the ingredients. The bread taste really good, not only the softness but the crunchiness of walnut and the taste of 黑八珍, fantastic!I think the dough can be baked in a loaf tin or make it into little buns, either use it for sandwich or any favorite spread or just eat as it is. I will add some dry fruits, sunflower and pumpkin seeds for my next baked. Anyone like healthy and soft texture bread, give this a try!


Recipe for a loaf of bread:  142g bread flour / 50g 黑八珍 / 40g whole wheat flour / 5g milk powder / 10g caster sugar / 3g salt / 5g yeast / 120g fresh milk / 48g water roux / 13g unsalted butter / 75g chopped walnut / some wheat bran for coating


Recipe for the water dough "water roux": Cook 125g water with 25g bread flour at medium low heat, keep stirring until it become thicken and no lumps left. If you've a candy thermometer, measure it until the temperature turn to 65C then turn of the heat. I didn't measure it with thermometer, so I cook it until like a baby porridge. Transfer to a clean bowl and cover with a cling wrap to avoid skin forming. The amount of water dough here would be more than a recipe required, you could store it in a the fridge for 2 days, if the color turn to dark grey.


Knead all the ingredients with a dough hook mixer except butter until the ingredients combine into  a dough. Add in butter and continue the kneading process until the dough no more sticking at the side of the mixing bowl. It should be smooth and elastic. Let it proof for 40 minutes in a clean bowl cover with cling wrap. Punch out the gas and shape into a ball shape to let it rest for 10 minutes. Flatten the dough with a rolling pin. Place the chopped walnuts around then roll up into a loaf shape.
Prepare some water on a clean plate and place a kitchen towel on the top. Damp the surface on the dough and run the damp surface with the wheat bran. Place on a baking tray and let the dough proof for 40 minutes.
Bake at 180C for  25 minutes.


    Karuvepilai Saadam/Curry-Leaves (Brown) Rice - Reposting for Green Gourmet Event

    Another Tasty Recipe using Brown Rice. Curry leaf is used in South Asian traditional medicine to treat the digestive system, skin conditions and diabetes. Its anti-diabetic properties are supported by scientific research

    Ingredients
    2 cups of Brown Rice, Cooked
    2 fistful of curry leaves
    3-4 no. Red Chillies
    1 tbsp urad dal
    1 small lemon-size of Tamarind
    Grated Ginger 1 tsp
    Salt to taste

    Seasoning
    1 or 2 tsp Canola oil
    1 tsp Mustard seeds
    1 tsp Chana Dal/Gram Dal
    hing a pinch
    turmeric a pinch

    Method
    Wash and Dry roast the Curry leaves, Roast urad dal, red chillies with lil oil. Let it cool, now grind urad dal, chillies, tamarind, ginger and curry leaves together to a fine paste.
    Heat oil in a wok, splutter mustard seeds, add hing and turmeric, and chana dal, let the dal roast a bit then add the grinded paste and saute for 2-3 minutes. Take it off the flame and mix with Rice.Enjoy it with a Raita

    I made some Cucumber-Onion Raita. 

    Ingredients
    Half a Cucumber
    one small Onion
    1/2 a cup Low-fat Yoghurt
    Salt to taste

    Mix them all together and adjust the salt.
    Sending this post to Show me your Whole Grains, Event hosted by Divya of Dil Se
    Reposting for Green Gourmet Event @ W'rite 'Food

    Veggie Rawa Idly

    Weekend Mornings are Lazy Mornings. We need something Filling, tasty, healthy and @ the same time Quick breakfast Idea to KickStart the day. Here's one such Quickie Breakfast Recipe!!!! Steaming Hot Hot Rawa Idlies with a Spicy Chutney!!

    Ingredients
    2 cups of Rawa/Sooji/Semolina
    2 cups of Sour Yoghurt,Whisked
    1 tsp of Eno Fruit Salt
    Salt to taste

    For Seasoning
    2 tsp oil
    1 tsp Mustard Seeds
    1 cup Mixed Veggies (i used frozen)
    2 Green Chillies, finely Chopped
    1 tsp Ginger juliennes
    2 sprigs Curry leaves
    hing a pinch

    Method
    Heat 1 tsp of oil in a pan and Roast the Semolina, until it gives out a nice aroma, Watch the flame. Mix the Roasted Semolina with the Yoghurt and Salt. If the batter is too thick you can add little more yoghurt or Water.  I normally use Thick Buttermilk instead of Yoghurt. 
    Heat oil in a pan and Splutter mustard seeds, add Green chillies, hing and ginger and saute for a minute. Then add Mixed veggies and saute for 3-4 minutes. Add this to the Rawa-Yoghurt Batter, Mix well. Now add the fruit salt to the batter and mix well. Let it sit for 5 minutes. 
    Grease the Idly plates and Pour the batter into the moulds and steam cook for 10 minutes in a slow flame.
    When done, Take it out of the steamer, Give it a minuute to cool and then unmould. Enjoy with any Spicy Chutney!!!! We Enjoyed it with some Mint Coconut Chutney.


    Sago Fritters

    Had some Leftover Aloo Curry and Shredded carrots Made for Lunch. My hubby wanted something Interesting for the Dinner. But, i didnt want to waste what i made for lunch. Nithya's 4th Sense Cooking Sago Bonda Got my eyes, which she has made from Leftover Dosa batter and sago. Planned to try it with some change. Made this Sago Fritters and it was yummy!!!!

    Ingredients
    1 cup Sago
    1/4 Cup Leftover Aloo Masala
    2 tbsp Shredded carrots
    2 tbsp Gram Flour/Besan
    1 tbsp Corn Flour
    1 tsp Red chilli powder
    1 tsp Coriander powder
    Amchur powder a pinch
    Salt to taste
    Oil for Frying

    Method
    Soak Sago in enough water for 3 hours. Drain the excess water. Mix all the above ingredients to a sticky dough. Heat oil in a kadai, when the oil is hot, Pinch small balls and drop it in the oil and deep fry them. Makes a Good Evening Snack!!!


    Friday, May 28, 2010

    MAIDHA PATHRI

    There are so many varieties like muttai pathri, ghee pathri, adukku pathri, chatti pathri and rice pathri in Kerala. This I have learnt from a friend. This is one of the most favourite dishes in our house. Any kara chutney or tomato chutney is suitable for this.
    மைதா பத்ரி


    Ingredients:


    Plain flour- 1 1/2 cup
    Rice flour- 1 1/2 cup
    Shredded coconut- half cup
    Salt to taste
    Cumin seeds- half sp
    Warm water- 1 1/2 to 2 cups


    Procedure:


    Sieve the flours twice.
    Add the cumin seeds, salt and shredded coconut to it.
    Transfer them to a bowl and mix with warm water to make a smooth and fine dough.
    Special care should be taken when mixing with the warm water.
    The dough will be loosened if the quantity of water is more.
    Keep it covered for half an hour.
    Grease a piece of butter papper.
    Take a small ball at a time, flatten it to the thickness of puri with the fingers, and drop it in hot oil.
    It will puff like a puri on both sides.
    Enjoy it with the chutney.

    Muzhu mambazha morkuzhambu - Whole ripe mangoes in curd gravy

    MANGO MANIA!


    MUZHU MAMBAZHA MORKUZHAMBU

    Ammamma was a grand old lady who ruled the roost where ever she stayed. She stayed with all her four offsprings in turns, and was very meticulous in getting their favourite dishes perfectly cooked at every meal time.
    Her grand daughter ( who is my sister - in -law) fondly remembered Ammamma's muzhu mambazha morkuzhambu ( whole ripe mango in curd gravy) , and about her eagerness to serve at least one muzhu mambazham ( whole mango fruit) to each family member and also to one or two guests who always thronged the house during meal time. In that effort she would always end up with a huge trough of morkuzhambu ( curd gravy) accommodating that many number of mangoes!
    I tried out the dish with only two ripe mangoes since I did not want any left over morkuzhambu. A particular variety of mango called "SINDURA" which we purchased near Dharmapuri was appropriate for my experiment. It was small, firm and without fibres.


    INGREDIENTS
    Whole ripe mangoes - 2
    Freshly grated coconut - 1 cup
    Green chillies - 2
    Rice - 2 tbsps
    Salt - 1 1/2 tsp
    Thick curd - 250 ml
    Curry leaves - a few
    Coconut oil - 2 tsps
    Mustard seeds - 1/4 tsp

    METHOD
    1. Soak rice and grind with coconut gratings and green chillies into a fine paste.
    2. Wash and slit the ripe mangoes keeping them intact at the base.
    3. Add a glass of water to half of the ground paste, immerse the slit mangoes in it and boil for ten minutes.
    4. Blend the thick curd and the second portion of the coconut and green chilly paste smoothly with salt, and mix it into the gravy.
    5. Let the mor kuzhambu be on low flame till it starts to thicken.
    6. Switch off flame just before it starts to boil.
    7. Heat coconut oil and add mustard seeds to crackle and then add the curry leaves, and pour the seasoning into the morkuzhambu.
    Enjoy the muzhu mambazha morkuzhambu with steaming hot rice and a spicy masala papad.

    Thursday, May 27, 2010

    Cheap Plumber In Mission Viejo

    Are you looking for a Cheap Plumber in Mission Viejo? How about a Cheap Laguna Niguel Plumber or even Laguna Beach?

    When you "Google" this and actually hire a company that is proud of the fact that they are "cheap" and advertise this way ...... what type of quality does the consumer get? They get what they paid for that's for sure.
    Cheap plumbing results in poor quality!

    Splash Plumbing offers some of the best plumbing service in Mission Viejo and surrounding areas like; Lake Forest, drain clearing in Laguna Beach, tankless water heater service in Laguna Niguel and water heater repair in Newport Beach. We cover most of Orange County and our plumbing service is the most affordable around.

    A heading like "Affordable plumbing in Mission Viejo" is what I would prefer to advertise with.

    Does anyone have any comments?

    Tankless Water Heater Service

    With so many people "going green" in California it seems simple enough to choose to install a tankless water heater right?
    That's what I did, and I have no regrets what-so-ever! As I mentioned in a previous post, I installed a NORITZ tankless water heater in Mission Viejo. After all I am a Mission Viejo Plumber and complete plumbing in Mission Viejo!

    Something to consider when istalling these units. Whether you install a Tankless Water Heater by NORITZ, RHEEM tankless water heater, BOSCH unit or even a Rinnai Tankless water heater in your Orange County home, they all require periodic maintenance.

    What kind of maintenance you ask? Tankless water heater serivce in Orange County is very important and our tankless water heater service we offer here at SPLASH Plumbing is very thorough and effective. Depending on the brand of unit you have, we run a diagnostic of the electrical componants, descale the heat exchanger(s) and much much more!

    Stay tuned for "bloggage" within this post.


    Well I'm back !!! 7-05-10

    I see that no one replied to this post
    Do you have a NORITZ tankless water heater http://noritz.com/
    Check out their website to confirm the maintenance you will need to comply with warranty requirements.

    Take Good Care of Your Thermostat

    Proper Care and Maintenance Means More Efficient Heating and Cooling!

    The thermostat is perhaps the simplest piece of equipment involved in your home’s heating and cooling system, yet it’s so sensitive that it responds to even slight temperature changes. Though there are fewer mechanical parts in a thermostat to malfunction, it can still cause major problems if not maintained properly.

    If a thermostat cover is installed improperly or bumped accidentally it can cause your furnace or air conditioner to fail to start. The thermostat base can sometimes slip out of balance, which causes faulty operation. Corrosion and loose wires can also affect your thermostat’s operation. Dirt and dust are perhaps the most common cause of improper thermostat function. Debris can work its way into the thermostat mechanism and interfere with its calibration. For example, if you set your thermostat for 70 degrees but it’s actually maintaining a temperature of 73 degrees, you’re wasting energy and increasing your monthly utility costs.

    If you suspect that the calibration of your thermostat is off, follow these simple steps to check it and repair any minor problems.

    First, you’ll need a few basic tools to check the calibration of your thermostat: tape, paper towels, a glass tube thermometer, a new dollar bill or a soft brush, a level, and a screwdriver. Gather these from around the house or hit your local hardware store.

    Next, tape the glass thermometer to the wall a short distance away from the thermostat. Use the paper towels to pad the thermometer and keep it from touching the wall. Make sure doors and windows are sealed to prevent outside drafts from affecting the temperature reading.

    Give the thermometer at least 15 minutes to stabilize, and compare the reading to the thermostat needle. If there’s a difference between the two of a degree or more, check the thermostat for dirt.

    To clean your thermostat, take off the faceplate carefully. Blow off any loose dust inside. Never use a vacuum cleaner, as the powerful suction can damage fragile parts in the thermostat. If your thermostat has accessible contact points, use the new dollar bill to rub in between them. This will help brush away dirt. If your thermostat has a coiled element, use the soft brush to clear away debris.

    If the thermostat has a mercury vial, use the level to ensure the unit is straight. If it’s crooked, try loosening the mounting screws and move the thermostat until its level. Don’t forget to retighten the screws.

    Once you’ve cleaned the thermostat, repeat steps one and two using the glass tube thermometer. If there’s still a difference between the thermometer reading and the thermostat temperature, you’ll probably need to replace the unit.

    Replacing a thermostat is a fairly simple procedure that you can do yourself quickly and inexpensively.

    Be sure the new thermostat has the exact same voltage as the unit you’re replacing. Mismatched voltages can cause dangerous power shortages and continued system malfunction. The thermostat must also be compatible with your home’s heating system. If you can’t match your old unit with a new one brand for brand, consult a sales representative at your local hardware or home improvement store for recommendations on comparable models.

    Also, be sure to keep electric lamps, TVs, stereos and and appliances away from the thermostat. Heat from these items can cause your air conditioner to run unnecessarily and cause the thermostat to malfunction.


    Related Information...

    Wednesday, May 26, 2010

    Reliable, Proven products

    Reliable, proven time and time again & backed by a network of great support.  Those are just a few reasons why Aune Plumbing has teamed up with Taco Inc. to bring you the latest innovative radiant heating products available.

    Our reputation is on the line, we take every job seriously and strive to select only the best products to complete your project. Ease of ownership, support, reliability and if needed, local replacement parts availability.

    I am a professional contractor member of the Taco FloPro Team network.  This close relationship allows me the factory training and industry inside track to all the best products this great American company has to offer.  Rest assured, if Aune Plumbing installs or works on your radiant, solar or domestic water system, you have the highest trained and dedicated contractor working for you!

    Eric Aune,
    Aune Plumbing, LLC
    763.238.2385

    Jeera/Cumin Rice

    Need a Quickie Lunch Menu, try this Cumin/Jeera Rice. Very Easy to Make and a Wonderful taste

    Ingredients
    2 cups Cooked Rice
    2 tbsp Cumin seeds/Jeera
    2 nos green Chillies Slited Lengthwise
    1 Large Onion
    2 cloves Garlic, finely chopped
    Salt to taste
    Hing a pinch
    Giunger Juliennes for Garnishing

    Method
    Heat oil in  apan, splutter Cumin Seeds, add hing ,turmeric, Chillies and garlic and sauté, then add onions and saute till translucent. Take it off the flame add cooked rice, mix well adjust the salt and garnish with Ginger Juliennes. Serve Hot with Applams/Chips.

    Sending this CWS-Cumin Seeds hosted @ Sara's Corner, Event by Priya.

    Tuesday, May 25, 2010

    Orange Roll

    It seems like a "rolled" month for me. You will notice there are crepe roll, peach roll and followed by this orange roll from my list. The last attempt of peach roll was using 指形蛋糕 from 孟老师的美味蛋糕卷 with a method of whisking egg whites until peak stiff then add in the egg yolk. For this orange roll, again... with the recipe of 孟老师 - 分蛋式海绵蛋糕 which I found even better although it's slightly more steps but worth it! The sponge cake is very soft and easy to roll up. The orange taste is excellent as the orange strips are everywhere on the sponge surface. The fillings suppose to be can orange but I use fresh one instead. Perhaps can orange would be much tastier as my fresh orange is a bit sour :(


    On my last attempt, I forgot to describe on the ingredient calculation for different sizes of baking tray. It's really important for this calculation because we all have different sizes of baking tray compare with different recipe books. You don't want to have too thick or too thin sponge but rather have the same picture from the recipe book so that it's much easier to roll up and the result come out as good as the pictures shown. Good thing about 孟老师的 recipe that she gave very detail information. Please refer to the calculation if you like to try out this recipe or from any recipe books. Hope you find it useful.


    Ingredients Calculation for different baking tray


    孟老师的美味蛋糕卷 (36cm x 26cm = 936)
    Kitchen Corner (36cm x 36cm = 1296)


    1296 ÷ 936 = 1.38 ( make it 1.4)
    All ingredients from the recipes should x 1.4 to match my baking tray


    My calculation of 36cm x 36cm from 孟老师的美味蛋糕卷


    1 Orange strips (2 or more)  
    20g Unsalted butter (28g
    20g Orange juice (28g)
    100g egg yolks (140g)
    25g caster sugar (35g)
    160g egg whites (224g)
    75g caster sugar (105g)
    55g plain flour (77g)
    1. Prepare a baking tray lined with baking paper. Remove the orange strips from its skin and place on the tray. Melt the butter than set a side to cool then add in the orange juice. 

    2. Whisk the egg yolks with sugar in a double boiler until thicken and pale in color. In another bowl whisk the egg whites with caster sugar until peak foam.

    3. Fold the egg yolks into the egg whites then gently fold in the shifted flour. 

    4. Pour some mixture (3) into a clean bowl then mix in the melted butter and orange juice. Pour back into the mixture of (3) and mix gently until everything well combine. 

    5. Pour into prepared baking tray and spread evenly. Bake at 190C for 10 - 12 minutes. Be careful  not to over bake it. 

    6. Remove the cake from the baking tray immediate when it out from the oven and place on a wire rack to cool. Tear out the side of the baking paper and let it completely cool down. 

    7. Gently tear out the baking paper and spread your favorite cream on the surface with fresh or can oranges and roll it up. Chill in the fridge for 1 hour before serve.

    Puthucode Pulingari - A variation from the normal pulingari

    Puthucode in the title is the name of a village in the district of Palakkad. The village is famous for its Anapoorneswari temple and the Navarathri celebrations. During Navarathri, feast/sadhya is there in the temple. The menu is fixed - Pulingari, Olan and Chadachadayam payasam. The pulingari served is different from the normal recipe and hence it is associated with the name of the village. To know more about this village, read Ammupatti's Thoughts.  During my childhood days, our family made it to atleast one day during the nine day celebrations. As kids, our main attraction was the sadya and the chance to taste the lip smacking pulingari. On one of our visits, we got the souvenir published as part of the festival and the recipe for the famous pulingari was given. From then on, amma made it at home too. It was reseved for special occassions. Not that its difficult to make, but to keep the novelty, its not made often as Sambhar is prepared. In olden days, the vegetable pieces added to the pulingari will be very big. Ash gourd, pumpkin and yam are the veggies added. It is told that after peeling the skin, the whole vegetable is dropped on the ground to break into pieces. The pieces, as is broken, is added to the gravy. During the time when I went, the pieces were not that big, but bigger than what we add in our homes. Just to get that feel, my amma also used to add big pieces. There is no dhanya added here and green chilli is used which is not common in pulingari. Usually pulingari will not have dal added to it. The recipe is simple and easy to make, but the taste is something different from the usual sambhar.


    You need

    Ash gourd/elavan/kumbalanga - 1/2 kg

    Pumpkin/Mathan - 1/2 kg

    Yam/chenai - 250 gms

    Turmeric - 1/4 tspn

    Chilli powder -1/2tspn


    Salt to taste

    Tamarind - lemon sized

    Cooked tuvar dal - 1 cup


    To roast

    Raw rice -2 tblspn

    Methi seed - 1 tspn


    Roast raw rice and methi seeds separately till light brown. Powder them separately.

    To grind

    Grated coconut - 1/2 cup heaped

    Green chilli - 2 nos


    Seasoning

    Oil - 1 tspn

    Mustard - 1 tspn

    Red chilli - 2 nos
    Curry leaves

    Method

    Wash and peel the vegetables. Chop them into 2 inch cubes. Add two cups of water to the cubed veggies and cook. Add turmeric and red chilli powder and half the amount of salt. The salt is added only for the veggies. The remaining salt will be added to the end. Yam takes more time to cook. You can either cook yam alone in a pressure cooker to speed up the cooking.

    When the vegetables are half cooked, extract the tamarind juice and add to it. When the veggies are cooked soft in the tamarind gravy, add cooked tuvar dal and roasted and powdered rice powder.

     Grind the coconut and green chilly to a fine paste by adding enough water. Adjust the amount of chillies according to your spice tolerance.

    When the gravy starts boiling, add the ground coconut paste and adjust the thickness of the gravy by adding water. The dal, coconut paste and rice powder will thicken the gravy. Add salt and let it simmer for few minutes.

    Remove from fire and do the seasoning with mustard seeds and red chillies. Finally add the powdered methi powder and garnish with curry leaves. The methi powder added at the end gives a nice aroma to the dish.

    Enjoy with hot rice with a vegetable side dish and papad.


    Mambazha Morekuzambhu/Ripe Mangoes in Spicy Yoghurt Sauce

    Mangoes, Mangoes Everywhere!!! My hubby is a Mango Maniac. My FIL, BIL and everybody in his family go crazy this summer and they used to mangoes like anything. Every week when i call my FIL and MIL they used to say aboutt varieties that have arrived and gone till date. So sad we dont get all those varieties here in Dubai. So, hatever was availabe he has got about 5-10 mangoes and all are lying in my rice pot!!! So, Every morning i open the rice pot, this nice aroma of ripening mangoes spread all over my kitchen. Thought of making something Delicious with mangoes. So made this morekuzambhu for the weekend. It was yummy and not to say about my hubby's brightened face!!!!
    This can be made with Okra/Brinjal/Ashgourd, But with King of the Fruits, its a real Delicacy!!!

    Ingredients
    2 Cups Chopped ripe Mangoes
    2 tbsp Fresh grated Coconut
    2 tsp tuvar dal
    2 tsp cumin seeds/jeera
    3-4 nos Green Chillies/Red Chillies
    1 inch piece Ginger
    2 springs Curry leaves
    2 cups of Whisked Yoghurt

    Seasoning
    1 tsp Mustard seeds
    1/2 tsp turmeric powder
    Oil for seasoning

    Method
    Soak Tuvar dal, cumin seeds/jeera in little water for 30 minutes. Then Drain the excess water and grind it with fresh coconut, ginger and curry leaves to a smooth paste.
    Heat oil in pan, splutter mustard seeds, add the chopped mangoes and turmeric and saute for a minute or two.  Add the grinded paste and cook in a slow flame for 15 minutes or till the masala and mangoes cooks well. As it cooks, you can feel the nice aroma of the masala cooking.

    Once the mangoes are cooked, slim down the gas flame to real low and add the whisked yoghurt.The Curry shouldnt boil!!! Keep the flame real low!!!!. Let it get cooked in a really slow flame for 10 minutes. Then take it off the flame and garnish it with fresh coriander.

    Sending this CWS-Cumin seeds hosted @ Sara's Corner, Event by Priya.

    Monday, May 24, 2010

    MANGO MANIA - Mavina hannina sasivae - Ripe mango and mustard gravy

    MANGO MANIA !

    MAVINA HANNINA SASIVAE

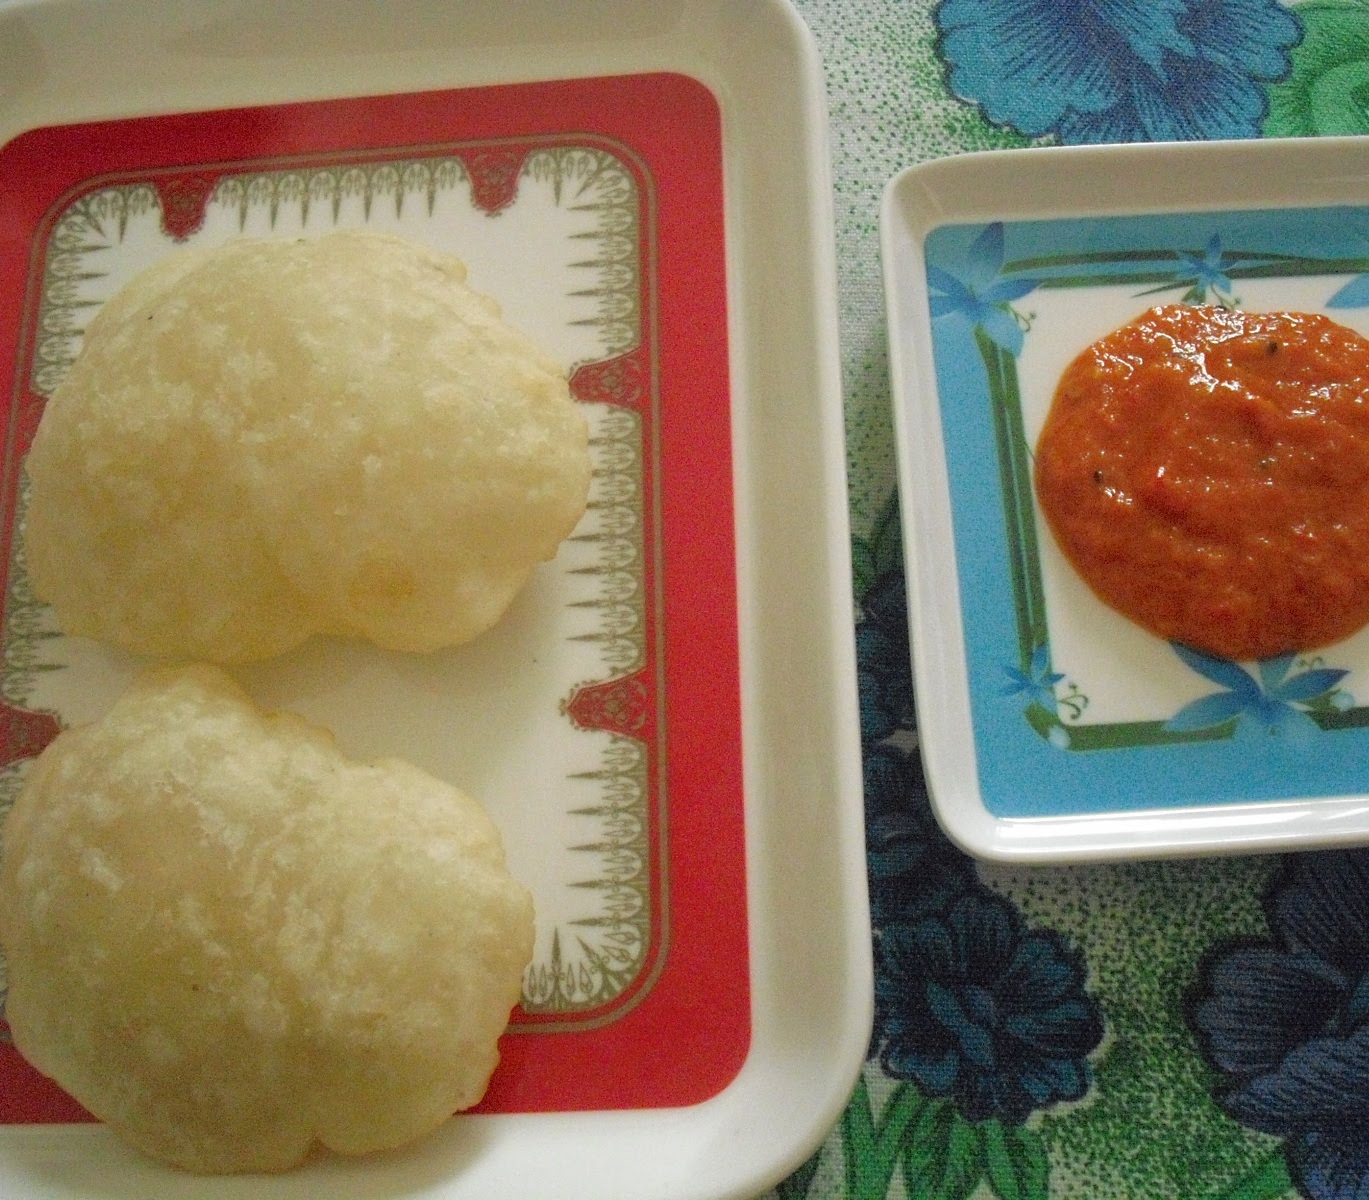
    It is a wonder that mangoes, both raw and ripe can be cooked into both sweet and spicy mouth watering dishes.Here is a dish which I prepared using ripe mangoes ( mavina hannu - Kannada ) and mustard seeds (sasivae - Kannada). The dish tastes good with firm ripe and pulpy mangoes with out fibres. The sweet, spicy and pungent dish was a great hit at home.

    INGREDIENTS
    Ripe mangoes (cubed) - 2 cups
    Mango pulp ( juice) - 1/2 cup
    (The above can be obtained by squeezing the mango seed dry after cutting out the cubes.)
    Grated coconut - 1 cup
    Mustard seeds - 2 tbsps + 1 pinch for seasoning
    Black pepper - 1 tsp
    Cumin seeds - 1/2 tsp
    Chilly powder - 1/2 tsp
    Tamarind - the size of a small marble(soaked)
    Grated jaggery - 1/4 cup
    Asafoetida - 1 pinch
    Salt - 1 1/2 tsp
    Oil - 2 tsps
    METHOD
    1. Dry roast mustard seeds till they crackle and give out a good aroma.
    2. Grind fresh coconut gratings with roasted mustard seeds, pepper, cumin seeds, chilly powder, soaked tamarind, jaggery and asafoetida into a fine paste.
    3. Heat oil in a pan and season with mustard seeds.
    4. When the mustard seeds crackle add the ripe mango cubes and saute for two minutes without mashing them.
    5. Add the ground paste , mango juice and salt.
    6. Let the Sasivae boil ( add a cup of water if needed) until all the flavours blend and reaches a gravy like consistancy.

    Enjoy the lip smacking dish to start a meal, through the meal and even after finishing your meal!

    Sunday, May 23, 2010

    Shall i call it the Hot n cold Salad!!!!

    My Weight hit a plateau last week. I was a bit surprised i have just started to lose, how come so soon a plateau!!!! My dietician advised to check my Thryoid levels, tested and it was under good control. Then she put me under no-carb diet* for  2 days!!!! No Chapthis, No Rice, was allowed to have Lentils, Lot of Veggies and Fruits. 
    I made this salad for my Lunch, Why the name hot n cold, i have added some raw mangoes, which is a bit of heat and Cucumber which is the other extreme of that!!! Leave the Name, Trust me,  the salad was divine!!!

    Ingredients
    2 sides of one Raw Mango(KiliMooku/thothapuri Mango)
    1 cucumber
    5-6 nos baby carrots
    2 leaves of lettuce
    Salt to taste
    Hot Sauce for dressing

    Method
    Wash and Chop the Given ingredients, Mix salt and Sauce and Toss well. Enjoy!!!!
    Tried the same salad for Dinner with a handful of Boiled Chickpeas, without raw mango!!!! It was very much filling, you can include this salad as part of your Lunch to reduce rice intake!!! You wont feel eating less!!!!

    And about my weight i have started losing again, though its a bit slow, but still happy that something is happening!!! :)

    Sending this Twenty-20 Event hosted by Niloufer and to Green Gourmet Event, hosted by Preeti @ W'rite' Food


    *note: Check with your Doctor/Dietician before venturing on any diet

    THIPPA ROTTI

    This roti is a nutritious one. Some 25 years back I have learnt to cook this tasty roti from my friend. Usually this must be made with a thickness of 1 inch. It will be crisper outside and soft inside. But I have showed here a thinner version. It will be delicious to have this as a Tiffin item either for breakfast or night. Tomato kara chutney will be much suitable as a side dish.
    திப்ப ரொட்டி

    Ingredients:

    Rice rawa- 3 cups
    Black gram- 1 cup
    Peppercorns- 1 tbsp
    Curry leaves- 3 arcs
    Fresh curd- 1 cup
    Bengal gram- half cup
    Salt to taste
    Thinly sliced onion- 1 cup
    Shredded coconut- half cup

    Procedure:

    Wash the rice rawa twice and drain the water completely.
    Add the curd, peppercorns, curry leaves, Bengal grams and salt.
    Mix well and let it soak for an hour.
    Grind the black gram to a fluffy batter.
    Add this to the rawa mixture.
    Add the coconut and the onions.
    Mix well.
    The batter should be thick.
    Heat a tawa and spread the batter in to half inch thickness.
    Pour a little oil around it.
    Cover it with a suitable lid.
    Once the bottom side is cooked to golden brown, flip it to the other side and cook until the other side is well cooked and crisp.
    Thippa roti is ready now!

    Saturday, May 22, 2010

    Heating and Cooling on Demand with Zoned Systems

    Lately at Horizon Services, we've been hearing a lot from consumers who want to upgrade to newer, more energy efficient central heating and air conditioning systems, but have concerns that they'd be wasting a lot of energy and money by heating and cooling the entire home when they really only need to heat and cool a few rooms or one floor or section at a time.

    For many years, whole house central heating and cooling was about the only choice consumers had. But today it doesn't have to be an all or nothing situation thanks to zoned heating and cooling.

    Zoned heating and air conditioning systems provide on-demand temperature control where and when you want it. Forget about cooling empty rooms or over-heating one area of your home just to feel comfortable in another.

    Zoned heating and air conditioning works a lot like a light switch, turning your home’s HVAC system on and off based on your preferences. Dampers inside your home’s ductwork open and close according to each zone’s individual temperature settings. Once a zone reaches its pre-selected temperature, the appropriate dampers close. This helps save energy and utility costs, and makes your home more comfortable.

    So how do you know if zoned heating and air conditioning is right for your home? If there is a lot of variation between temperatures in your home from room to room or from level to level, or if you find that you’re constantly adjusting your thermostat to reach an optimal temperature, a zoning system might be the solution you need. Homes with multiple levels, with a sprawling ranch or multi-wing design, lots of windows, large square footage, or large open areas like spacious foyers or vaulted ceilings can also benefit from zoned heating and cooling.

    A zoned heating and air conditioning system can make all areas of your home more comfortable in both winter and summer. You’ll also save energy and money because your heating and cooling system won’t have to work as hard to regulate the temperature inside your house. By adding programmable thermostats, you can save even more.

    Just like it doesn’t make sense to have all the lights in your home controlled by a single switch, it seems pretty silly to control your home’s heating and cooling system with a single thermostat. Zoned heating and air conditioning is like installing several temperature controls throughout the rooms of your house—like having multiple light switches to control lights. It lets you turn down the heat in unused rooms during the day or cool bedrooms on an upper level just before bed.

    For new home construction, zoning systems are easily integrated into most modern central HVAC systems. You can save money on installation by putting in a zoning system while your contractor still has easy access to ductwork; costs go up significantly once ducts are covered by walls and ceilings. Zoning saves money on utilities, too, making your new home more affordable to live in.

    For existing homes, zoned heating and air conditioning can reduce the frustration caused by wild temperature fluctuations from room to room. Even if your ductwork is covered by drywall or plaster, there is such a variety of zoning systems available that chances are good your contractor will be able to match your home with an affordable system. Since most of the installation work will be limited to the area around your furnace—usually found in a mechanical closet, attic, or crawl space—there will be minimal disruption of your daily routine.

    What’s more, a new zoning system will pay for itself in a very short time thanks to the savings you’ll see on your monthly utility bills during both heating and air conditioning seasons.

    Your Horizon Services Comfort Consultant can provide more information about zoned heating and air conditioning systems and will help you find an option that fits your home, your budget, and your heating and cooling needs.


    Related Information from Horizon Services...

    MANGO MANIA - Chamandi - Mango Chutney

    MANGO MANIA!

    Last week we visited our native village accompanied by our sambandis .(When a boy and a girl get married, their respective parents become Sambandis to each other.)
    The highway via Dharmapuri and Salem split smoothly through the beautiful tender green mango topes (Groves), with rough and sturdy hillocks standing guard in the background. Green, firm and juicy mangoes looking like emerald pendants weighed down the branches of the short mango trees. The already harvested ones lay in mounds at the foot of each tree.
    Ripe and raw mangoes of all hues and sizes were stacked up in shacks skirting the high way.The fragrance and the colour of the king of fruits attracted each and every passing vehicle which compulsively stopped by, for a happy bargain.
    The sight of the king of fruits lead us to exchange various mango recipes and my sambandi and I chatted and chatted only mangoes till we reached our destination!
    Since we had bought a cart load of mangoes on our return trip, I started preparing the mango dishes one by one.
    CHAMANDI which I learnt from my Sambandi was the first one to be dished out!


    MANGAI CHAMANDI
    Chamandi is a chutney or a dip or you can even call it a pesto, prepared with raw mangoes and raw spices. It involves no cooking. A side dish with a tang, it goes very well with rice and koottu or rice and morkuzhambu , curd rice, chapatis and dosais.

    INGREDIENTS
    Firm raw mango - 1 medium size
    Red chillies - 8 ( depending on the degree of sourness of the mango.)
    Salt - 2 level tsp
    Asafoetida - 1 pinch
    Grated jaggery - 1 tbsp
    Coconut oil - 2 tsps
    METHOD
    1. Peel and grate the mango .
    2. Grind all ingredients without coconut oil into a slightly coarse paste.
    3. Add coconut oil and run the mixer just to blend.
    Enjoy the mixed taste of Chamandi with a mixed flavour of mango and coconut oil, with steaming hot rice.