Monday, October 31, 2011

Tervis Tumblers!


 This post is a part of a Foodbuzz Tastemaker program with Tervis. Tervis tumblers are virtually indestructible - they won't crack, melt, shatter, or chip, and they come with a lifetime guarantee. Even better, their double-wall insulation means hot drinks stay hot, cold drinks stay cold, and your furniture stays clear of those annoying condensation rings! 


Recently, I was selected to receive a tervis tumbler! I have been using it everyday and it keeps any beverage hot or cold for longer time. Do buy these beautiful tumblers and try them!
The beverage displayed in this picture is badam kheer. For recipe click here

Orange Cupcakes


This year I prepared home made chocolate truffles for Halloween to gift my neighbourhood kids but in the last minute the kids count was high than expected. So I searched some simple recipe (aiming with available ingredients at my pantry) on web and got orange cupcake recipe from 
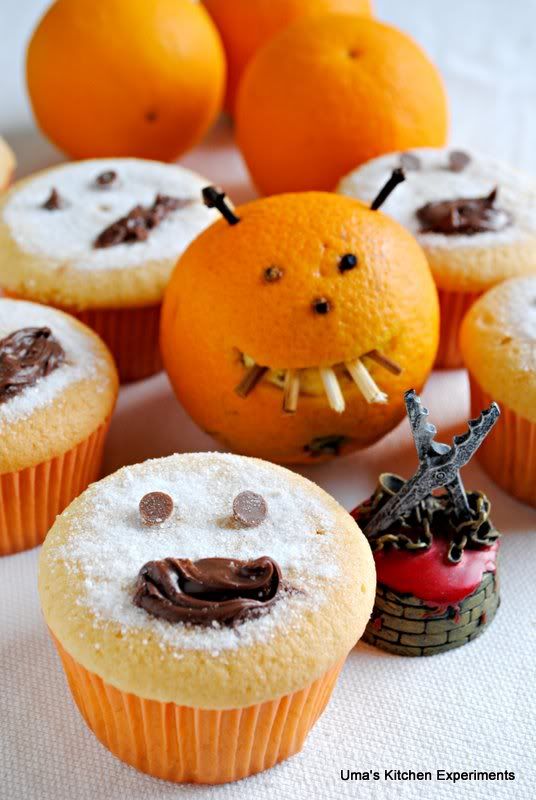
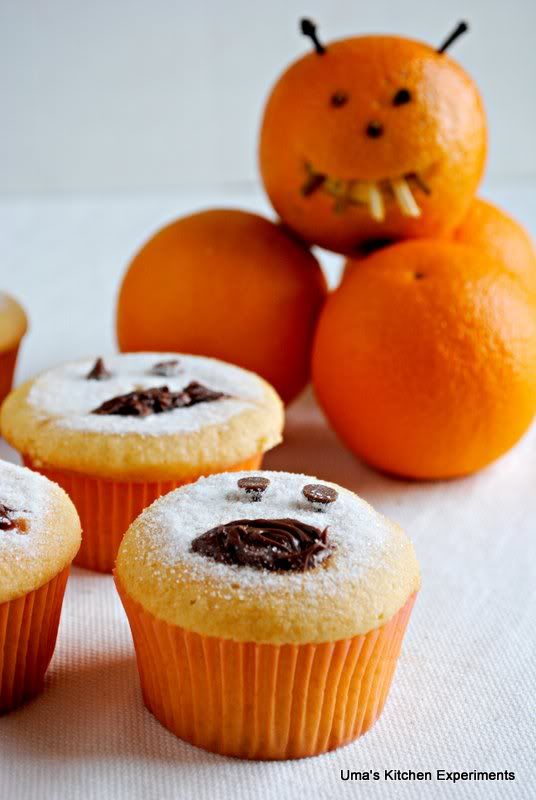
here. As I didn't get time to prepare frosting, I did very simple kids friendly Halloween decoration with chocolate chips and nutella. I prepared it in a jiffy and I need to say it disappeared in a jiffy. I first hesitate to blog this cupcakes because I felt the decoration is little sloppy, but the soft spongy orange taste of cupcakes made myself to compromise and post this recipe. Try the cupcake recipe and choose your own favorite frosting and enjoy them.


Basic Information:

Preparation Time: <15 minutes

Cooking Time: 18 minutes

Makes: 12 cupcakes


Ingredients:


For Orange Cupcakes:


Unsalted butter - 1/2 cup

Sugar - 2/3 cups

Egg - 3 nos

Plain flour - 1 and 1/2 cups

Baking powder - 1 and 1/2 teaspoon

Salt - 1/2 teaspoon

Fresh Orange Juice - 1/4 cup (I used store bought juice)

Orange extract - 2 teaspoon (I didn't use)

Orange food color - 2 drops (I added a drop from Dr.Oetker's red and yellow color and I got mild orange colour.)


For Quick Halloween Decoration:


Chocolate chips / Chocolate buttons - 24 nos

Nutella - 1/4 cup approx

Powdered sugar - 1/2 cup approx


Method:


For Orange Cupcakes:


1) First bring butter and egg to room temperature. Sift  flour, baking powder and salt together and keep aside. Line the cupcake tray with cupcake liners. Preheat the oven to 180C(350F).

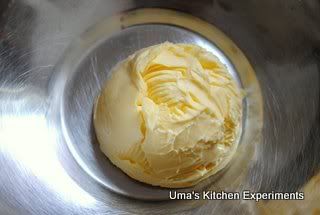
2) In a mixing bowl, beat butter until pale.


3) Add sugar and continue beating till you get the cream texture.


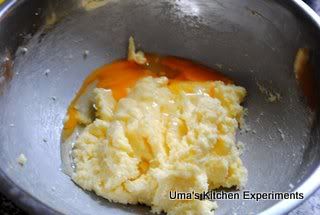
4) Add one egg at a time and beat well till all the eggs incorporated.


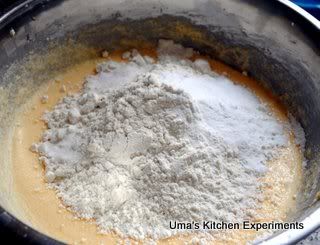
5) Add flour, baking powder and salt mixture and mix well.


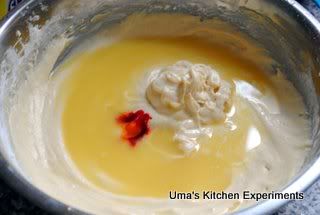
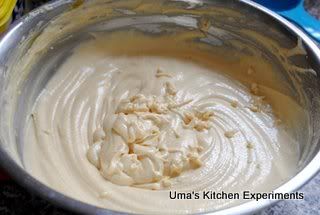
6) Add orange juice, orange extract(If using) and orange food color. Mix well till all incorporated.


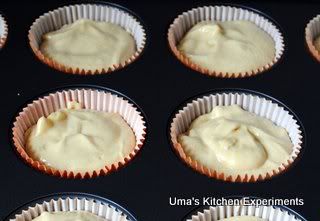
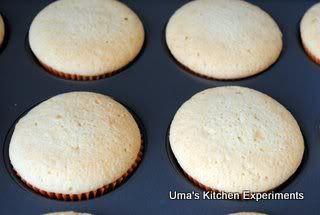
7) Spoon the cupcakes tray with 2/3 batter full.


8) Bake it for 18 minutes or till the tester inserted in the center comes out clean.

9) Cool sometime and transfer to a wiring rock to cool completely.
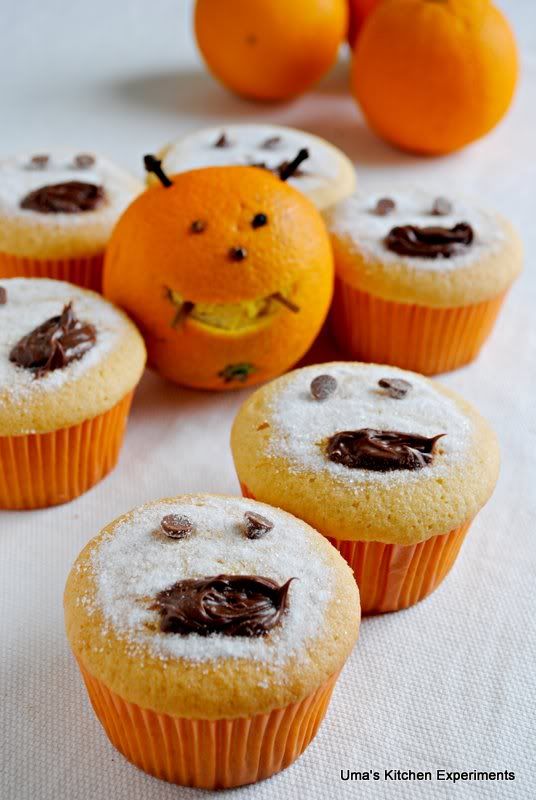


For Quick Halloween Decoration:


1) Top the cupcake with powdered sugar.

2) Place the 2 buttons or chips on each cupcakes like eyes in the face.

3) Draw a mouth line using nutella. Instead of nutella, any jam also be used here.


Note:

1) The original recipe's frosting was excellent, I didn't do that because of unavailability of time. But I suggest to do that if you are going to try this cupcakes.

2) As I started preparing this recipe in last minute, I kept eggs in bowl of hot water for some time to bring it to room temperature. This is the tip I used from the original recipe.


Sending this to Vardhini's Halloween Fiesta and

Srav's Cooking concepts- Festive foods.

RIBBON PAKODA

Usually the snacks like murukku, thattai, cheeppu cheedai, cheedai, ribbon pakoda, karasevu etc are very famous in Tamilnadu. But I always think that this ribbon pakoda remains at the top as the most favourite snack to so many people. There are different names for this snack like nada pakoda, ottu pakoda, olai pakoda, ribbon murukku, etc. There are also so many variations in preparing this pakoda. Some will add ground ginger+garlic+green chilli paste to this. Some will add just garlic paste. What I am going to post is a simple procedure to make a delicious ribbon pakoda.


ரிப்பன் பகோடா

Ingredients:

Fine rice flour- 4 cups
Gram flour- 1 cup
Butter- 3 tbsp
Salt to taste
Asafoetida- 2 pea’s size
Chilli powder- 1 tsp
Enough oil to fry

Procedure:

Soak the asafoetida in a small cup of hot water over night.
In the morning, pour this water to the flours.
Add the remaining ingredients with enough water.
Knead the flours to a soft dough.
Fill enough dough in a murukku press with ‘ ribbon pakoda mould’.
Press it in to thin stripes on hot oil length wise or in to a circle.
Take the ribbaon paoda stripes out when they are cooked to golden brown on both sides.
The delicious ribbon pakoda is ready now!

Anniversary Cupcake ( Bayu )

Bayu ini juga customer baru nya Lola..Pesenan mendadak juga..hohohoho.
Bayu mo kasi cupcake untuk anniversary nya ama ce nya yg ke 3.So sweetttt...Romantis.


Aku kadang suka amazing ama co yang bisa nyari kue buat ce nya..Honestly kebanyakan yang bikin anniversary cupcake ini ce ..makanya waktu dpt customer co, aku rada-rada amaze..hehehehe.


Bsk bakalan ada 1 lagi nih, salah satu co yang menurut aku.Romantis.


Comment :
" Sis Lorent , makasi bgd y cupcake na. The best bgd sis. Pasti si dia jg suka. "


Makasi jg Bayu..Langgeng teruss yaaa..Hepi bisa jadi bagian dari kalian berdua.Wish u luck

Sunday, October 30, 2011

Figurine Cupcake ( Ann )

Repeat order Ann yang ke 3.Makasih ya Ann..

Personal cupcake 17 pcs full figurine..Ampe gempor bikin figurine..But it's fun..

The Girls :


The Boys :


All figurine :


Comment : Menyusul yaa

Red Cupcake ( Yessy, Gatot Subroto )

Yessy ini juga customer baru nya Lola's..Huaaa Minggu ini full customer baru n pesenan . Thanks God...
Yessy pesennya mau temanya merah karena yang ultah suka warna merah..


Love you Mom ( Ridha,Cakung )

Customer baru n dadakan nya Lola nih..hehehe. Pesen nya 1 hari sebelumnya..Dadakan bgt ya.Cuma aku ga tega kalo orang uda pusing nyari kue ga dapet, trs aku tolak.Lebih ga tega lagi permintaan dari seorang anak buat mama nya tercintah.

Ridha minta nya simple bgt..cuma ditulisin nama aja.Cuma ga mungkin lah, aku cuma tulisin nama doang..Try my best..

The result :


Comment :

Carrot Thoren

Susan Pachikara (COPYRIGHT 2011)

CARROT THOREN

This South Indian stir-fry features freshly grated carrots, toasted mustard seeds and coconut which grows abundantly in Kerala. Mustard seeds jump about after sitting in hot oil so be ready to move on with the recipe when they start to shoot out of the pot. Quick cooking the carrots produces a colorful, crunchy dish. Remove them from the heat before they fully soften.

Serves 6 to 8

INGREDIENTS

2 1/2 tablespoons olive oil or coconut oil
3/4 teaspoon black or brown mustard seeds
1 dried red chili
1 cup diced onions
1 pound carrots, shredded
1 teaspoon salt
1/4 teaspoon turmeric
1/2 teaspoon freshly ground cumin
1/2 cup shredded unsweetened coconut

INSTRUCTIONS
Heat oil in a saute pan over medium heat. Add mustard seeds.

As soon as mustard seeds start to pop, add dried chili and onion. Cook until onion becomes translucent.

Increase heat to medium-high. Add shredded carrots, salt, turmeric and cumin. Stir to coat with onion mixture. Cook for 2 minutes, stirring constantly.

Mix in coconut and cook for another 2 minutes.


Susan Pachikara (COPYRIGHT 2011)

Susan Pachikara (COPYRIGHT 2011)

Saturday, October 29, 2011

Q & A About Lighting a Living Room

Q.

Hi Peggy,

Saw your website and wanted to ask a question if you don't mind. I want to install LED can lights in the ceiling of my living room. Right now there is only lighting from table lamps. Can you direct me to a website that might provide can light spacing/quantity calculations for LED lights? Appreciate the help.

Neil

A.

Hi Neil,

I would like you to examine your reasons for putting LED (or any other) recessed can lights in your living room ceiling. Think first about the purposes of your living room.

Most people use their living rooms for:

1. Entertaining guests

2. As a family room if they have no family room

3. Reading

4. Watching TV and/or listening to music if they have no other entertainment room.

Absolutely none of these tasks is made better by having recessed can lights overhead.

1. Entertaining guests: Everyone looks horrible with dark shadows under their brows, noses and chins. Imagine looking like this to your guests:


BwaHaHAH (Really apropos since it's almost Halloween)


Well ACTUALLY, you would look like this if you put the recessed cans in the floor, but you get my idea.

Much better to create a diffuse light with lamps and wall sconces. If you want to spend money on this, then add cove around the room (Google "indirect lighting") and hide the lights and bounce the light off a light colored ceiling (Use warm-white T8 or T5 fluorescent tubes in two rows on separate switches to get a "high" a "low" setting).

2. As a family room if they have no family room: Same issues as above. If you need some task lighting over a table for game-playing/crafts, add a pendant there.

3. Reading; The best light for reading comes from a table lamp on a side table or a sconce on the wall behind you, or a floor lamp positioned behind you and to one side.

4 . Watching TV and/or listening to music if they have no other entertainment room. Recessed can lights often reflect in the TV screen, making watching more difficult. You have to be very careful how you place can lights in such a room.

Almost all of the suggestions above cost quite a bit less than having a bunch of can lights put in your living room ceiling Neil.

This is why you hire a designer Neil. To help you make choices that are not only more beautiful and functional, but cost-effective as well. I'd appreciate a check for half the difference if you decide to follow my advice


P.S.

We kitchen designers often are forced to use recessed can lights in kitchen ceilings because so many are 8' high, or even less, and surface-mount lights with diffusers are out of fashion these days.

Any time I have a ceiling even 8-1/2' high I always try my best to convince my clients to use a different lighting scheme than recessed cans for the ambient (or general) lighting in the room. If not, then I am looking to see if there is attic space above the kitchen to raise the ceiling and put in cove lighting around the perimeter. Recessed can lights are almost always my very last solution to a lighting conundrum because they make the people in the spaces look so horrible. Functionally, they only work as task lighting in an area where we can't use undercabinet lights or pendants.

P.P.S.

Spacing of recessed ceiling can fixtures depends on a number of variables: Once you decide the fixture and lamp (lightbulb) going into the fixture, then you can contact the fixture manufacturer and tell them your ceiling height and they will give you some spacing suggestions based on the amount of lumens you want to reach the floor. There is no pat formula that works with every fixture and lamp. They are all different.

Happy Halloween!

Peggy

Friday, October 28, 2011

Bhindi Zunka / Spiced Okra with Chick pea flour crust


Okra / Bhindi is a love-hate vegetable. People either love it or hate it. We at home love okra. When I saw this Bhindi Zunka in Richa's space I immediately bookmarked it. I had remembered the okra which I got few days before at the market. Gave it a try and boy did I like it... It was awesome. I had made this zunka with bell peppers (sister's recipe). This method of making okra though would

MU Cupcake ( Nda,Sunter)

MU Cupcake againn..hahahaha entah kenapa MU Cupcake ini favorite bgt.
Pesenannya Nda ..(againnn)hahhaha. Dia ngefans kayanya ama gw..


Da,makasihh yaa orderannya..
Gw doain tuh jualan baju biar laku, biar bs sampe ke luar negri..wkwkwkw *lebayy


Happy Bday, Fredy
Wish u all the best.GBU

Thursday, October 27, 2011

Kashmiri Curried Apple


Curried Apple?  That too from India? Sounds little weird, right? I felt weird and wondered too when I read Pat's India-Food & Cooking. He explained 200 Indian foods in his book covering almost all major states in India. I was little interested to know unknown factors of our Indian spices and the story behind few famous known curries. I have also tried few unknown Indian recipes from the book in my kitchen. One among them is Kashmiri curried apple.


As there are no picture given for this recipe in the book, I couldn't imagine about how the final outcome would look like.  But the uniqueness of the curry pulled me and made me to try.  I tried with few granny smith apples which were sitting in my fridge after I made the apple pickles. I followed his instructions and posted them with picture here. The curry tasted like eating sweet pumpkin with cinnamon and cardamom flavor. If anyone of you familiar with this curry give your views about it.


Basic Information:

Preparation Time: 10 minutes

Cooking Time: 25 minutes

Serves: 3


Ingredients:


Ghee/Butter - 1 tablespoon

Cooking Apple/Tart Apple - 2 nos, peeled, cored and cubed

Onion - 1/2 cup, chopped

Tamarind  - 1 small gooseberry size

Green cardamoms - 3 nos

Cinnamon sticks - 1 inch

Black salt - 1 teaspoon or to taste

Cumin seeds - 1/2 teaspoon

Red chilli powder - 1 teaspoon or to taste

Turmeric - 1/8 teaspoon

Ground ginger - 1/4 teaspoon

Oil - 2 teaspoon

Boiled water - 1/4 cup


Method:


1) Heat oil in a wok and caramelize onions. Once it is done transfer to a plate. Allow it to cool and make a paste of it. Keep it aside.


2) In the same pan, heat ghee/butter. Add apples followed by red chilli powder, turmeric and ground ginger. Stir fry for 2 minutes.


3) Add cardamoms, cinnamon, onion paste(as said in step 1), salt and mixwell.

4) Mix and squeeze the juice from tamarind using boiling water and add to the wok. Mix again.


5) Cover the wok and cook apples for about 5 minutes. Makesure to maintain the firmness of the apples.

6) Crush the cumin seeds in between you palms and sprinkle on the cooked apples.

7) Serve hot.


Sending this recipe to Akila's Dish Name Starts with K Event.

Wednesday, October 26, 2011

Oma Podi / Sphagetti Sev

Diwali brings with itself a lot of joy and brings families together. There is an atmosphere of happy celebrations in every household. Gifts and sweets are exchanged. When I was young, I would help my Grandmother and  Mother in making sweets and savories for Diwali. Oma podi is a savory that is made for Diwali. It is a very easy snack and can be made in very limited time.


Ingredients:

(This makes 4-5 omapodi's)
Gram Flour / Besan - 2 cups
Rice Flour - About 1 tbsp
Salt - To taste
Red Chilli powder - 1/2 tsp (Optional)
Asafoetida / Hing - To taste - a few pinches
Ajwain - 1 Tsp
Jeera - 1 Tsp
Water - To make the dough
Oil - To deep fry the sev

Method:

  • Sift the gram flour to remove any lumps in it.

  • Combine all the other ingredients and mix well.

  • Add water little by little and make it into a stiff dough.


  • Use the Sev maker/ Sev press and select the cutter with many holes in it.

  • Fill the dough in the sev press and close it.


  • Heat a kadai or a wok and add oil in it. 
  • Press down and rotate the sev press or press down the sev press (depending on the model of the sev press you have) in a circular motion. 

  • Make 2 at a time and fry it till the sizzling of the oil stops. Drain it on a paper towel and set it aside. 

  • Once cooled, store it in an airtight container and it will stay good for a week to 10 days.


Notes:


  • You can double the quantity to make more of the dough.
  • Make sure that the oil is hot before you drop in the sev's.
  • You car crush and eat the sev with other snacks such as bhel puri or sev puri.


Instant Microwave Doodh Peda

Wishing everyone a very Happy and a Bright Diwali.. Due to lack of time to prepare elaborate sweets, I tried making this instant Doodh Peda that was taught to me by a friend. The recipe is very simple and requires just 3 ingredients. All the ingredients are available easily at any supermarket. Surprise your relatives and guests by serving them this instant and traditional delicacy.


Ingredients:

Milk Powder - 21/2 cups
Condensed milk - 1 14oz can (sweetened)
Unsalted butter - 1 stick

Method:

  • Sift the milk powder and set it aside.

  • Melt one stick of butter in a microwave safe glass bowl.

  • Once the butter has melted, add the milk powder and condensed milk and mix well.


  • Microwave it for 4 minutes. After every minute remove the bowl and mix the contents well.

  • After 4 minutes, the mixture would have thickened and now let the mixture cool for 10 minutes.

  • Take a spoon or a mini ice-cream scoop. Scoop out a small portion of the mixture and roll it out into a ball and flatten it.
  • You can stick an almond, cashew, pistachios or any dry fruit you like in the center of the Peda.


  • Enjoy your Diwali delicacy.
Happy Diwali to all.

  • You can shape the Pedas in any form you like.
  • Else you can pour the mixture on a greased tray and cut it in diamonds or squares.
  • You can also remove the entire mixture and flatten it out about 1/2 an inch thich and cut it using a cookie cutter for getting the desired shapes.
  • You can use edible silver foils, cake decoration materials to decorate the Pedas. You can get creative and decorate it the way you like.
  • Every microwave has a different power setting. Some may meed 3 minutes and other many need 5 minutes. Ensure that you remove the mixture every minute and mix it well so that it does not burn the milk solids.