Wednesday, December 10, 2008
Low fat Dhahi Vada
Can you say no to low fat dhahi vadas? I cannot. When I first saw this recipe on Red chilli's blog (click here for the recipe), I thought it was a great idea to make dhahi vadas using kuzhi paniyaram pan. I bookmarked it immediately. Today I saw this recipe on Laavanya's blog (click here for the recipe). I couldn't stop myself from trying it out. This method hardly consumes any oil. But there is no compromise on taste. Vadas come out as soft on the inside and crunchy on the outside as deep fried ones. Many thanks to Red chills -the creator of low fat urud dal vadas :) and Laavanya for reminding me of the same. I combined both their recipes.
Ingredients:
To soak in water for 2 hrs and grind into a smooth paste adding little water(about 3tbsp)
Urud Dal-1 cup
Yellow mung dal-1/2 cup
Red chilli(optional)-1
Cashews-10
Other ingredients:
Green chilli-1 chopped finely
Ginger chopped-1/2 tsp
Salt
Hing-a pinch
Curry leaves-a few
Coriander leaves-a handful chopped
Pepper powder-1/4 tsp
For yogurt sauce:
Yogurt-2 cups
Salt
Red chilli powder- a pinch to sprinkle on top
Garam masala powder- a pinch to sprinkle on top
Coriander leaves-to garnish
Method:
Grind the soaked dals with little water to a smooth paste.
Add rest of the ingredients. Heat kuzhipaniyaram pan and put 2-3 drops of oil in each hole. Using a laddle, pour the batter on each hole. Drizzle 1 drop of oil on top of the vadas. Cover with a lid and let it cook on low flame for 2-3 minutes. Flip over and cook for 2 minutes or until they are done.
Mix all the ingredients listed under "ingredients for yogurt sauce". Tamper mustard seeds in oil and add it to yogurt sauce. Poke tiny holes on the vadas using a pin(this step is optional). Drop them in the yogurt sauce 1 hour before serving.
Note: You can grind coconut and green chilli together and add it to yogurt sauce for enhanced taste.
As Laavanya did, you can dunk the vadas in hot water, gently squeeze extra water and then put them in yogurt sauce.
Or you can even enjoy just plain vadas with coconut chutney.
Kitchen Treasure Hunt - Event Round Up Part 1
It has been an amazing time reading all the posts, and we did indeed discover so many treasures, not only from India, but also Indonesia, Japan, France, Cyprus, China. We have few antiques, traditional utensils, unusual one of pieces, as well as a few modern gadgets as well.
This is also the first time we can fully appreciate the efforts by fellow bloggers, who host events and do lovely round ups! We had a number of photos from the non-bloggers, and didn't want to leave out any. We found that doing one mega round up with with the capabilities of Blogger daunting. We therefore, decided to do two posts. This round up consists of entries from Non Bloggers. Part 2, will have the entries from bloggers.
Let us first take a look at entries from Shivashankari and Guhan. This young Bangalore based IT couple, do a lot of globe trotting, with gigantic cameras and photography gear slung around their necks! You can see some of their marvelous photos of a recent trip to Cambodia at my links. The treasures below including the ‘Guess What?’ were sent in from Shankari’s parents home in Chennai.
This is a quaint looking ‘aruvamane’ or vegetable cutter. It is held steady, by placing a knee on the wooden board. Vegetables are then held with both hands, and slit against the sharp vertical edge. The serrated tip is used to grate coconut. This arvamane has decorative etching at the base.
Tenkuzhal is dough that is squeezed into ribbons and deep fried to make a crunchy savoury snack. This one a is 'tenkuzhal nazhi'.
This on the other hand is a 'sevai nazhi' or a 'string hopper press'. Its a difficult task pressing strings through these perforations! You can see another type here.
The second non-blogger entry is from Malini and Savithri. They are from a joint family in Mysore, have a sprawling garden, and usually grow their own vegetables and fruits. They still use many of the traditional equipment in their daily lives. Those which are no longer used, have been creatively utilized in landscaping and interior design as you can see below!
Tool to remove the husk from the Coconut
Removing the husk from a coconut is not an easy task as can be seen here. Savithri’s husband is an engineer who designs and fabricates innovative machines and tools. He has fashioned this tool so that the coconuts from the garden can be dehusked easily by anybody. The coconut is impaled on the tip and held firm, while the lever is turned to separate the thick fibre. It is one of a kind, and that's why it does not have a name! Doesn't the first photo look like a robot straight out of Star Wars ?
This is a very old traditional coffee bean grinder. It needs to be clamped to a surface and then used. Roasted coffee beans are freshly ground, after which the powered is used to make filter coffee decoction. More on coffee filters in part 2.
This simple equipment is a called an 'aduppu' or 'choolha', and can be used to light a fire for cooking.
'Ammi kal' and kuzhavi, 'beesora kallu' and are used for grinding, powdering and so on, and are now used so innovatively to adorn their garden! Take a look at the pictures of the ones that are still in use at these links.
Ammi Kal and Kuzhavi – used for grinding chutneys
Water Trough, and an Iron Bandli
In the days, when water was drawn manually from the well, this large trough was used to store water to wash vessels. This has now become a safe sanctuary for seedlings, before they are big enough to be transferred to the ground or to pots.
The largest vessel is called 'Gangalam', again used for large scale cooking. The one inside is a 'Kodam' used to store water, the one behind the Buddha an old 'Ola Koodai' or a straw basket.
Aluminum Water Jug
This old Aluminum water jug, has been painted over and converted into a nice pot holder. Yelli Koondu
This is definitely not a cooking gadget, but a real friend in ancient kitchens, and hence it is in here! As many of you know, this is a old rat trap. This one is closed, but rest assured no rat inside! A 'Yelli Koondu' was a must in the 'ugrana ul' or storage room, where sacks of rice, lentils and all provisions were stored, and an easy target for mice and rats!
That's all for Kitchen Treasure Hunt - Part 1 folks! Hope you have enjoyed browsing this post, as much as we enjoyed posting it! Look out for Kitchen Treasure Hunt Round Up – Part 2 for all the treasures from bloggers!
Tuesday, December 09, 2008
wood floor refinishing; cabinet installation
We got some exciting work done this weekend!
Wood floors: Firstly, I can’t believe I ever considered replacing the original floors, and here’s a thanks to those of you who openly considered my sanity. They turned out great! The floors had been refinished in the past and we liked the aged color and look. They had potential. Our goal was a super shiny, smooth floor that will stay that way - despite the canine parade. We came up with a process that worked and we love the way they turned out.
The first step is to clean and prepare the floors. We used the shop vac, brooms, swiffers, etc. You’ll also need to remove the baseboards - be careful if you want to keep and reuse them as they break easily. If you have nail heads popping up or loose boards, this is the time to fix that too.
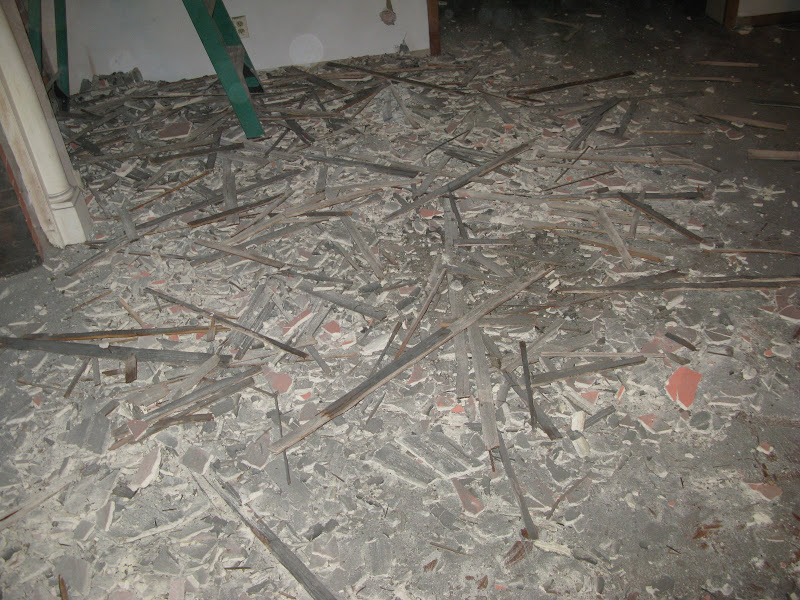
Before:
After thoroughly removing the debris, we sanded the entire floor with an orbital sander (rented from Home Depot) using a 150 grit sanding screen. The edges and corners were done manually with a hand sander. We were careful not to sand too deep in order to keep enough of the current finish and color (the orbital sander is simple to use and more forgiving than a belt sander). After sanding, you should see a powdery white dust over the floor.
Next, we dusted thoroughly with swiffer pads and followed up with mineral spirits using a lambswool applicator. This step was imperative in our case due to the waxy buildup over the years. If the wax is not completely removed it can affect the finish at the end. The mineral spirits also cleans up any dusty layer that might be left and leaves the floors free of residue. We went over the entire floor twice to ensure that it was clean and ready for the first coat of polyurethane.
We used an oil based, gloss by Minwax – I’ve used water-based poly before and while I know it can be argued that it’s a better choice, I feel like the oil-based was easier to use. One big difference is that there were no wet edge problems. This is partly due to it’s slow drying time (18-24 hours before the second coat can be started). Even though it took longer, we're much happier with the results here than in our previous house.
We allowed the floors to dry and lightly sanded them again with the orbital sander (150 grit). You’ll get the white powdery residue again (swiffer, then more mineral spirits with the applicator) – let the mineral spirits completely dry and hit it again with the same poly I mentioned above.
We love them – so much – I think they might be pregnant.
You can also see that we started the cabinet installation! I think that needs one more exclamation point. !
They’re Ikea Akurum in Adel. The finish is called Medium Brown. Medium Brown is a rare species of tree only found in the forests of Sweden. Couldn’t Ikea come up with a name involving more than just adjectives?
Ta-Dah!