Exciting news for San Francisco and San Mateo County residents who might want to do an energy audit and upgrade:
Energy Upgrade California and San Mateo County are combining their rebates to DOUBLE them! WOW! San Francisco's is almost as good!
More counties here.
Peggy
Advanced Upgrade Matching Incentive - San Mateo County Residents Only - Existing Home - Existing Home
Double your rebate up to $8,000! The County of San Mateo offers a rebate match of up to $4,000 for homeowners based on modeled energy reduction through a home energy improvement. Incentives from the County of San Mateo will be allocated on a first come, first serve basis while funding lasts. The matching incentives will range from $1,500 -$4,000 and combined with Advanced Upgrade Package offered by Energy Upgrade CA results in up to $8,000 in rebates and incentives for San Mateo County Homeowners. \ \ Contact a participating contractor for a home energy assessment to get started. \ \ Sponsor: County of San Mateo – County Manager’s Office. \ \ Program Website: www.co.sanmateo.ca.us/energyupgrade
Sponsor: County of San Mateo
Go to program website »
Phone: 1(855) 464-8484
Advanced Upgrade BONUS - San Francisco Residents Only (SFHIP) - Existing Home
Boost your rebate to up to $7,000! San Francisco Home Improvement & Performance offers up to $3,000 in incentives for San Francisco homeowners that achieve 15% modeled energy reduction through a home energy improvement. The standard incentive is now $2,000 (this goes down to $1,000 after August 31st, 2011). Homeowners earning less than 120% of the Area Median Income qualify for an additional $1,000. Combining these incentives with the Advanced Upgrade Package offered by Energy Upgrade CA results in up to $7,000 in rebates and incentives for San Francisco Homeowners. Call a participating contractor for a home assessment. \ To find a SF participating contractor please visit the program website
Sponsor: City & County of San Francisco - Department of the Environment
Go to program website »
Phone: 415-355-3769
Wednesday, August 10, 2011
Kodak Photo Book
This post is part of the Foodbuzz Tastemaker program with KODAK Gallery. Recently I was chosen the lucky winner of a free photo book from kodak gallery, a partner of food buzz.
Using the photo book creation software, it's easy to create photo books and photo albums in few minutes by choosing a book size and style. There are three sizes available - large, medium and small. There are two options available to make your photo book. If you are short on time, you can use the quickstart option or choose the step by step option if you want to customize every photo at your own pace. You can easily resize, rearrange, add captions, change layouts, add or remove pages to customize your photo book the way you like. There are tons of cover designs and page background options to give the photo book a professional look. I received mine yesterday and was quite happy with the product. One thing I noticed was the pictures were more saturated than the original ones.
Visit http://www.kodakgallery.com/products/photo-books/pc-Products-c-C830001
to know more on how to create photo books. I had a great experience creating mine.
KODAK Gallery is also providing an exclusive offer to my readers; 40% off a medium hardcover or a large Photo Book. Visit www.kodakgallery.com/
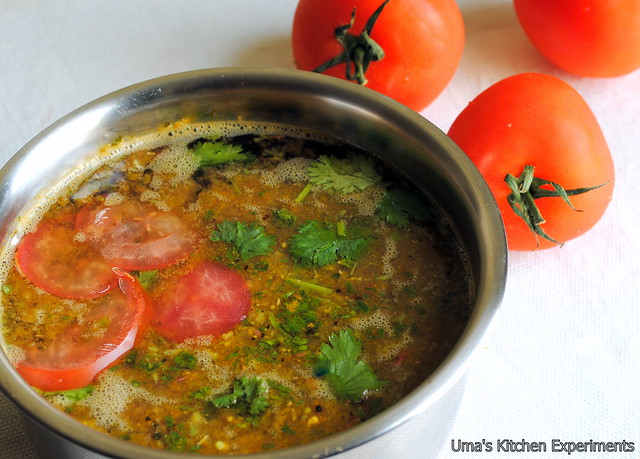
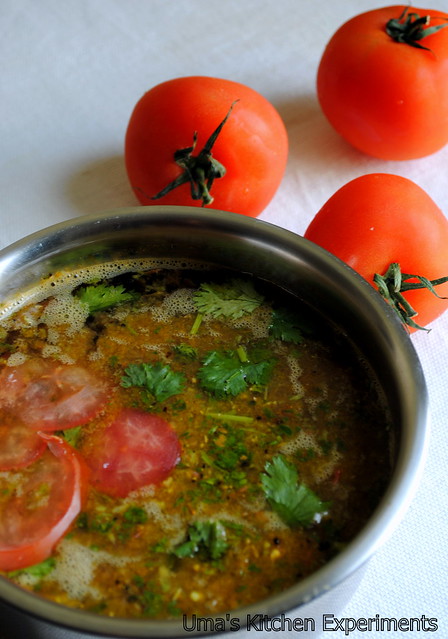
Tomato Rasam / Spicy Tomato Indian Soup

Till my marriage, all I know about rasam is ONLY Rasam. No prefix, suffix to it. But I was introduced many prefixes and suffixes afterwards by my MIL and now I have >10 rasam recipes in hand. I'll post them one bye one.
Tomato Rasam is one which is quite often prepared at homes in India next to tamarind rasam
where tomato will be leading in quantity than tamarind. Here, the method
differs slightly in the way we extract juice from tomato whereas it is
very straight forward in the case of tamarind rasam.
Basic Information:
Preparation Time: 15 minutes
Cooking Time: <10 minutes
Serves - 3 - 4
Ingredients:
Tomato - 3 nos, big size
Tamarind - a big pinch
Coriander leaves - 3 strings
Turmeric powder - a pinch
Salt - to taste
For Rasam Masala:
Green chilli -2 nos
Garlic - 1 no,
Black peppercorns - 1 teaspoon
Cumin seeds - 1 teaspoon
Coriander leaves - 1 string
For Seasoning:
Fenugreek seeds - 1/4 teaspoon
Curry leaves - 1 string
Asafoetida - a pinch
Oil - 1 teaspoon
Method:
1) Take all tomatoes in a bowl and pour 2 cups of water and heat this for 10 minutes on medium heat.
2) After 10 minutes, turn off the flame and add tamarind. Keep aside for few minutes.
3) Meanwhile, Coarsely grind all the ingredients given for rasam masala. You can do this using a mortar and pestle or straightly using mixer.
4) Now, Peel off the skin from tomato and squeeze it using your hand till you don't find any pulps of tomato.
5) Mix the ground ingredients with rasam and add salt. See to the taste and adjust the salt and tanginess by adding salt or water.
6) As soon as you add salt, heat it in stove.
7) When rasam is about to boil, (in this stage foam forms on rasam surface),turn off from stove and garnish with coriander.
8) Do seasoning separately and add to the rasam.
Note:
1) Do no add too much oil, it spoils the taste of the rasam.
2) Do not boil it and remove from heat before boiling to get correct taste of rasam.
3) You also do seasoning first and adding the rasam to it next.
4) Increase/ Decrease the pepper and cumins seeds according to your taste.
Subscribe to:
Comments (Atom)


