For the last few days, daily, atleast one post in TOI is on roti with varied stuffings and ingredients, thanks to Srivally and her Roti Mela. I had planned to try some new varieties as part of the on going Roti Mela. Ever since she announced the mela, I was too busy that routine cooking itself was too tedious. Now, things are falling back to routine.
This recipe is from Sanjeev Kapoor's Dal-Roti cook book. An easy one to make and can make good use of the left over rice too. Here is the recipe.
Cooked rice - 1 cup
wheat flour - 1 1/2 cups
salt - 1 tspn
curds/yogurt - 1/4 cup
ghee - 2 tblspn
red chilli powder - 1/2 tspn
cumin powder - 1/2 tspn
green chillies - 2 nos, chopped
medium sized onion - 1, chopped
oil for frying
Sift wheat flour and one teaspoon of salt. Add yogurt, 2 tablespoons of ghee and half cup of water. Mix together to form a soft dough.Cover with a damp cloth for half an hour.
Meanwhile prepare the stuffing. You can make use of left over cooked rice for this paranthas. Mix cooked rice, red chilli powder, cumin powder, chopped green chillies , chopped onion and salt to taste.
Knead the dough and divide into equal sized balls. Roll out each ball to a three-inch round. Keep a portion of the rice mixture in the centre and gather the edges together and shape into a thick round pedha. Roll out into a 7 inch circle.
Heat a tawa. Place a parantha on it. Turn over once and sprinkle some oil on it. Flip and spread some oil on the other side. Cook till both sides are well.
Paranthas were very soft and spicy too. Since these paranthas remain soft for a longer time, it is suitable for lunchbox too. Serve with some plain curds and pickle or any side of your choice.

 I told him my bread making failure then he was so generous and gave me a live demo straight away in my kitchen. He easily picked up a recipe book from my bookshelves and took a basic bread recipe to start his demonstration.
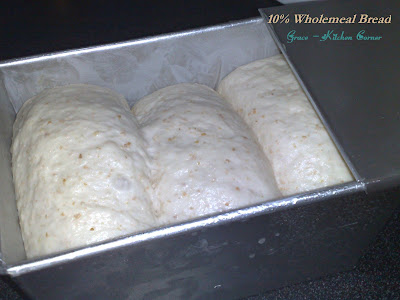
 This is the bread that been baked 40 minutes at 190'C. Later on, I was advised to increase my oven temperature to 210'C to achieve a golden brown color but it was too late as the bread had been cool down for a while. Anyway, that is pretty much optional.
 I was very impressed when I've produced this square bread. It was very soft and tender with no yeasty flavor. The texture had no different compared with those Gardenia bread.
 The only different is the bread did not contain any preservatives or bread improver. It's just the right homemade bread I have been looking for.
 We finished eating the whole loaf in 4 days. The bread is still quite soft in the 3rd day, hence I kept the leftover bread in the fridge.
 We toasted the bread with some "Anchor Salted Butter" in day 4, the smell and texture was fantastic!
 Since we had finished the whole loaf, I would like to try to make one on my own. Hopefully it turns out the right bread as the demo one. I was very happy with my first result. This bread is almost in square shape. The texture and smell was exactly the same as the previous one.
 Recipe instructed by the guru: