Sunday, April 06, 2008

About the new place

The new place is in Little Italy - which is a nice, traditionally Italian neighborhood in the heart of downtown. The location is great and we'll be able to walk to plenty of good spots - restaurants, bars, shopping, grocery store, etc.

It's a typical Baltimore rowhouse, here's the front

We plan on painting the window trim, adding shutters and flower boxes under the windows. We're not sure on color yet, but black is what we've been talking about recently.
There is another window that is hidden behind the jeep just below the first floor window.

It's a quiet street - we have off-street parking across the street in a parking garage, but it seems like there are always a few spots available.

When you walk in the front door you are in this foyer type room. There is a fireplace to the right. The next room is about the same size and has another fireplace to the right. We are hoping we can remove this wall and open up the space. The doors will be stripped and reused elsewhere, they are huge and have some cool, old hardware on them.
This is that second room - that wall directly in front will hopefully be coming down also.

This is where the new kitchen is going. It's a shame that when we rip the wall out that the faux ivy lattice wallpaper will have to come out - it's a gem - more on that later.

There are four fireplaces in the house, two of which are sealed off. The mantles look like they are in good shape and will be salvaged - they should look great in front of exposed brick.

The kitchen is in the basement. It's quite average and getting a new one upstairs is high on the priority list. It'll be nice to have this while the first floor is in shambles.

I wish I could say that we are all pushing 7', but it's not true - the ceiling is really that low. This is the other half of the basement. That wood floor is going to come out (it takes about 5" of height) and the kitchen will turn into more of a wet bar (to accompany the pool table).

This is the master bedroom on the second floor. The wallpaper here is another rare specimen, we can only assume it was hung to have yearlong Easter celebrations. The beams are exposed in this room and are huge - we are in disagreement about what will happen with them. Maybe cover them with drywall, maybe paint them...

Here is some brick that has already been exposed - this is the stairwell wall and the brick will stretch from here to the front door.

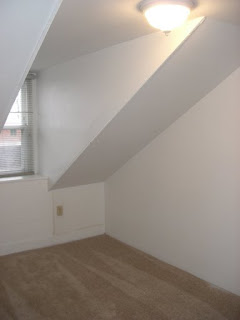
Third floor bedroom - they both look about the same.

Some outside pictures. Lots of work to do here - but it is a relatively big space for the city. There is no alley behind the house, which gives it more of a private feel. The deck picture is the neighbors' houses - file this under 'long term goals'.

View from the stoop. This is looking down toward Craig's office building the other direction is more rowhouses. The harbor is just past that block!

I can't give a tour without pointing out the talent of the meticulous wallpaper artist. This is clearly why we love the house.

Selling and Buying

We have decided to chronicle our next big project using this blog. It will hopefully be a great way to track the progress and tribulations of renovating a rowhouse that is 200 years old.

While we absolutely love our house - our first house - here on Forrester, the time has come to move up and take on a new challenge. We have learned so much about caring for a home and are looking forward to taking that knowledge and building upon it with the rowhouse on S. Exeter.

Performing a renovation project on a home of this age will certainly teach lessons, affirm limitations and try emotions. Although, I truly hope that the buying and selling phase - where we are right now - proves to be the most stressful. It has been a relatively quick process that has been filled with highs and lows. Ultimately, we have been very fortunate despite a mediocre real estate market.

The current owner of the rowhouse quickly accepted our first offer and has been very helpful throughout the process. Our house was listed and we received two offers within seven days! We are getting just under the asking price for our house and we are buying the rowhouse for about $35,000 less than the original listing! Needless to say, we are quite pleased.

The settlement date is tentatively scheduled for June 4, 2008 - assuming no more surprises. We are sort of expecting a few more surprises, but our fingers are crossed. For the time being, we will be packing, getting our house ready for the home inspection and letting our imaginations run wild with ideas - more on that later.

Friday, April 04, 2008

Molagushyam & Parikkai thayir pachadi

Molagushyam is a simple and easy to make gravy to serve with rice. With pepper as the main spice and protien rich moong dal, makes it more healthy. My paati (Mom's mother) prepares this delicious molagushyam without adding dal. It is also referred as Kari molgaushyam, perhaps due to the color of the kootan due to the addition of pepper. (Kari indicates black color). It tastes wonderful with salted whole lemon. Whole lemon is pierced with a skewer and pickled in salt. Nothing else. After pickling for more than 6 months, the lemons will be gooey and melted salt mixed with lime juice will be dripping like honey. How I miss that. I don't bother to pickle lemons this way, since I am the only person who likes that. When I ever I visit my paati, I never miss to taste the salted lime. For my molagushyam, I prepared bitter gourd thayir pachadi as side.


Molagushyam
Vegetables are cut into cubes.
elephant foot yam (chenai) - 1 cup
raw banana - 1 cup
ash gourd (elavan/vellai poozhinikkai) - 1/2 cup (optional)
moong dal - 1/2 cup
turmeric - 1/2 tspn
pepper powder - 1 tspn (Adjust to your taste)
salt
Coconut oil
curry leaves

Wash the vegetables and transfer to a bowl to cook in pressure cooker.
Add 2 cups of water. Adjust the water according to how much you would like the vegetables to be cooked. It taste good if the veggies turn mushy also.
Add turmeric,salt, pepper powder.
Pressure cook for 3 whistles and cook for another 5 minutes on low flame.
Open the cooker after 15 minutes.
Lightly mash the cooked gravy by the ladle. Add water to adjust the consistency. If you are adding water, then boil on stove stop .
Garnish with a teaspoon of coconut oil and few curry leaves.


Parikkai thayir pachadi (Bittergourd Raitha)
Bitter gourd - 1 nos
Coconut - 2 tblspn
Green chilly - 2mustard powder - 1/2 tspn
Curd - 1 cup
salt
Seasoning
oil
mustard seeds

Method
Select BG which are less bitter. We get fluorescent green colored ones which are less bitter.
Slice the bitter gourd in to rings. Remove the seeds.
Shallow fry them till it turns brown.
What I do is MW for 3 minutes wihtout covering.
Take a pan, add a tablespoon of oil. Add some sugar and the half cooked BG. This way it gets fried easily.

Grind together coocnut, green chilly and mustard powder to a smooth paste adding little water.
Add the grinded paste to curd and whip. Do the seasoning using mustard seeds.
Just before serving, add the fried BGs to the pachadi, to have them crisp.


The pachadi is going to Pooja's VOW-Bittergourd event.