Friday, September 19, 2008

contractors; wall removal

The contractors have started working to remove the wall!

First of all – selecting contractors, spending money and negotiating is my day job. I follow strict regulations on a regular basis to increase competition and ensure we receive quality crap at a fair and reasonable price. I assume I can use similar methodology for our personal venture.

We called six different contractors – most upon recommendation. That seems good, right? Five of them called back. Still good – competition is up; these guys are wetting their pants with excitement at the mere notion of working in OUR house. After each one leaves I tell Craig how he reminded me of my Dad and how, "that one there, he's good, he's got the job - he's even willing to let us help with the work."

Then – mostly silence. I take personal offense. Why don't these fools want our money? I consider listing bank account numbers along with their mothers' maiden names, cities of birth and favorite foods. I also avoid begging for quotes – if this is indicative of workmanship, then they're already behind.

One guy continued to call back. I felt really good about him from the first visit, but feared his professionalism and fancy business card translated to cash; money; records. Seriously – his business card is two-ply maple. This gave him a significant advantage in this competition. All you guys with one-ply maple business cards, suck it.
From 9.19.08

The original quote was pared down quite a bit because we are saving a bunch by doing the framing and drywall work ourselves. After that, I negotiated and knocked off a chunk of cash from the bottom line. I can't stress this enough, people – if you don't ask, you won't get it. Negotiation feels rude and cheap at first; but fatter pockets are sexy and more fun. I also suggest that when you ask for something, offer something. In our case, I pointed out that we already had done most of the demo work and would finish the remainder prior to them starting. He liked it and we signed the contract.

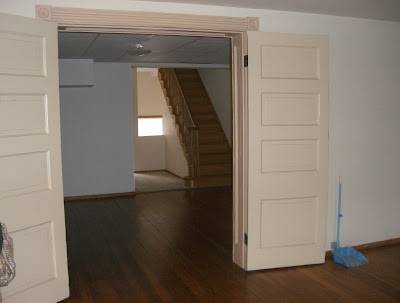
Before - a few things to note, the drop ceiling was put in at some point because when they upgraded plumbing in the past, they placed all the pipes below the joists. This lowered the ceiling by about eight inches - idiots. Also, the bulkheads (i.e. those big drywalled boxes taking even more of our precious ceiling space) were built around a very strange mess of HVAC ductwork. We considered living with the multiple leveled ceiling, because we thought it'd save money. Although, because of the way the contractor has to work and re-support the structure, these items all needed to be moved. So, the ceiling will be all one level and quite a bit higher.

The plumber came out first and moved the pipes into the ceiling.
From 9.19.08

Here, you can see more of the pipes as well as the steel beam and bricks.
From 9.19.08

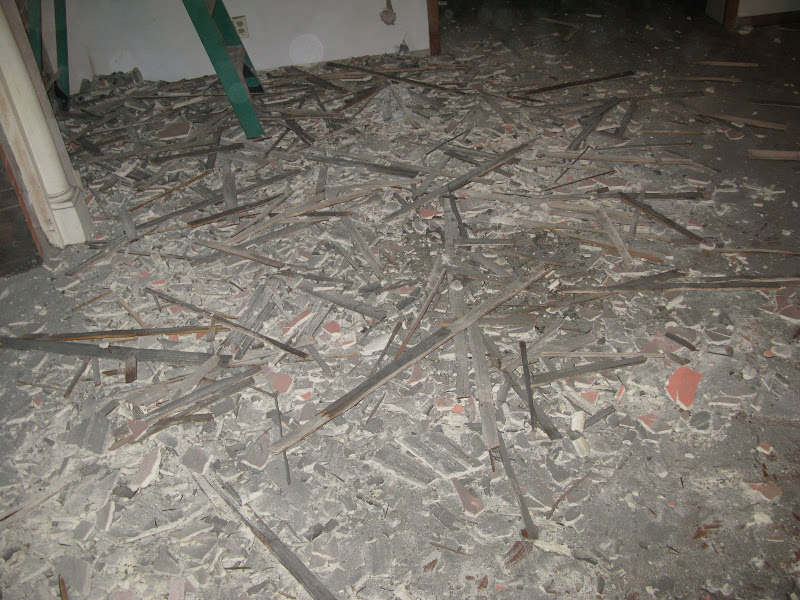
This is the workzone. See those large, solid looking vertical wood columns? Those are the temporary supports that are put in place to hold the structure while they're working on re-supporting the new opening. There are a few more on the other side.
From 9.19.08

Today they are finishing the wall removal and the HVAC guy comes out Tuesday to finish his part. We're so excited that this is moving so quickly!

wood door headboard; stripping paint

These doors used to separate the front two rooms. They're big, heavy and among the few things that are original to the house. While we definitely love them, we knew they couldn't stay there. They took up way too much space and offered no utility.


There was no question and no discussion necessary - we both knew they'd make a fantastic headboard, especially considering the fact that our current bedframe is low and we chose it because the master bedroom in our previous house had much lower ceilings. i.e.:

Ahhh, let's reminisce about the days when there were dust-free surfaces and the big decision to be made was whether or not that purple pillow should remain on the bed... ... ...
Oh that's right - this was our living room the other day:


Back to the doors - stripping the paint is step one. We used Klean-Strip stripper because after all, it is America's #1 Stripper Brand.

It's a gel and fairly easy to work with. The label says 15 minutes, which is a pretty convenient amount of time if you want to go crack open a bottle of wine and boil some noodles. The problem is that the label lies, which makes me wonder about their claim of superiority in the world of strippers. It actually works much faster. In 15 minutes it was dry - and everyone knows it's much better to work with wet strippers. I'd still recommend this product, as it worked quite well once we got the hang of it. We found that it's best to just keep an eye on it and start scraping a few minutes after the paint starts bubbling:

Scrape away:

It took a few rounds of stripper despite the fact that there were surprisingly few layers of paint on the doors. We wanted to keep a worn look to them, which was a good decision considering our skill level.

Break time - and we wanted to see one behind the bed.

After the paint was off, they were sanded;

and then stained with English Chestnut stain from Minwax. After the stain, we used two coats of a satin finish polyurethane, also by Minwax. In between the coats of poly we sanded them lightly giving the final finish a nice smooth feel. Ta-dah - here we are - nicks, scrathes and all. We love 'em.


We're now working on the pair of fireplaces on the first floor... the stripper is proving less effective. There are many more layers and some of the old stains seem to be made of tar as seen here:

We traded leftover muriatic acid for a loaner heat gun with our pals Jessica and Joy. So far, so good - more to follow.

***a picture of the headboard behind the bed is in this post

Wheat in Bisibelebath and a salad

Bisibelebath with broken wheat


I use broken wheat for making pradhaman. Other than that it doesn't feature in our regular menu. So when bought for making payasam, usually there will be left over, since only a small quantity is required for the preparation. When I had some broken wheat to be used up, I was thinking of recipe where I can replace rice with wheat. I had posted pongal with wheat before. The next trial was making bisibelebath out of broken wheat. Broken wheat is not the same as wheat rava. This is coarser. Believe, broken wheat made good substitution for rice. Unless told, you cannot make out the difference. From then, I have been regularly including broken wheat in my shopping list.
Only when I searched my archived to link this to bisibelebath post, did I realise, that I haven't posted the recipe yet. So here is my recipe.

Broken wheat - 1 cup ( Usually rice is used)
Toor dal - 1/2 cup
peas(fresh/dried) -1/2 cup
chopped veggies - 1 1/2 cups (carrot/beans/potato/capsicum)
shallots/pearl onion - 15 nos
tamarind -small lemon size
sambhar powder - 1tspn (optional)
turmeric powder
salt

Seasoning
Oil
mustard seeds
red chilli - 2 nos
curry leaves
For masala
red chilli - 6 nos
coriander seeds - 1 tspn
cloves - 4
cinnamon - 1" piece
hing - 1/2 tspn
grated coconut -1/4 cup(kopra is preferred.)
If fresh coconut is used, saute them till lightly brown. Grind all the ingredients for the masala to a smooth paste.
Soak tamarind in warm water for 10 minutes and extract pulp.
Wash, broken wheat,dal and peas.If dried peas is used, soak them for 5 hours.Pressure cook them together. Keep it aside
Heat oil in a pan, add the seasoning ingredients. Saute the onions till golden. Add the chopped veggies, turmeric and salt. When it is half cooked, add the tamarind pulp. When the mixture starts boiling, stir in the ground paste and mix well. Cook for 10 minutes. Mix the cooked wheat-dal mixture to the cooking masala and mix well. Cover and cook for 5 minutes till the flavors seep in the wheat-dal combo.Heat one tablespoon of ghee in a seasoning pan. Add a teaspoon of sambhar powder and pour on top the cooking mixture. This step is optional. But it does enhances the flavor of bisibelebath. Remove from fire. Garnish with coriander and serve hot with papad.

Sprouted Wheat berry salad


I buy whole wheat to make dosa. My co-sister always sproutsome of the soaked berries. Ever since she told gave me the idea, whenever I soak berries for dosa, I keep aside a handful of the soaked berries for sprouting and use that in salad. Steam cook the berries before using for salads. These will be chewy, but very tasty. Toss in any veggies(I have used grated cucumber and carrot, onion and tomato) you have and sprinkle some salt, pepper and lime juice and teaspoon of olive oil for dressing. You can have the bowl of healthy salad as a meal by itself or use it in wraps.

Wheat berry salad is my entry to EC's : WYF- salad/soup/starter

Diet friendly bisibelebath and salad is making to Divya's Diet Food Event