Friday, March 30, 2012
glass candelier; mirror tile fireplace
Here are a couple of DIY projects we have in our dining room. A side note, the dining room is the first room you walk in when you enter our rowhouse. This works quite well for us - not because our dining room has a front door, but because the living room / kitchen creates a great space for both entertaining and living.
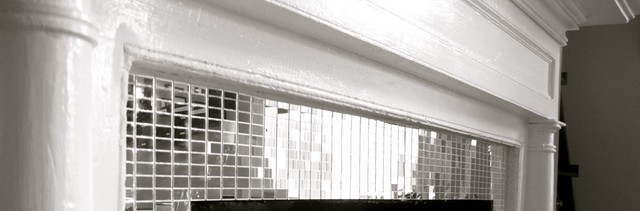
First, the fireplace surround now doubles as a mirror-ball. I like the way the aged and worn, glossy-white-painted mantel looks with the bright, square tiles. By the way - they do not actually create a mirror-ball effect. They do, however, bounce natural light around in a place that is normally pretty dark. Take a look:
I got these at Kit Kraft and installed them with a tile-mastic for fireplace surrounds. This is not a working fireplace and I'm not vouching for their ability to withstand heat - but I will vouch for their ability to prompt a random, "Girl, that fireplace is fabulous!"
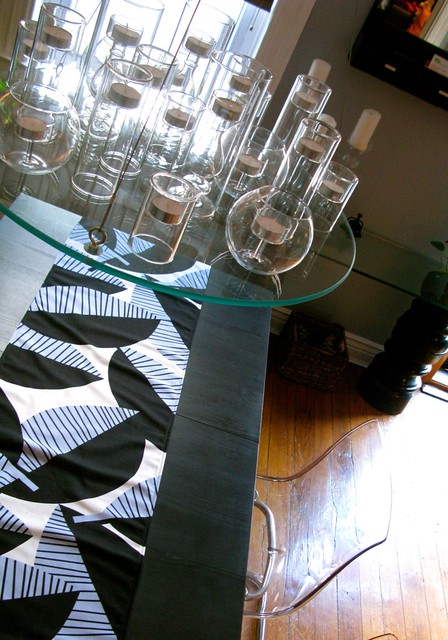
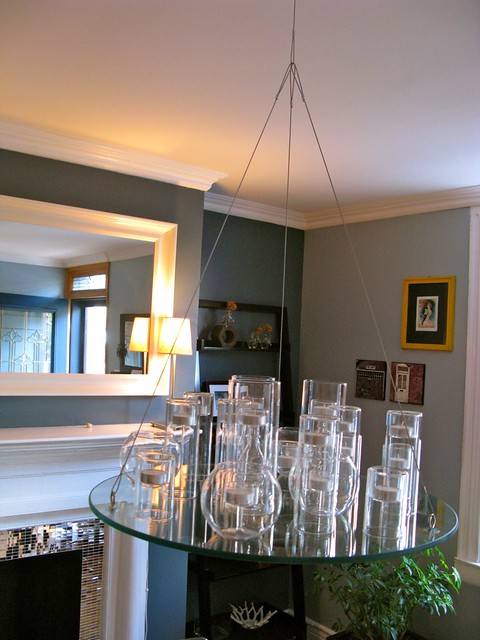
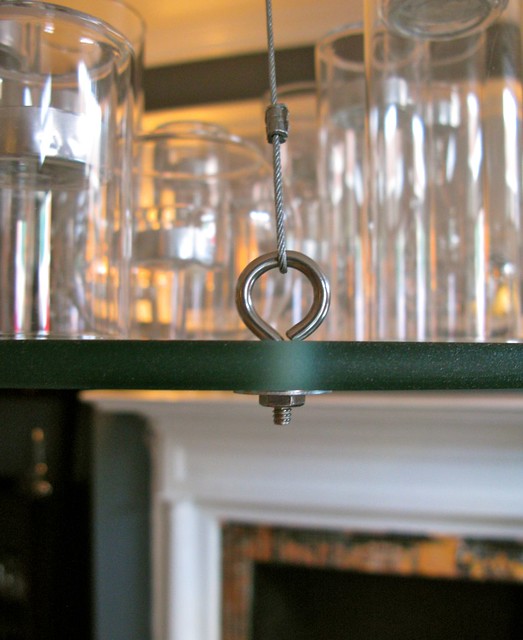
Now onto one of my favorite projects - this glass candelier that hangs over the table. The tealight holders came from Crate & Barrel. The different heights and shapes are interesting from just about every angle. The glass base came from a trusty glass shop called Caplan that we've used for a few projects. They cut the piece to specification with three holes evenly distributed around the edge.
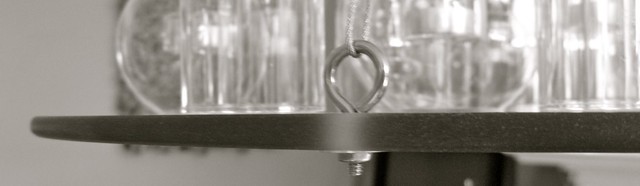
From there I added the hardware that you can see in detail in the pictures. The biggest tip of advice (courtesy the glass cutter man) is to have non-metallic washers. There should be no metal touching the glass at any time. The glass is fairly heavy and sometimes covered in a small fire. I heeded the man's advice and have been eating worry-free ever since. While you can't see it in the picture, I used vinyl washers to keep everything properly protected.
A special thanks goes to our wonderful friend, Kim, who made the table runner with her own little hands.
I know, I know - you want to see what that thing looks like when it's lit. I'll get around to that...
Thursday, March 29, 2012
Egg Bhurji / Scrambled Eggs
Whenever I am not well or feel lazy, TH becomes the cook of my kitchen. And, I know by default what he cooks. Egg, egg and only egg.
I had never seen preparing recipes other than egg when I am not available. He usually says that the egg makes his job easier and reduces the time to stay in the kitchen.
I find it correct anyway. It is always easy to prepare and helps when nothing available at home.
Here is the recipe from TH, the simple, easy, colourful egg bhurji. Enjoy!!!
Basic Information:
Preparation Time: < 15 minutes
Cooking Time: 20 minutes
Serves: 3-4
Ingredients:
Oil - 3 teaspoons
Mustard seeds - 1/4 teaspoon
Cumin seeds - 1/2 teaspoon
Green chilli - 2 nos, slit or finely chopped
Onion - 1/2 cup, finely chopped
Capsicum/Bell pepper - 1/4 cup, any colour, finely chopped, optional
Eggs - 4 nos
Salt - to taste
Pepper powder - 1 teaspoon
Method:
1) Take a wok and heat oil in it.
2) When it is hot and not smoking, add mustard seeds and cumin seeds. Allow them to splutter.
3) When crackle sound of mustard seeds reduces, add green chillies.
4) Add onion and saute till it turns soft.
5) Add capsicum and saute without changing colour.
6) Break eggs one by one and leave it for a minute.
7) Start stirring continuously to form lumps. Initially it would look like messy as shown in the picture.
8) Stir it continuously till the eggs are not sticking with the pan.
9) Now, add salt and pepper as per the egg quantity and stir well.
10) Serve hot with steamed rice or chapati.
Note:
1) Roast and make a powder of cumin seeds and black pepper corns. Add this at the end of the preparation of egg bhurji. If you are doing this, skip adding the cumin seeds for the seasoning.
2) Addition of capsicum is completely optional. As TH and I like capsicum a lot, we added to this bhurji.
3) Avoid green chillies and increase the pepper quantity, if you are going to serve for kids.
Cake Keju Parut ( Ci Yulia, Cengkareng )
Repeat order dari Ci Yulia, kali ini pesen cake keju parut. Katanya liat keju nya bikin kepengen..Hahahaha. Sekalian buat kue potong anaknya ultah.
Biasanya cake keju ini 2 lapis tapi ini spesial buat Ci Yulia bikin 3 lapis.Hehehehhe
Happy Bday, Giorgio
Panjang umur, tambah pintar dan selalu diberkati Tuhan. Amin
Biasanya cake keju ini 2 lapis tapi ini spesial buat Ci Yulia bikin 3 lapis.Hehehehhe
Happy Bday, Giorgio
Panjang umur, tambah pintar dan selalu diberkati Tuhan. Amin
Subscribe to:
Posts (Atom)