Tuesday, September 30, 2008

The Kitchen Sisters Come Out Swingin

Events On
Our Radar

The 2008 Presidential Election,
Tuesday,
November 4.
VOTE.

Public Radio Fund Drives happening nationwide this month. Support your local station. Keep the airwaves public and vibrant.


The Naked Truth: The Katie Lee Exhibit
at the Cline Library, Northern Arizona University.
Katie is one of the pioneering river activists we chronicled in “Cry Me a River.” She fought the
damming of Glen
Canyon in the 1950's and at 88
still works unrelentingly for the environment.

Books We're Reading:


Girls: Ordinary Girls and Their Extraordinary Pursuits by Jenny,
Laura & Martha McPhee. Three of John McPhee's daughters create a collection
of photographs and life stories.

A Platter of Figs and Other Recipes by David Tanis. When we first began the Hidden Kitchens series we ate at a secret, twelve-seat, one-table, one-night-of-the-month restaurant tucked into an apartment in Paris. That elusive ritual dinner that David Tanis & Randal Breski created helped inspire our NPR series. This is a collection of some of David's recipes and stories. David is also the chef at Chez Panisse.

Evening is the Whole Day by Preeta Samrasan
Our intern Deena Prichep recommends this lovely novel.

Alabama Stitch Book by Natalie Chanin. We have been following the saga of Project Alabama for years now. Natalie is a clothing designer from Florence, Alabama, home of Sam and Becky Phillips of Sun Studios and WHER fame. Her commitment to hand-made textiles and local artisans is part of what we are watching as we explore the secret life of girls around the world.

Radio We're Making:

Chocolate Town: A Hidden Kitchens story-in-progress about the chocolate company towns and the candy factory “sweetie towns” of England.

Kitchen Sisters Recording & Interviewing Workshop - Friday, September 26, San Francisco.

The Blonde in the Village: We travel to the mountains of Korea near the DMZ for the secret saga of an outcast girl.

Favorite Things: The Kitchen Sisters session at the Third Coast International Audio Festival - October 11, Chicago.

Music We're Spinning:

WWOZ FM in New Orleans, "Guardians of the Groove."

Sincerely Jane by Janelle Monae. We heard this song on KCRW when we were in LA for the gathering of Public Radio Program Directors from all over the nation. We're looking for music for our new girls series and something about this song stuck.

Papa Was a Rollin' Stone by The Temptations, co-written by Norman Whitfield, who died last week. He also co-wrote Ain't Too Proud To Beg, Just My Imagination and I Heard it Through the Grapevine and so much more.

Earl Palmer's drumming. A beautiful lost and found sound. Palmer, who also died last week, played drums on La Bamba, Lucille, Donna, Tutti Frutti and so many songs with a rhythm that lives. He worked with Fats Domino, Little Richard, Frank Sinatra, Tom Waits and on and on. Beat in peace.

Paintings We're Admiring:

Kitchen Brother, Charles Prentiss (Nikki's husband) exhibits his paintings at Open Studios in Santa Cruz the 1st and 3rd weekend in October. You're invited to visit the commune where Nikki and Charles live, tour his studio and take a behind-the-scenes look at The Kitchen Sisters' production studio there. October 4-5 & 18-19, 11am - 6 pm. See some of Charles' artwork and get directions at charlesprentiss.com.

Monday, September 29, 2008

Okra & Pearl Onion Curry


I am sending this recipe to Sunshinemom's FIC Green event.

I love Okra. I also love pearl/baby Onions. Somehow it did not strike my mind to combine these two lovely veges together. Of course I have made Okra subji with big onions. After looking at
Bhawana's "Okra with baby onion" recipe, I was too tempted to try this combination in my own way. Needless to say, it was great and I enjoyed every bite of it with Rice and Sambar.

Ingredients: Okra-1 pound
Baby Onions-1 cup(peeled)

Salt

Chilli powder-1/2 tsp

Turmeric powder-1/2 tsp

To Tamper:
Mustard seeds-1/2 tsp

Jeera-1/2 tsp

Oil-2 tbsp


Method: Heat oil in a pan. Tamper with mustard seeds and jeera.
When they crackle, add baby onions. Fry for a couple of minutes.
Then add chopped okra, salt, turmeric powder, chilli powder and fry till okra gets roasted.

Yummy curry is ready to go with rice or roti.

Keerai Molagootal and Nellikkai Archukalakki ~ Lunch Series #1


I have been planning a lunch series featuring the ordinary lunch menu at my home, which most of the time is traditional dishes. I took few pictures also. It ends there. I kept on procastinating the posting part. Finally I have come around to posting stage.I didnot want to stop it after 2/3 posts and leave it there. I wish to feature atleast the most common recipes in this series. Hope I will do minimum justice to it. A normal lunch consists of a gravy/kootan as referred in Palakkad Iyer lingo, upperi/dry curry, rasam(not everyday), mor/buttermilk and pickle. I had not doubt to what will be my first post in this series. What else other than Molagootal, the signature dish of Palakkad Iyers, to kick start the series.


Keerai molagootal (Spinach in dal and coconut gravy)


Arakeerai/Amaranth leaves (the one with small leaves) is the best variety for molagootal. Palak/Spinach is also good. Most of the times I end up buying palak since it is easy clean, where arakeerai takes quite some time to separate the leaves and tender stem.


Roughly chopped keerai - 3 cupssaltturmeric
Tuvar dal - 1/2 cup
Cumin Seeds/Jeers - 1 tspn
Grated coconut - 1/2 cup
For roastingUrad dal - 1 tspnRed chilly - 1 no

Seasoning

Oil - 2 tspn

Mustard seeds - 1 tspn

Method
Ccook the spinach leaves in 1 cup of water till the leaves are withered. Alternatively Mw for 3 minutes. Leave it to cool . Pressure cook tuvar dal till soft. Mash the dal well. Roast urad dal and red chilly in a tspn of oil till dal turns light brown.

Pulse the keerai in the mixer for few seconds. It should be pureed but not too smooth.Grind the coconut,roasted dal and chilly and jeera to a fine paste.
Coimbine spinach puree, mashed dal and ground paste. Bring to a boil. Season with mustard seeds.


The preferred sides for molagootal is puli pachadi (tamarind based), thayir pachadi(with yogurt base) thogayals (chutney) or arachukalakki.


Now I am posting the recipe for nellikkai arachukalakki. Arachukalakki literally translates as Ground and Mixed.Here it is grounded gooseberry and coconut with chilly mixed with yogurt. Chenai/yam, kanni manga (salt pickled small mangoes ) are generally used for preparing arachukalakki.


Gooseberries pickled in salt - 10 nos.

(Usually these berries would have turn soft on soaking in salt water. If you find them firm, u can steam cook/MW for few minutes to make them soft. )
Grated coconut - 1/2 cup

green chilly - 3 nos

whipped curd - 1/2 cup

Seasoning

oil - 2 tspn

mustard seeds - 1 tspn

red chilly - 1 no

methi seeds - 1/4 tspn
Remove the seeds from the berries. Grind together GB, coconut and green chillies.
Heat oil in a pan. Add mustard seeds, followed by red chilly broken into two. Finally add methi seeds. When methi starts turning brown, add to the ground mixture. While the pan is hot, add the whipped curd to the pan and pour over the seasoning. Mix well. Since salt in the gooseberries will be enough, additional salt will not be required. Though check if needed.

Keerai molagootal is going Sunshinemom's FIC: Green

Nellikkai Arachukalakki is my entry for AFAM:Gooseberry hosted by Illatharasi.

Oatmeal Chocolate Squares


Ingredients

Quick cooking oats - 2/4 cup
Cornflakes - 1/4 cup (Can use 1 cup of oats alone. I added cornflakes to give a crunch.)
Sugar -1/2 cup
Unsweetened coco powder - 2 tspn
All purpose flour/maida - 1 tspn (for binding)
Water - 2 tblspn


Method
Take oats in a MW safe bowl and MW for a minute. Keep it aside.
Take a MW safe bowl with sugar and water. MW for 4 minutes. Sugar must be completely dissolved and syrup must be sticky. Mix maida and cocoa powder well. Stir in maida, cocoa mixture without forming lumps. Add oats and cornflakes. Mix well. MW for 2 minutes. The mixture should come together and must be moist too. Don't let it turn dry. If you feel it has dried, add a tspn of water and MW for 30 secs. Either drop spoonfuls of the mixture on a greased plate or press them down and mark squares when warm.


It was tasted by my friends who was visiting us and they enjoyed it very much. This is my entry to Srivalli's MEC-Chocolate

I am sending this to The O Foods for Ovarian Cancer Awareness Month Contest. The contest seeks to raise awareness and money for the Ovarian Cancer Research Fund through recipes for "O Foods," foods that start or end with "O". For more info visit here.

Sunday, September 28, 2008

Matcha Sorbet

I've been using a brand of matcha powder bought from "Shaw House" at Orchard. I love its fragrant as the flavor works well for cakes or desserts and the color is so refreshing. I made few cups of matcha sorbet followed the recipe from "点心达人轻松学". It's simple to made and low fat. I think sorbet is low fat than ice cream as its made by water or milk. I used MEIJI low fat milk for the sorbet and reduce some sugar from the original recipe. I like this recipe as it's really refreshing.

Method:
  1. Boil the milk and cream in a pan.
  2. In another bowl, mix green tea and sugar until well combine. (I used about 40g sugar)
  3. Gradually add ingredients (2) to (1) and mix until the sugar and green tea dissolve.
  4. Filter the mixture and pour into a shallow dish.
  5. Cling wrap the dish and store in the freezer for 4 hours or overnight.
  6. Cut the freeze sorbet in cubes then blend in a food processor.
  7. Scoop out the sorbet and it's ready to serve.

Sesame Rice


I think I am in the mood to try out others recipes these days :-). This recipe is by Usha of Veginspirations. I made it after a really long time. I had almost forgotten about this recipe until I saw Usha's post recently. I loved it! Thanks for sharing the recipe!

Ingredients:
Cooked rice-sufficient for 2 people

Salt

To dry roast and grind:

Sesame-3 tbsp

Dhaniya-1 tbsp

Red chillies-3


To tamper:

Mustard seeds-1 tsp

Jeera-1 tsp

Hing- a pinch
Curry leaves-a few sprigs

Urud dal-1 tsp


Method:

Cook rice and cool.

Dry roast the above ingredients and grind to a fine powder.

Heat oil in a pan, tamper the above mentioned ingredients and switch off the gas.
Add rice, salt and ground powder and mix well.
Serve with pappad or curd.

Saturday, September 27, 2008

Instant Wheat Dosa

I found an interesting recipe from My Kitchen (click here for the recipe)this morning when I was wondering what to make for breakfast. I tried her wholemeal pancake recipe(which I renamed as wheat dosa). I liked it and I am sure I will make it more often. Only thing I did not add was ginger garlic paste. Otherwise I followed the exact recipe. Thanks for sharing the recipe! I will jot down the recipe here so that I can refer to it anytime.

Ingredients:
Wheat flour-2 cups
Besan flour-2 tbsp
Salt
Chilli powder-1/2 tsp
Hing-a punch
Turmeric powder-a pinch
Jeera-1/2 tsp
Onions chopped-1/2 cup
Tomato chopped-1
Coriander leaves chopped-1 tbsp
Ginger garlic paste-1/2 tsp(optional)

Method:
Mix everything with water to dosa batter consistency.
Make like regular dosas.
Serve with podi or chutney.

Gone nuts with Dates!


One of the easiest ways to get all the goodness of fruits and milk is by having milkshake or smoothie everyday for breakfast. It is very filling and satisfying. Date milkshake is not only healthy but als0 delicious.

Ingredients:
Dates-5
Almonds-a handful
Banana-1
Milk-2 glasses
Cardamom powder-a pinch(optional)

Method:
Blend everything together well and enjoy!

Friday, September 26, 2008

the contractors have finished

We are thrilled with the new open space! It's still a mess and we now have tons of work to do, but getting rid of this wall really helps us move forward. Here's what we're looking at:

We can't believe how much of a difference it made! The kitchen will mostly be the area where there is currently carpet (it may spill out a bit into the living room). The walk-through will be to the right of the column and to the left will be cabinetry/appliances. We've only made preliminary layout decisions, but now that we can really see the space we're going to get serious about the plan.
In the following picture you can sort of see how the ductwork is all tucked as high as possible and grouped together:

The next steps are to:
come up with the basic design;
decide where plumbing and electrical will be going;
and start the framing and drywalling process.
We'll also be drywalling the living room ceiling and the master bedroom ceiling (both are just exposed joists right now).
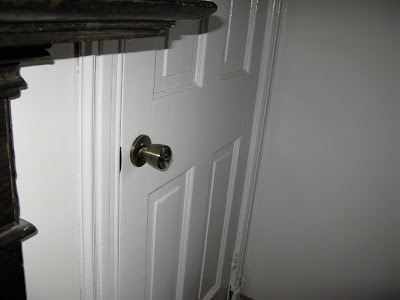
There are lots of other random jobs that will continue - speaking of, we installed doorknobs on a few closet doors. I basically followed the directions and they all work perfectly. These were doors that had no previous knobs, so there was chiseling and hole-sawing involved. Be careful, because this picture is about as exciting as hunting moose:

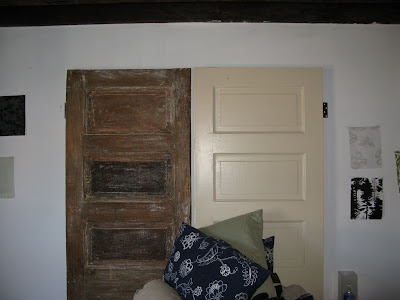
Also, upon request - here is a picture of the doors-as-headboard. There are going to be quite a few changes... actually everything will change, except for the headboard. Remember the wallpaper we were indecisive on? It's going on the wall behind the bed. The linens will certainly be changed; new side tables; the ceiling will be a solid surface - yeah, yeah, you think we should keep the beams - they look interesting in the picture, but they're a mess in person and they have to be covered. Also, the sound travels 100% through to the upstairs bedroom and that is less than ideal.

Gratuitous dog picture - ole blue eyes:

Vegetable Pizza

I followed a pizza dough and tomato sauce recipe from Jamie Oliver (Jamie's Dinner). Again, his recipe is wonderful! I've never failed by using his recipe. For the topping, I simply sliced some mushroom, red and green pepper and finally topped with some cheddar and mozzarella cheese. I would say, the tomato sauce makes the pizza smell very good and delicious.

Recipe for quickest tomato sauce: I made 250ml (you might not need to use all)


2 cloves of garlic, peeled and finely sliced
a bunch of fresh basil leaves, picked an torn
600g tins of whole plum tomatoes
sea salt and freshly ground black pepper
1 dry bay leave
  1. Fry the garlic with some olive oil in a pan then add in basil and tomatoes. Using the back of the spoon, mush and squash the tomatoes as much as you can.Season the sauce with salt and pepper and add the bay leave.

  2. Let it simmer at the medium low heat. The tomatoes will break into puree. Let it cook for 15 minutes until the mixture puree and dry. Leave to cool and ready to use.

Recipe for the dough: I made two pieces of 8 inches pizza

200g bread flour / 1/4 tbps fine sea salt / 3.5g yeast / 5g sugar / 163g water

  1. Knead all the ingredients until smooth springy soft dough, cover it with clingfilm and let it rest for 1 hour until the dough has double in size.

  2. Knocking back the dough by kneading and pushing the air out with your hands. Divide the dough up into 2 balls and rest for 15 minutes.

  3. Roll the doughs into circles about 0.5cm thick and place on a flour-dusted tinfoil then proof for 40 minutes. Place the foil together with the dough on a pre-warmed flat baking tray or pizza stone. The dough will start to bubble and cook immediately.

  4. Then quickly spoon 3 to 4 tablespoons of tomato sauce into the middle and spread it out evenly. Add all the ingredients like vege, ham etc. Then top with cheese and season with salt and pepper and drizzle with olive oil.

  5. Place the pizza in the 220'C preheated oven and cook for 10 minutes until the pizza base is golden, bubbly and crisp around the edges and the tomato and cheese topping is melted.

Thursday, September 25, 2008

Aval Payasam

After seeing Aval payasam recipe posted by Srikars kitchen, I could not resist myself from trying it out. I made a few modifications according to my taste and imagination and the end result was that I could not have enough of it. Thanks Sripriya for sharing this wonderful recipe.
This is my version of Aval Payasam.

Ingredients:
Aval(Poha)-1/2 cup
Ghee-1tbsp
Cashews-a handful
Almonds-a handful
Milk-1 cup
Evaporated milk-1 cup
Sugar-according to your taste
Cardamom powder-a pinch
Orange color(optional)-a pinch
Saffron-a few strands
Edible camphor-a pinch(optional)
Coconut-1 tbsp

Dry grind almonds and cashews(setting a few aside to roast) to a fine powder.
Heat ghee. Fry some cashews to golden brown. Set aside. In the same pan, fry poha in ghee for a couple of minutes. Add milk. Let it boil(if the mixture is too thick, add some more milk). Add the ground nuts, sugar, evaporated milk, coconut, saffron, orange color, cardamom powder & edible camphor. Simmer for 5 minutes. Garnish with roasted nuts. Tastes best when warm!

Wednesday, September 24, 2008

Malaysian Veg Noodles-for all you spicy lovers out there!

Thanks to our family friend who introduced us to this dish. This noodles tastes simply superb. It actually tastes great the day after it is made.
Ingredients:
Hakka noodles-1 packet
Chopped vegetables like onion, beans, carrot, cabbage
Chilli powder as per your spice level
Salt
Oil-3 tbsp

To grind:
Tomatoes-3
Garlic pods-3

Method:
Heat oil. Fry onions to golden brown. Add beans, carrot and cabbage. Fry till veges are half cooked(takes about 5 to 8 minutes). Add the ground paste, salt, chilli powder and continue to cook till the raw smell of tomato goes and mixture becomes thick. Now it's time to mix in cooked noodles.(cook noodles as per the instruction on back side of the packet)
Toss well and serve.

Backflow Devices

Starting about 3 or 4 months ago, we got a whole bunch of calls from various property managers saying that people had stolen their backflow devices. (What's a backflow device? Click here!) People were stealing them and then trying to "recycle" the brass at one of these scrap metal places. These things cost a lot of money (in many cases, more than $1,000.00) and, to steal them, they shut off the water to your building! And you can't turn it back on until you replace the device!

Then, they found one of the guys in Mission Viejo with hundreds (I think) of these devices in his house. I don't know what he was going to do with them. No way would a scrap metal yard take that many from one person.

There are all kinds of ways to minimize your risk of having one of these stolen, but the best is to install a cage around it. If you contact us, we can give you a bid. We would pour a concrete pad around your device, install some bolts in it and then put a metal cage over it. When we come to test it, we just unlock the cage and go to work. When we're done, we just put the cage back! A determined thief can still get to it, but most thieves don't want to put that much effort into it and will move on to easier pickings


Now, off the subject...

I put here in a previous post that I am a ballroom dancer (no, I am not nearly as good as the ones on Dancing With the Stars). I do it strictly for fun, some exercise and because my wife loves it. When I started, though, I had a real problem.

I have studied one martial art or another since 1983. Most of these require strict body positioning, positioning that usually looks nothing like any type of dance step. It was really funny watching me try to maintain my balance while trying to look good dancing!

Fortunately, due to the patience and perseverance of many dance instructors, I got past this. Now, I am a decent dancer and I don't look all stiff and awkward as I did when I started.

There are a lot of excellent dance instructors in and around Orange County. Just a few are Lisa Narita, Tom Hyatt and Louie Herrera. Check out these sites if you are interested in having fun, meeting people and getting some exercise!

Tuesday, September 23, 2008

Mixed Fruit Salad with Cottage cheese


Treat yourself with a big bowl of fresh fruits drenched in honey and topped with chunks of cottage cheese and slivered almonds to satiate your sweet tooth!

Fruits used here:A handful of chopped cantaloupe, apple, banana, grapes and orange.
Mix the fruits with 1/4 cup of cottage cheese and drizzle honey all over. Garnish with your favorite nuts.

Variation:Condensed milk can be used in place of cottage cheese and this fruit salad goes great with vanilla ice cream.

This recipe goes to Sangeetha's:CALCIUM RICH EVENT

Cheese Garlic Biscuits -MBP


My bookmarked recipes folder is ever growing and my attempt to bring the number down is not showing any results. When you have so many wonderful cooks around, dishing out equally appealing dishes, I think the only way I can clear up my bookmarked folder will be to start a new one. So I get a false joy of clearing the folder. Though I know there is a new one growing at the other drive. When the theme for MBP was announced by Siri, I knew what I was going to make, since this recipe is bookmarked ever since Cham posted it in her blog. As she says, its easy to make. I replaced all purpose flour with wheat flour/atta, since AP was out of stock. May be I would have used half and half. Except for that, I have followed her recipe.


Whole wheat flour - 1 cup
Sugar - 1 tspn
Baking powder - 1 1/2 tspn
Baking soda - 1/4 tspn
Butter - 1/4 cup
Grated cheese - 1/2 cup
Garlic - 2 cloves, finely chopped

Buttermilk - 3/4 cup


Preheat the oven at 230 C
In a bowl, mix the dry ingredients. Cut the butter into flour to resemble crumbs. Add the garlic and cheese and stir in buttermilk to form a dough.Either roll to 1 inch thick dough with some flour and cut into any desired shape, else drop spoon full of the dough onto a cookie sheet.
Bake for 15 minutes or until top is brown.


P.S
I was in a hurry while mixing the ingredients that I forgot to add the baking powder. So mine did not rise well. It had a crisp crust but inside tasted like garlic bread. Later I popped them in MW for a minute and it was crisp in the inside too. Now I have a reason to bake it again.

Monday, September 22, 2008

Apple Chiffon Cake

Here is my second attempt on apple chiffon cake. I've made a 17cm and a 22cm round chiffon. It took some time to made this cakes as the apple need to be cooked first before making the cake. I bought few apples that came with very red skin to produce a lovely pink color for the cooked apple.

Most of the chiffon cake I've been making consist of corn flour. I followed a recipe book named "戚枫蛋糕秘法转授". I think it's the best chiffon recipe book I had so far. The book stated that adding some corn flour in the egg whites will absorb the liquid of the egg whites in order to stabilize the meringue and produce a special texture. I guess its chemical reaction is quite similar with cream of tartar or lemon juice. I like the recipe because it don't consist of chemical element such as baking powder or cream of tartar but just the ordinary ingredients like egg, water, oil, flour, sugar and natural color from fruits or vegetables.


Recipe for 17cm round chiffon

For the egg whites mixture:
110g egg whites
55g caster sugar
5g corn flour

For the egg yolks mixture:
40g egg yolks
36g water
36g vegetable oil or olive oil
55g plain flour
150g cooked apple

For decoration:
200ml Whipping cream
12g caster sugar
some cooked apple
few pieces of mint leaves

How I made it:
  1. For the cooked apple, peel 3 large apple and finely chop the skin or blend it in the blender. Cut the apple in small cubes. Mix the chopped skin with apple cubes. Weigh the mixture.
  2. Mix 15% of caster sugar from the weight of mixture (1) and cook with 4 tablespoon of water until the juice absorb and the cooked apple appear soft pink color.
  3. For the chiffon cake, mix all the egg yolks mixture except flour. When everything well combined then gradually add in sifted flour (I used electric mixer, its came very handy for this process). Mix everything well combine and no lumps left. The mixture would be very thick and and smooth. Gently mix in the cooked apple (make sure the cooked apple had completely cool down).
  4. Beat the egg whites in a clean large bowl until peak foam. Gradually add in sugar, one tablespoon at a time. Then finally add in corn flour. Make sure the corn flour mix well in the egg mixture (Using an electric mixer would be great!). The egg whites mixture should be peak foam, smooth and shiny.
  5. Gently fold in 1/3 of the egg whites mixture into the egg yolks mixture. When everything well combine then gently fold in the 1/2 of the remaining egg whites mixture. Lastly, fold in the remaining egg whites mixture. (Note: This stage took some times and patient and practice. Make sure all the egg whites mixture well combine with the egg yolks mixture without breaking the egg whites. Little egg whites left will cause a big hole in the cake during baking. And, over mixing will cause it hardly rise during the baking.)
  6. Pour the well mix mixture into a 17cm chiffon cake tin and bake at a 160-170'C preheated oven for 40 minutes. After baked, let the baked cake turn upside down for cooling before unmold it. (Note: The recipe book stated that to cling wrap the entired cake tin and place in a big plastic bag once its completely cool down. Then, place in the fridge for over night to emit the fragrant of the cake and stabilize the cake for decoration).
  7. Unmold the cake and whip the fresh cream with sugar. Decorate it like the picture shown above or decorate it with your creativity.
  8. Keep the cake in the fridge it could last for 4 - 5 days. Best serve in 3 days.

DIY Sites to Visit

I received the below email today from an editor at Consumer Reports' ShopSmart Magazine.

I had visited DIYnetwork.com, Doityourself.com and WikiHow; but the new BeJane.com and ExpertVillage.com were new to me!

I have a soft spot in my heart for do-it-yourselfers because I started on the path toward my career as a kitchen and bath designer by DIY remodeling my old and decrepit house when I couldn't afford to hire the pros.

Next thing I knew, all my neighbors were hiring me to design and remodel their kitchens and baths.

BeJane walks women through lots of DIY projects with language they can understand.

Maybe you too can make the transition from surgical nurse to kitchen designer via the hands-on route!

Great additions to the DIY universe.

Peggy


Sometimes it pays to just do it yourself. But what if you don’t know how to replace a faucet or fix a running toilet?

The Web is loaded with how-to resources that can make those jobs easy.

Google “replacing a faucet,” for example, and you’ll find all kinds of help to bring out your inner plumber, including Doityourself.com.

The November 2008 issue of ShopSmart, from the publisher of Consumer Reports, reveals the other DIY sites that are worth a look the next time you need to fix something, whether it’s replacing a doorknob or installing a new tail light.

You might decide the project is too complicated, but at least you’ll know what you were up against.

One warning: You may have to wade through ads to find what you’re looking for.

DIYnetwork.com has countless how-to videos and articles on home projects, gardening and landscaping, and crafts too.

Expertvillage.com offers short video clips and articles on just about everything you might need to fix things around the house and make car repairs.

WikiHow.com lacks the glitzy design (and ads) of some other sites but covers a huge range of home, car, and computer repairs.

BeJane.com was re-launched just as we went to press. It’s a DIY site aimed at women.

If you choose to use these tips, we ask that you credit the November 2008 issue of ShopSmart.

Instant Mango pickle

Mango pickle and curd rice make an incredible combination. This pickle can be made in a jiffy and stored for a few days in the fridge. Mine was a slightly ripened mango which made the pickle taste sweeter.
Ingredients:
Raw mango-1
Salt
Hing-a pinch
Chilli powder-1tsp or less

To tamper:
Mustard seeds-1/2 tsp
Oil-1 tbsp

Method:
Mix all the above ingredients. Tamper mustard seeds in oil and pour it on the pickle.

goodbye summer

I'm ready for the change of season. In fact, I'm always ready for a seasonal change. Not unlike our hometowns in Ohio, this part of the country provides a nice balance of all four seasons, despite the fact that you will hear comments like, "can you believe it's September" and "holy moses, we went from summer to winter overnight". Well here it is - fall - the windows are open; the mums are on fire; the geese are moving. Who can complain about this?

We sent summer out in a good way - sailing. Three years have passed since we've moved to Baltimore and we've yet to get on a boat (other than an occasional water taxi or tour). We recently met some new friends, Michelle and Rick, who graciously invited us out on their sailboat this past weekend.
Happy boys,

and a beautiful day


Welcome back, Fall.

Sunday, September 21, 2008

Andhra Pesarattu


Green moong dal is a great source of protein and fiber. No other dal I know of has as much fiber content as this dal does. One thing I like about pesarattu is that you cannot go wrong in the process of making it. It always turns out good for me.

Ingredients:
Green moong dal - 1 cup
Raw rice - 2 tablespoons
Ginger - an inch piece
green chilies - according to your taste
salt
onion - 1/2 cup

Method:
Soak moong dal and rice together for 4 to5 hrs.
Grind it to a smooth batter along with ginger, green chillies, onions and salt adding water.
Batter should be slightly thicker than dosa batter.
Make dosas the usual way. No need to ferment the batter.

Saturday, September 20, 2008

Tengapal Rasam – Watery Soup with Coconut Milk

Tengapal Rasam – Watery Soup with Coconut Milk
Rasam is an indispensable dish in the south Indian families. Many would have savoured the delicious rasams prepared in eeya chombu . The eeya chombu is a pot made of lead. Some say it is made of tin. My brother says it is an alloy**! Eeya chombus were an integral part of a bride’s trousseau. Ladies would treasure these vessels, and pass them on through generations like family heirloom! Rasam was typically prepared in these eeya chombus using the kumti which is small iron choolha that uses charcoal fire. One should know the technique and be careful while making rasam in an eeya chombu. It is not unusual (and very expensive!) to find new comers melting the rasam pot over their gas stove! If the pot is left on the fire unattended, it can simply melt in no time!


We hear a lot about lead poisoning and other metal toxins in recent times. But it is amazing to see the old people who used to eat food cooked in brass vessels plated with kalai or lead are still leading a healthy life. The use of brass and lead vessels have certainly declined after the advent of ever silver steel vessels. These in turn have become less popular after the nonstick items and glass vessels invaded the market. With all this evolution or revolution, I still have relatives who insist on having eeya chombu rasam.

Eeya chombu or not, here is a rasam with the unique flavour of coconut milk which will surely entice any rasam lover.


TENGAPAL RASAM
Ingredients
Three extracts of coconut milk from 2 cups of freshly grated coconut as described below.
Freshly ground rasam powder - as given below
Tur dal (Red Gram Dal)- ½ cup
Turmeric powder – 1 pinch
Tamarind – 1 small lime sized ball
Salt – 1 ½ tsp
Curry leaves – a few.
Tomato – 1 big
Coriander leaves – a few
Ghee – 1 tsp
Mustard seeds – ¼ tsp

Method to extract coconut milk:
a) Use 2 cups of freshly grated. Grind the fresh coconut gratings in as little water as smooth as possible. Use a strainer and squeeze the mixture to extract the milk. This is first and thickest extract.
b) Add more water and grind the coconut again and extract milk the second time. Keep this more dilute second extract separately.
c) Follow the same process and extract milk the third time, this will be really dilute with hardly any coconut milk left, but this will come into use as well.
For the Rasam Powder
Ingredients
Cooking oil – 1/4tsp
Coriander seeds – 2 tsp
Bengal gram dal – 2 tsp
Red chillies – 6
Pepper – 1 tsp
Cumin seeds -1 tsp
Asafoetida – 1 pinch
Method for Rasam Powder
1.Dry roast, pepper and cumin seeds.
2. Roast the rest of the ingredients in a drop of oil.
3. Make a smooth powder with all the roasted ingredients.
Method
1. Soak tamarind in water and leave it aside.
2. Pressure cook tur dal with a pinch of turmeric powder and water.
3. Extract the juice of tamarind.
4. Add the most dilute or the third extract of coconut milk to the tamarind juice.
5. Add salt and the rasam powder and boil until the raw smell disappears.
6. Add cooked dal, curry leaves and the second extract of coconut milk and boil vigorously.
7. Add chopped tomatoes.(Optional)
8. Finally, add the thickest or the first extract of coconut milk and decrease heat.
9. Add finely chopped coriander leaves and wait till the rasam foams.
10. Switch off flame before it starts boiling.
11. Season mustard seeds in a spoon of ghee.
Relish the coconut milk aroma as you slurp it down with hot rice.
Note: A thumb rule for tasty rasam is that it should never be boiled, as it spoils the flavours. It should be switched off, just as it foams rises to the top of the vessel, quite similar to milk. A tight lid should be used to immediately cover the rasam, to seal in the flavours.

This image below shows a long unused eeya chombu & a kumti, which we took out from mothers attic, to take a photo for this post. As you can see my newphews even started a small fire in the kumti! We did not actually cook using these vessels, since they have been unused for a very long time! My sister-in-law still actively uses her eeya chombu, and has sent in the photo shown above in the recipe.
** Disclaimer: The authors of this site do not claim knowing about the metallic composition of eeya chombus, and neither the impact of using eeya chombus on health! A google search on eeya chombus reveals many aruguments on what is the metallic composition of eeya chombus! Some say its lead, some say its tin, others say it an alloy. One view says it was originally tin, but unscrupulous manufacturers sold pots adultrated with lead for several years, and therefore a common and wrong notion that it is lead!

Spinach Sambar - a healthy meal

Ingredients:
A bunch of spinach
Tomato-1
Green chilli-1
Tamarind-lime size
Sambar powder-1 to 1.5tbsp
Salt
Hing-a pinch
Thur dhal-1/2 cup uncooked
Turmeric powder-a pinch

To tamper:
Vadagam or mustard seeds and jeera

Method:
Cook dhal with turmeric in pressure cooker.
Soak tamarind in warm water for 10 minutes and extract the water.
Boil tamarind water with chopped tomato, green chilli, hing, salt and sambar powder for 15 minutes on medium heat.
Chop spinach and add it to the boiling tamarind water mixture. Let it boil for another 10 minutes. Add cooked dhal and simmer for 5 minutes.
Tamper with vadagam or mustard seeds and jeera.

Friday, September 19, 2008

Coconut Poha

I tried veggie platter's coconut poha and came out awesome.Check out the recipe here

contractors; wall removal

The contractors have started working to remove the wall!

First of all – selecting contractors, spending money and negotiating is my day job. I follow strict regulations on a regular basis to increase competition and ensure we receive quality crap at a fair and reasonable price. I assume I can use similar methodology for our personal venture.

We called six different contractors – most upon recommendation. That seems good, right? Five of them called back. Still good – competition is up; these guys are wetting their pants with excitement at the mere notion of working in OUR house. After each one leaves I tell Craig how he reminded me of my Dad and how, "that one there, he's good, he's got the job - he's even willing to let us help with the work."

Then – mostly silence. I take personal offense. Why don't these fools want our money? I consider listing bank account numbers along with their mothers' maiden names, cities of birth and favorite foods. I also avoid begging for quotes – if this is indicative of workmanship, then they're already behind.

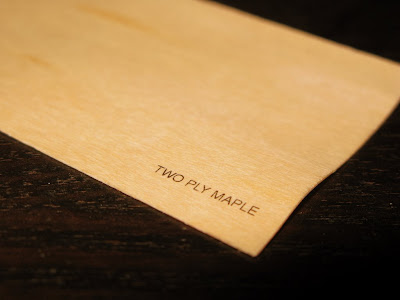
One guy continued to call back. I felt really good about him from the first visit, but feared his professionalism and fancy business card translated to cash; money; records. Seriously – his business card is two-ply maple. This gave him a significant advantage in this competition. All you guys with one-ply maple business cards, suck it.
From 9.19.08

The original quote was pared down quite a bit because we are saving a bunch by doing the framing and drywall work ourselves. After that, I negotiated and knocked off a chunk of cash from the bottom line. I can't stress this enough, people – if you don't ask, you won't get it. Negotiation feels rude and cheap at first; but fatter pockets are sexy and more fun. I also suggest that when you ask for something, offer something. In our case, I pointed out that we already had done most of the demo work and would finish the remainder prior to them starting. He liked it and we signed the contract.

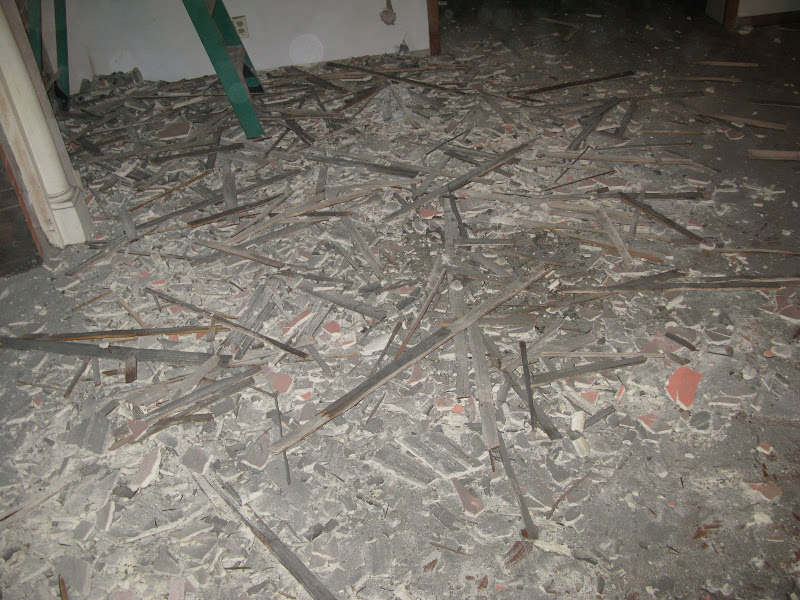
Before - a few things to note, the drop ceiling was put in at some point because when they upgraded plumbing in the past, they placed all the pipes below the joists. This lowered the ceiling by about eight inches - idiots. Also, the bulkheads (i.e. those big drywalled boxes taking even more of our precious ceiling space) were built around a very strange mess of HVAC ductwork. We considered living with the multiple leveled ceiling, because we thought it'd save money. Although, because of the way the contractor has to work and re-support the structure, these items all needed to be moved. So, the ceiling will be all one level and quite a bit higher.

The plumber came out first and moved the pipes into the ceiling.
From 9.19.08

Here, you can see more of the pipes as well as the steel beam and bricks.
From 9.19.08

This is the workzone. See those large, solid looking vertical wood columns? Those are the temporary supports that are put in place to hold the structure while they're working on re-supporting the new opening. There are a few more on the other side.
From 9.19.08

Today they are finishing the wall removal and the HVAC guy comes out Tuesday to finish his part. We're so excited that this is moving so quickly!

wood door headboard; stripping paint

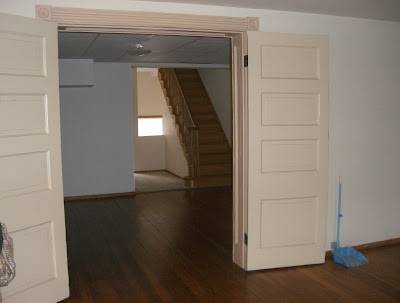
These doors used to separate the front two rooms. They're big, heavy and among the few things that are original to the house. While we definitely love them, we knew they couldn't stay there. They took up way too much space and offered no utility.


There was no question and no discussion necessary - we both knew they'd make a fantastic headboard, especially considering the fact that our current bedframe is low and we chose it because the master bedroom in our previous house had much lower ceilings. i.e.:

Ahhh, let's reminisce about the days when there were dust-free surfaces and the big decision to be made was whether or not that purple pillow should remain on the bed... ... ...
Oh that's right - this was our living room the other day:


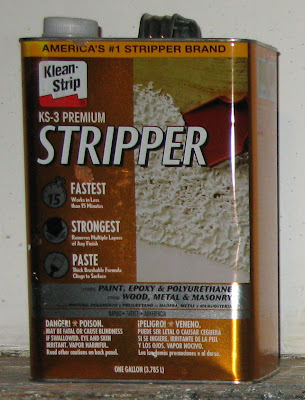
Back to the doors - stripping the paint is step one. We used Klean-Strip stripper because after all, it is America's #1 Stripper Brand.

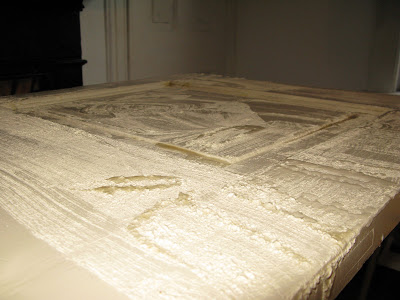
It's a gel and fairly easy to work with. The label says 15 minutes, which is a pretty convenient amount of time if you want to go crack open a bottle of wine and boil some noodles. The problem is that the label lies, which makes me wonder about their claim of superiority in the world of strippers. It actually works much faster. In 15 minutes it was dry - and everyone knows it's much better to work with wet strippers. I'd still recommend this product, as it worked quite well once we got the hang of it. We found that it's best to just keep an eye on it and start scraping a few minutes after the paint starts bubbling:

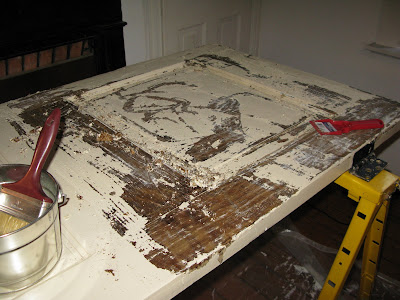
Scrape away:

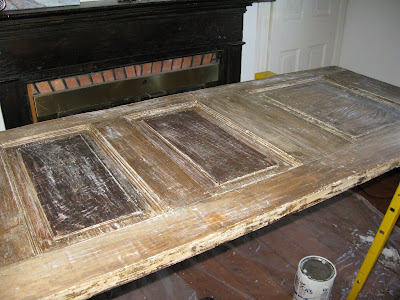
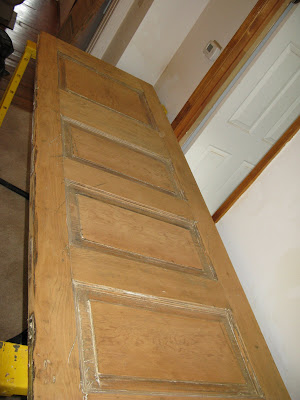
It took a few rounds of stripper despite the fact that there were surprisingly few layers of paint on the doors. We wanted to keep a worn look to them, which was a good decision considering our skill level.

Break time - and we wanted to see one behind the bed.

After the paint was off, they were sanded;

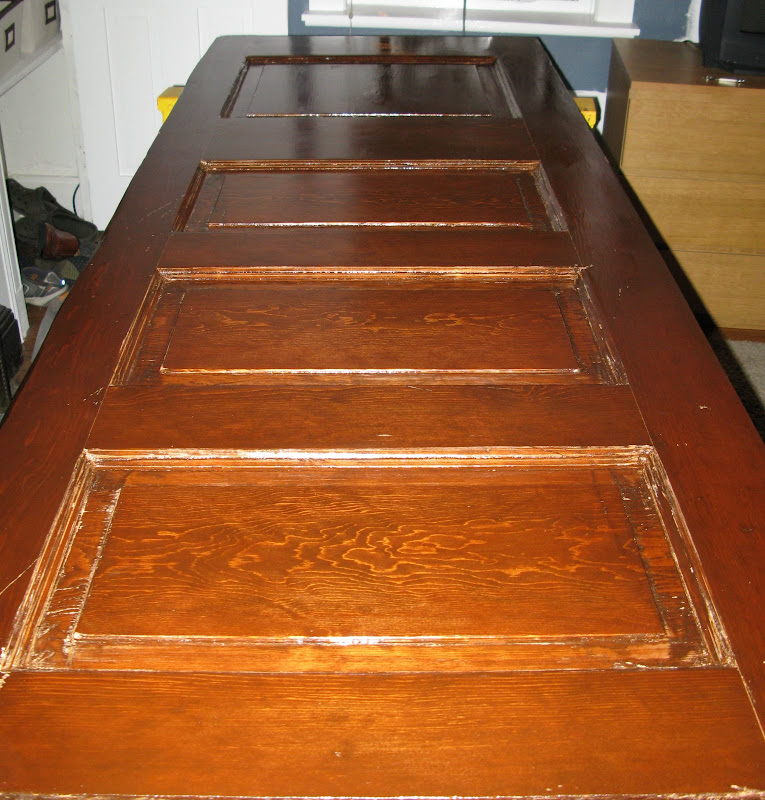
and then stained with English Chestnut stain from Minwax. After the stain, we used two coats of a satin finish polyurethane, also by Minwax. In between the coats of poly we sanded them lightly giving the final finish a nice smooth feel. Ta-dah - here we are - nicks, scrathes and all. We love 'em.


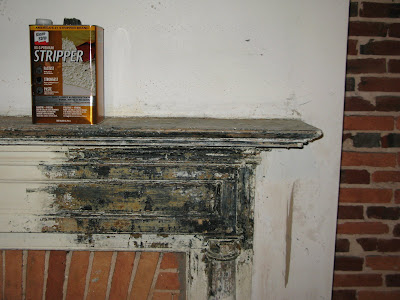
We're now working on the pair of fireplaces on the first floor... the stripper is proving less effective. There are many more layers and some of the old stains seem to be made of tar as seen here:

We traded leftover muriatic acid for a loaner heat gun with our pals Jessica and Joy. So far, so good - more to follow.

***a picture of the headboard behind the bed is in this post