Thursday, June 30, 2011

Potato Pizza


This recipe inspiration came from me visiting manjula’s website because she has a recipe contest for the month of September 2010 and in this contest we need to come up with a recipe using potato. Thought I might participate in this recipe if at all I get a new recipe idea with potatoes.
It kept me thinking as to what new recipe I can make with potato other than the usual curry/sabji etc., out of potatoes. It made me scratch my head all through this week thinking about this potato recipe. So I did search in and out of Google for some new recipes. I saw this recipe in a blog ….wondered as “pizza with potato?”….hmm ….then said to myself “why not?”…
So trying this recipe with some changes to the original recipe…

Ingredients:
---------------
3 large and even sized Baking Potatoes/Russet potatoes
3 multi colored Bell Peppers (I used Red, yellow and green), chopped finely
1 small Onion chopped
2 tbsp Capers
¼ cup parsley chopped
¾ cup Pasta sauce (used sweet basil pasta sauce)
Salt to taste
½ tsp Black pepper powder
¼ tsp Red pepper flakes
¼ cup Parmesan cheese
½ cup Fresh mozzarella cheese grated/ Fontana cheese (I used Fontana cheese)
1 tbsp Olive oil

Method:
----------
1. Boil the potatoes in pressure cooker for 2 whistles or until they are cooked almost 3/4th. Cool the potatoes and peel off the skin and cut into 3, one (1) inch slices on the lengthier side. Cut thin slice on the edge slices so that they have a flat bottom.
2. Preheat the oven for about 400F.
 3. In a bowl mix ¾ tbsp olive oil, salt and pepper. Whisk it well. Spread this mixture on the potatoes so that they coat well and arrange them on a baking sheet and bake them for about 10 mins.
4. Meanwhile, in a bowl add the chopped onions, chopped bell peppers, capers, salt, pepper and parsley, crushed red pepper flakes and remaining olive oil and mix them well. (you can add any toppings of your choice....like creating your own pizza)


5. Take the potatoes out of the oven, spread the pasta sauce evenly on top of the potatoes, place the mixed veggies on top so that it covers all the pasta sauce,
6. Add some Fontana/mozzarella cheese on top and sprinkle with Parmesan cheese and pop this into oven for more 5-7 mins or until the cheese it melted. 

7. Enjoy the yummy pizza without all the fat and meat ;-)


Note: You can also broil it for about 2 mins to get a light brown crust on top of the cheese and veggies.


Re-posting this recipe to participate in the event hosted by Tamalapaku and  Pari's 'Only'- Baked giveaway  page.


Announcing "Serve It" Series.. Serve It-Grilled

'Serve It' is a series of event focusing on cooking techniques started by my dear friend Denny of Oh Taste N See and me. After a grand success of the Serve It - Chilled last month at Denny's, the event is happening here this month. The round up of the last month's Serve It event can be checked out here.

This month's theme is Serve It - Grilled. According to wiki, Grilling is a form of cooking

Lemon Rasam


As an asian fruit, Lemon is always available in my kitchen. I use it in my recipes sometimes to get a fresh feeling instead of tamarind. It gives an unique taste when you add it to the food you prepare. Pure lemon extract stored in bottle is available in supermarkets nowadays.


Whenever my mom prepares this rasam I and my sister usually drink it instead of eating with rice :-). It also goes well with hot white rice. Coming to this recipe, it is prepared without tamarind and tomato. If you wish to add tomato or tamarind, you can, but make sure to reduce the lemon juice.

Basic Information:

Preparation Time: 5 - 10 minutes

Cooking Time: 5 - 10 minutes

Serves: 2-3


Ingredients:


Lemon - 1 lemon

Toor Dal - 2 tablespoon

Ginger - 1 inch length piece

Cumin seeds - 1/2 teaspoon

Black pepper - 1/2 teaspoon

Garlic - 1 clove

Green chilli - 2

Coriander leaves - 2 strings

Curry leaves - 1 string

Fenugreek seeds - 1/2 teaspoon

Turmeric Powder - a pinch

Asafoetida - a pinch

Salt - to taste


Method:


1) Boil/Cook the dal with 1.5 cup of water.

2) Squeeze the lemon and extract the juice from it.

3) Crush ginger, garlic with skin, cumin seeds, block pepper, green chilli and a string of coriander leaves using a mixer/food processor.

4) Add the crushed ingredients and curry leaves to the cooked toor dal water. (you can either use toor dal with water or only cooked water for this rasam).

5) Add lemon juice, turmeric and salt.

6) When foam forms in the surface of the pan, sprinkle asafoetida and immediately remove it from heat.

7) Now take a kadai and heat oil in it.

8) When the kadai is hot, add fenugreek seeds. Allow them to splutter. Add this seasoning to the rasam.

9) Garnish with coriander leaves.

10) Serve it hot with rice.


Note:
1) Do not boil this rasam, as it will give a bitter taste to it.

2) As soon as you add the salt to rasam, keep the rasam vessel in the heat and start the cooking process as mentioned above.

Barley Mint Stoup


"Barley"  is an another ingredient in the quest of my Healthy Kitchen. Now a days I am more concentrating on using whole grain ingredients into my recipes, as these grains all packed with high fiber and protein, which will make you eat less and at the same time fill your stomach. 
You might be wondering which I called this recipe as "Stoup"....If the readers have watched Rachael Ray's show, this would not be a question in their mind anymore, but I will explain it for those who don't know.....
"Stoup" - I call is "a Rachael Ray word" :) because, when I made this recipe I thought it might look like a soup, but it turned out to be little bit more creamy and thick, but still thinner consistency than a stew, so it's not a soup nor a stew, but a stoup. :)
Finally I decided to add mint to the stoup, which made this recipe taste much flavorful with the peppery mint and green action with was colorful and refreshing.

 Barley Nutrition
-------------------------


Barley contains eight essential amino acids. According to a recent study, eating whole grain barley can regulate blood sugar (i.e. reduce blood glucose response to a meal) for up to 10 hours after consumption compared to white or even whole-grain wheat, which has a similarglycemic index. The effect was attributed to colonic fermentation of indigestible carbohydrates. Barley can also be used as a coffee substitute.
Hulled barley (or covered barley) is eaten after removing the inedible, fibrous outer hull. Once removed, it is called dehulled barley (or pot barley or scotch barley). Considered a whole grain, dehulled barley still has its bran and germ making it a nutritious and popular health food.Pearl barley (or pearled barley) is dehulled barley which has been steam processed further to remove the bran. It may be polished, a process known as "pearling". Dehulled or pearl barley may be processed into a variety of barley products, including flour, flakes similar to oatmeal, and grits.

Ingredients:
---------------

1 cup Barley ( I choose Pearl Barley) 
3 1/2 cups Water
1 Onion chopped
3 Tomatoes chopped
1/2 tsp Tomato paste (optional)
1 Green Chili chopped
1/4 tsp Ginger-Garlic paste
1/2 tsp Black Pepper powder
1/2 tsp Cumin powder
1/4 tsp Red Chili powder
Salt to taste
1 tsp Olive oil
1/4 cup Mint chopped
1 tbsp Lemon juice

Method:
----------
1. To soak the barley you can either do it for about 3-4 hours or in a sauce pan add water and barley and bring it to a boil and stir it once then off the flame and let it stand for an hour.
2. In a pressure cooker add 1 tsp oil, when it's medium hot add the ginger-garlic paste, saute it until it turns golden brown, add chopped onions and saute it for 2-3 mins.
3. Add the tomatoes and the tomato paste along with all the spice powders and salt.
4. Lower the flame, cover and cook the tomatoes and the spice powders for about 2-3 mins or until the tomatoes are soft and cooked.
5. Now add the barley with the water and cover the lid and pressure cook it for 2 whistles or until cooked.

6. Allow it to come to room temperature, remove the lid of the pressure cooker and mix it again and finally add the mint, lemon juice and stir it again and serve when it's hot.


Before posting this recipe, I saw a blogger hosting an event called "Cook It Healthy", so thought of participating for this event by submitting this recipe.

"Cook It Healthy" Event - By Sobha
So wish me Luck!! :-))

Methi Fulka


This is another usual recipe which I make especially for dinner. Instead of making plain roti or fulka's, it's always tastes better and healthy when you add some greens or ajwain or vegetables or even cumin seeds, just a little happy healthy ingredient. Here in this recipe I used Kasuri Methi which is dried methi leaves...I used this when I don't have fresh greens or ajwain which is good for digestion.

Ingredients:
--------------
2 cups Whole Wheat Atta
2 tbsp Kasuri Methi
Water as needed
1 pinch salt

Method:
----------
1. In a mixing bowl add all the ingredients except water and mix well, and then add enough water and knead to a chapati dough. Make sure the dough is not too hard or too soft, else the chapati will not rise and will be hard to eat.
2.Coat the dough with a little bit of oil, just about some 3-4 drops, and with a damp paper towel or kitchen towel cover it and let it rest for about 20 mins.
3. Now make lemon size balls, flatten each ball and coat with flour and roll it to small chapati's or fulka's.
4. Heat a non-stick tava and when it's hot place the fulka and when you see bubbles, turn it over and cook the other side.

5. Now turn the other side again after 2 mins and with a spatula press the sides where it starts to rise, so that the steam will pass to other sides and will help rise all over, as shown. 


6. Now remove it from the tava and place in a hot pack or in a box lined with damp kitchen towel, this will help to keep the fulka's soft.


7. I served these fulka's with Tofu Green Moong Dal Kofta Butter Masala


8. You can also serve with your choice of curry, sabji, curd or pickle.

Stove Top Popcorn

Susan Pachikara (COPYRIGHT 2011)

I don't know if you've heard, but a study just released by researchers at Harvard found that Americans who snack on potato chips pack on the pounds. Frank Wu, one of the study's authors said the results help illustrate that there are in fact 'good' and 'bad' foods.

I love potato chips. But with the obesity epidemic raging across the country, perhaps it's time we found a new national snack food. I nominate homemade popcorn. It's crunchy, filling and fun and possesses the power to release the inner child in even the grumpiest adult.

Let me clarify what I mean by 'homemade' popcorn. I'm talking about popcorn that is made over the stove or in a popcorn popper layered with a bit of oil. I am not referring to microwave popcorn with its musty, dusty aroma. At my last job, I dreaded mid-afternoons when a very kind-hearted colleague would nuke up a bag and perch it on the edge of his desk. A synthetic smell hung in the air for the rest of the day. At one point, our director burned a bagful of popcorn in the microwave. The smell was so piercing that the maintenance man paid us a visit, fearing a toxin had been released five floors away. An off-putting odor plagued the kitchen for weeks.

The experience makes me worry for people who feed on microwave popcorn. Many brands contain partially hydrogenated oil and other spooky sounding items like TBHQ, propy gallate and annato. (I wish I was making this up.) It costs two to three times as much as homemade popcorn, takes nearly as long to make and worst of all, pales in taste. Like a bad toupee, microwave popcorn is an obvious impostor that will leave you craving chips.

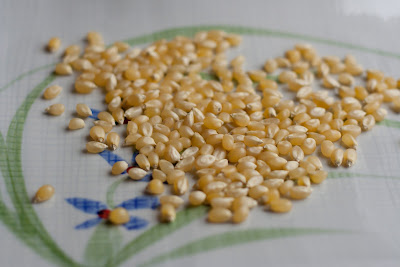
Americans devour old-fashioned popcorn at the movies and savor it at the park. It's a shame that we shy away from it at home when all it takes to make the playful, fiber-rich treat is a steel pot and lid, some corn kernels and a dusting of salt. A reasonably priced popper will also do the trick. (I nabbed the Stir Crazy for half price when Carson's closed on State Street a few years ago. I can make a delicious bowl of popcorn with just a dab of oil.) Both options allow you to control the salt and fat content.

The good news is that one you're comfortable making plain popcorn, you can move on to fancier versions. It's lovely popped in flavored oils and encrusted in a sprinkling of sugar. Believe me, once you get going you'll forget the chips.

Susan Pachikara (COPYRIGHT 2011)

STOVE TOP POPCORN

Makes 4 cups

INGREDIENTS

1 tablespoon canola oil

1/4 cup corn kernels
Salt to taste

INSTRUCTIONS

Coat the bottom of a steel pot with oil. Add corn kernels. Heat on medium-high. Cover.

Allow kernels to pop. Remove from heat when popping slows to about a pop every two seconds. Do not wait until the last kernel pops, as the rest of the popcorn will burn.

Pour popcorn into a bowl and dust with salt.


Tofu Green Moong Dal Kofta Butter Masala


It's been a long time since I've used tofu, so was thinking of something new and interesting, so that Shoj and Anush will eat and not know that I have used tofu. Shoj doe snot like tofu, but green moong dal is his favorite. I know tofu binds well and moong dal too, so instead of making south indian curry, I thought of making this north indian kofta which will soak up the gravy better and the kofta's would taste better.
After I made it, I was bit tensed whether Shoj will like it or not, but he liked it and he said he didn't taste any tofu in there, so was happy. 


I had called his office friends over and made the same curry, they also like it.
Now I am sure it will taste good and having healthy main ingredients like tofu and green moong dal, sharing with you all too.

Ingredients:
-----------------
For Making Kofta:
-------------------------
1 pkg Extra Firm Tofu
1 cup Green Whole Moong Dal
1/2 Onion chopped finely
Salt and Pepper to taste
1 Green Chili chopped
1/4 tsp Cumin seeds
1/4 inch Ginger grated or chopped
1/4 tsp Chili powder
1/4 cup Bread Crumbs

For Making Butter Masala:
-------------------------------
1/2 Onion Chopped
1/4 tsp Ginger-Garlic paste
Whole Garam Masala (1 Bay Leaf, 2-3 Green Cardamom, 1/2 inch Cinnamon Stick, 3-4 Cloves)
1/4 tsp Turmeric powder
1/2 tsp Red Chili powder
1 tsp Paprika powder
2 tsp Coriander powder
1/2 tsp Cumin powder
1/4 tsp Pepper powder
1/2 tsp Sugar
Salt to taste
1 tbsp Kasuri Methi
2 tbsp Tomato Ketchup
1 tbsp Tomato paste
1/2 pint (1/2 cup) Whipping Cream
1 tbsp Butter
1 tsp Oil

Method:
----------
Making Kofta:
-----------------
1. Soak the green moong dal in water, overnight or at least 4-6 hours.
2. In a mixer add the green moong dal, green chili, ginger, cumin seeds, salt and pepper and grind it into paste adding little bit of water if needed.
3. In a bowl transfer the moong dal paste, crumbled tofu, salt, and chopped onion and chili powder, bread crumbs and mix well.
4. Preheat oven to 400F
5. Form lime size balls of the tofu and green moong dal mixture and arrange them on a line baking sheet and bake it for about 40 mins, turning once in between or until golden brown.


6. Meanwhile in a pan add  butter and oil and when the butter starts to melt add the whole garam masala and saute it for a min.
7. Add ginger-garlic paste and saute it for another min, add the onions and add sugar and salt.


8. Now add the turmeric powder, chili powder, coriander powder, cumin powder, paprika powder, pepper powder, tomato ketchup and tomato paste and cover and cook the masala until the raw smell is gone for about 5 mins stirring occasionally.
9. Now add the whipping cream and stir so that the masala blends well and add water if it is too thick for gravy. and bring to a boil on medium flame.
10. After it starts boiling, add the kofta's gently and coat with the gravy and cover and cook this for about 10-15 mins on medium low flame.


11. In another saute pan dry roast the kasuri methi on low flame for about 2-3 mins and let it cool.
12. Once the gravy and the koftas are cooked properly, crust the kasuri methi with hand and sprinkle it over the top after you off the flame.


13. You can serve this with any north indian rice or fulka or roti. I served this with kofta masala with Methi Fulka

Wednesday, June 29, 2011

Curd Rice / Yogurt Rice


Curd rice or Yogurt rice is the most day to day food of south India. The preparation involves very little time and according to our taste we can change the ingredients keeping the base as yogurt. It is the best lunch box food those days for me and it always pairs with all kind of pickles.


Basic Information:
 

Preparation Time: 10 minutes

Cooking Time: 10minutes

Serves: 2-3


Ingredients:


Fresh Cooked Rice / Left Over Rice - 1 cup

Curd - 1.5 - 2 cups

Butter Milk - 1/4 cup (optional)

Ginger - 1 inch, chopped very finely

Curry leaves - 2 strings

Dry red chillies - 2 nos

Salt - to taste

Channa Dal - 1 teaspoon

Mustard seeds and urid dal - 1/2 teaspoon

Green chillies - 2 nos, chop them finely.

Asafoetida - 1 pinch

Oil - 2 teaspoon


Method:


1) In a Bowl, take rice and lightly mash them. If you are using a fresh cooked rice, allow it to cool and mash them.

2) Pour Curd/Yogurt, butter milk to the bowl. Add green chilli,one string curry leaves and salt to taste. Mix well.

3) Now, Take a pan and heat oil in it.

4) When oil is hot, put mustard seeds,urid dal and channa dal.

5) When Mustard seeds splutter up, add dry red chilli and asafoetida.

6) After a second, add ginger and fry them for few minutes.

7) Add remaining curry leaves and turn off the heat.

8) Mix this seasoning with curd rice. Mix well.

9) Serve with Pickle.


Note:

1) You can also mix grapes and pomegranate seeds, mango slices and grapes with this to get unique and different taste.

Redcurrant jelly


Glorious red jewels, not from my garden this time. simply made into a rich slightly tangy jelly/jam. Here's the pictures!

Lauki Peas Tikki

Today is the last day of the blogging marathon. For the last, the participating bloggers are paired and has to choose from the paired blog. I had to choose from Suma's Veggie Platter. Suma has posted quite a few recipes using Lauki and her Lauki-Oats tikki interested me. I tweaked the recipe to suit the ingredients available with me. Now I have another interesting recipe to include lauki. Thanks Suma. Here is how I made it.

You need


  • Grated bottle gourd/lauki - 1 cup
  • Sprouted white peas - 1 cup
  • Aval/poha - 1 cup
  • Red chilli powder - 1/2 tspn
  • salt to taste
  • Saunf - 1 tspn
  • Kitchen king masala - 1/4 tspn


Method
Cook the sprouted  peas in MW for 7 minutes. The peas will be cooked and will not be soft to touch. Pulse it coarsely in the mixer. Toast the aval/poha for few minutes till  you see few flakes starts browning. Powder it coarsely like rava/sooji and not too fine.


Squeeze the grated bottle gourd and collect the juice in a bowl.  Mix all the ingredients in a bowl.  The dough will be very soft. If it is not moist enough, add few drops of the juice. I pinched off a small ball from the dough and while shaping into tikkis, I brushed little water to moisten it and proceeded. 


Heat a dosa tawa and shallow fry the tikkis. Drizzle oil around the tikkis and cook both sides till they are brown.

The tikkis were spicy on its own. It had a crisp exterior and soft interior. The coarse peas gave the feel of paruppu vada. This makes a good, guilt free snack to go with a cup of hot tea/coffee.


Check out what my fellow marathoners have cooked for the blogging marathon.
'


Kappa (Tapioca) Thoran - New Kerala Recipe


Does this recipe sound new?? Hmm .... New inventions are introduced after accidents, right ?? I believe so after trying this recipe. He he hee....
I bought this Tapioca from a local fresh veggie market and forgot about it. Actually I wanted to make Kappa and Fish curry, which is my husband's favorite. When I removed the outer skin of tapioca, half of it changed color and rest of the part was good. There was no much to do kappa and I didn't know any other recipe to make out of this. So I kept thinking what to make, as I already made the fish curry. I was feeling so bad. Then suddenly I thought of grating it and make like thoran (sabji). It turned out so yummy and very easy, my husband was so happy and liked it very much and he immediately asked whether I already posted this recipe in my blog. I said to him, if he likes then I will post it. His words were too encouraging and so thought of sharing with you all, especially for the people who are from Kerala, India - If you have never tried this recipe - you must now!! :-)

Ingredients:
-------------
1 medium size Tapioca skin peeled and grated
1-2 Green Chilies
1 Red Dry Chili
3-4 Curry leaves
1/4 tsp Turmeric powder
1/2 small Onion sliced
1/4 tsp grated Ginger
1/4 cup grated Coconut (I used the dried/ desiccated one)
1/2 tsp Mustard seeds
1 tsp Oil
Salt to taste

Method:
------------
1. In a glass bowl ( I choose Pyrex square bowl) add the grated tapioca, salt, turmeric powder, ginger, onion, green chili and coconut. Mix all the ingredients well and keep aside.
2. Preheat the oven/microwave/toaster oven to 350F.
3. In a seasoning pan add oil and when it's hot add oil, add the mustard seeds, and when they start to sputter add curry leaves and dry red chili and off the flame.
4. Add this to the tapioca mixture and mix again gently.
5. If you want to cook this tapioca in oven/ toaster oven (I used toaster oven), cover the glass bowl with an aluminium foil and cook it for about 20 mins and let it stand for another 5-10 mins in oven after you off the oven and then remove the foil to check if it is done. Make sure you remove the foil carefully, as the steam might burn your hand.
6. If you want to cook in microwave, cook it covered with a damp paper towel covered on top for about 15-20 mins, stirring it after every 8-10 mins, making sure that it does not dry, sprinkle some water if needed.
7. Serve this warm with fish curry and steamed rice.

Tomato Sambar for Idli/Dosa | Side Dish for Idli Dosa


This Tomato sambar is an easy-to-make and a perfect side dish for idli and dosa. Always a staple side dish at our home this is a simple sambar which can be done in less than 30 minutes. Made using the freshest ingredients, it is an all-time favorite. This also makes an excellent combo for parotta.


Ingredients:
Tomato - 1 - chopped fine
Onions - Chopped - 1 cup
Oil - 2 tsp
Mustard seeds - 1/2

Tuesday, June 28, 2011

Boondi Raita


Boondi Raita is a perfect side dish for all Biryani varieties and Parathas. Those who hate onion or other raita can choose this. It has become a big hit among kids.


---

Jewels in the Garden


So so so hot that time just had to be spent in the garden, you have to make the most of it. Today is so dull it proves the point. Baby and I found some lovely jewels in the garden, black and green ones just ready for picking. the gooseberries have gone in the freezer for treats later on. The blackcurrants will make a lovely cheesecake later in the week. Mmmmm!

Color and Lighting for an Inviting Bathroom

Though a bathroom is a necessity in every home, there are things that you can do to make your bathroom not only functional but a place for relaxation and tranquility.

How should you design a bathroom? According to the Home Improvement Blog, you should first think of the color. Consider the following:

Some may feel that White is plain and sterile looking. You’d be better not making your bathroom completely white. Some psychologists feel shades of Blue or Green can create a more calming and peaceful feeling. Try combining the two.

Combinations of Black and White colors will not only create a formal atmosphere in your bathroom, it can give a modern day retro look as well.

An inviting bathroom created by
Kruse Home Improvement

Warmer tones such as Red, Orange, Gold and Yellow will make your bathroom cozy with a more intimate feeling.
 
As designers say, the color you choose expresses a part of you. Always remember that for an inviting theme a room needs color. It’s not a bad idea to buy a bright red rug or colorful shower curtains for a bold, refreshing atmosphere. Express yourself and make your bathroom a sanctum of spiritual tranquility.

If you are remodeling your bathroom, consider a variety of lighting options. Bright lighting will make your bathroom more inviting. Dim lighting may be soothing for a soak in the tub but could make problems while shaving or applying makeup. You can also add a mirror. This is one of the tricks that you can use to give the impression of a wider and brighter bathroom, as it will reflect light from the lamps. With this, you do not need to buy extra lights.